Dealing with a broken sewer line can be a daunting and messy task, but with the right knowledge and approach, you can navigate through this challenging situation effectively. Here we will walk you through the necessary steps to take when facing a sewer line break, ensuring a smooth resolution and minimal disruption to your daily life. Whether you are a homeowner, property manager, or simply someone interested in understanding the process, this article is for you.
Understanding Sewer Line Breaks
Before we delve into the actions to take when your sewer line breaks, let’s first understand what a sewer line break entails. Sewer lines are an essential component of any plumbing system, responsible for carrying wastewater and sewage away from your property to the main sewer system or septic tank. When a sewer line break occurs, it means that there is a rupture or damage to one or more sections of the pipe.
The causes of sewer line breaks can vary, ranging from age-related deterioration, intrusive tree roots, ground shifting, extreme temperatures, debris build-up, or even accidental damage during construction. Regardless of the cause, a broken sewer line can lead to significant issues such as foul odors, sewage backups, contamination, and potential health hazards.
Signs of a Broken Sewer Line
Identifying the signs of a broken sewer line early on is crucial in preventing further damage and minimizing the impact on your property. Here are some common indicators that your sewer line may have suffered a break:
- Foul Odors: If you notice persistent, unpleasant odors in or around your property, it could be a sign of a sewer line break. Sewage gases escaping from the broken pipe can cause a distinctive smell.
- Slow Drains: Slow drainage or recurring clogs in multiple fixtures, such as sinks, bathtubs, or toilets, may indicate a blockage or break in the sewer line.
- Sewage Backup: The most obvious sign of a sewer line break is a sewage backup. If wastewater or sewage starts flooding into your sinks, toilets, or drains, it’s a clear indication that there is a problem.
- Lush Patches of Grass: Unexpectedly lush and green patches of grass in your yard, especially near the sewer line, can suggest a leak or break underground.
- Presence of Rodents or Insects: Sewage leaks can attract rodents and insects, so if you notice an increase in pest activity around your property, it could be linked to a broken sewer line.
Flushing toilets or using drains can exacerbate the problem, leading to more significant backups or additional damage to the plumbing system.
Immediate Actions to Take
When you suspect a sewer line break, it’s crucial to act promptly to prevent further damage and ensure the safety and well-being of yourself and your property. Here are the immediate actions to take:
- Turn Off the Water Supply: The first step is to locate your main water shut-off valve and turn off the water supply to your property. This will help prevent any additional wastewater from flowing into the broken sewer line and potentially causing further damage or contamination.
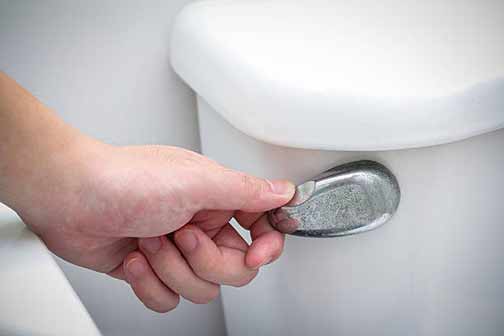
- Avoid Flushing or Using Drains: As tempting as it may be to use the toilets or drains in your home, it’s imperative to avoid doing so until the issue is resolved. Flushing toilets or using drains can exacerbate the problem, leading to more significant backups or additional damage to the plumbing system. It’s best to limit water usage until a plumber assesses and repairs the sewer line.
- Stay Clear of Contaminated Areas: If you notice any sewage backups or overflows, it’s essential to keep yourself and your loved ones away from the contaminated areas. Sewage contains harmful bacteria and pathogens that can pose health risks. Minimize contact with the affected areas and avoid tracking any contaminated materials into other parts of your home or property.
- Contact a Professional Plumber: Once you have taken the necessary immediate actions, it’s time to contact a professional plumber who specializes in sewer line repairs. A licensed and experienced plumber will have the expertise and equipment to assess the extent of the damage and recommend the most appropriate course of action.
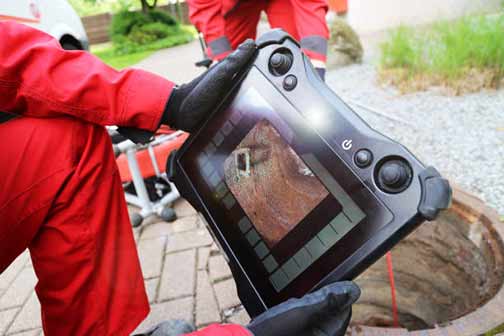
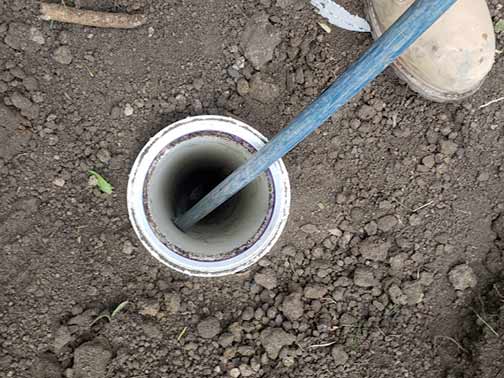
A professional plumber will conduct a thorough camera inspection of your sewer line to determine the exact location and cause of the break.
Involving a Professional Plumber
Repairing a broken sewer line is a complex and specialized task that requires the expertise of a professional plumber. Here’s what you can expect when involving a plumber:
Assessment and Diagnosis
A professional plumber will conduct a thorough camera inspection of your sewer line to determine the exact location and cause of the break. This may involve using video inspection technology or other advanced diagnostic methods to identify the problem accurately.
Repair Options
Once the assessment is complete, the plumber will discuss the repair options with you. The appropriate solution will depend on the severity and nature of the break, as well as the condition of the existing sewer line. Common repair methods include:
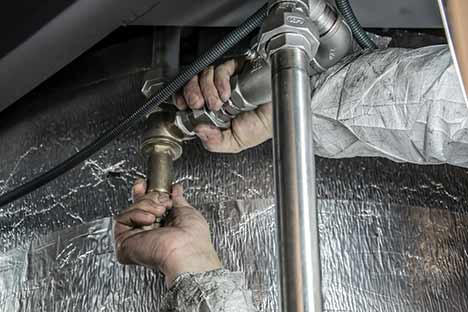
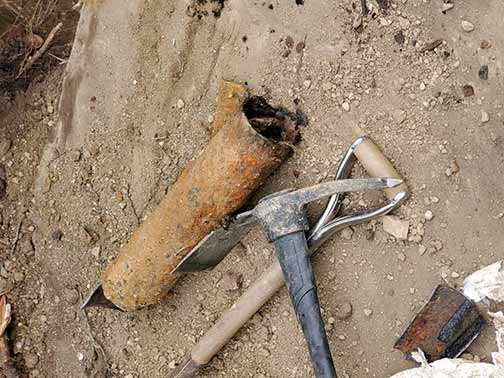
- Spot Repairs: In cases where the break is limited to a specific section of the sewer line, the plumber may recommend a spot repair. This involves excavating and replacing the damaged portion of the pipe.
- Pipe Lining: For less severe breaks or instances where access is limited, pipe lining or trenchless technology may be employed. This involves inserting a new liner into the existing pipe, creating a durable and seamless inner layer.
- Full Replacement: If the sewer line is extensively damaged or compromised, a full replacement may be necessary. This will involve excavating and replacing the entire sewer line to ensure optimal functionality and longevity.
Cost Estimation
After discussing the repair options, the plumber will provide you with a detailed cost estimation for the recommended solution. This will typically include the cost of materials, labor, and any additional factors such as permits or restoration work.
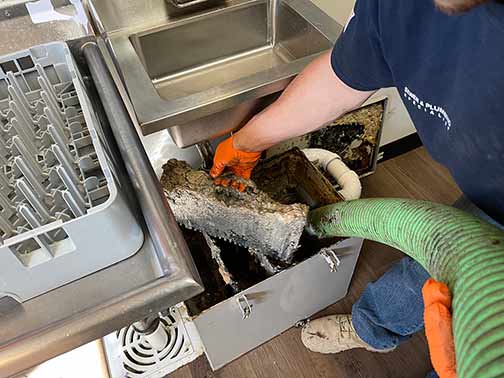
Repairs and Restoration
Upon your approval, the plumber will proceed with the necessary repairs. This may involve excavating and repairing a section of sewer line, installing new liners, or carrying out a full replacement. Once the repairs are complete, the plumber will ensure that the affected areas are properly cleaned and restored.

When planting trees or shrubs near your sewer line, be cautious of their root systems.
Preventive Measures and Maintenance
While a sewer line break can occur unexpectedly, there are preventive measures and maintenance practices you can undertake to minimize the likelihood of future issues. Here are some tips to keep your sewer line in good condition:
- Regular Inspections: Schedule periodic inspections of your sewer line by a professional plumber. This can help identify minor issues before they escalate into major breaks, saving you time, money, and hassle in the long run.
- Watch Your Flushing and Draining Habits: Avoid flushing down items other than toilet paper, and be mindful of what you pour down your drains. Grease, oil, and other non-biodegradable substances can accumulate in your pipes, increasing the risk of clogs and breaks. Use drain screens or strainers to catch solid particles and prevent them from entering the sewer line.
- Tree and Plant Placement: When planting trees or shrubs near your sewer line, be cautious of their root systems. Some tree varieties, such as willows, poplars, and cottonwoods, have aggressive root structures that can infiltrate and damage underground pipes. Consult with an arborist to ensure you choose tree species with shallower or less invasive root systems.
- Temperature and Weather Considerations: Extreme temperatures, particularly freezing conditions, can cause the ground to shift and potentially damage your sewer line. Insulate exposed pipes and take precautions during winter months to avoid freezing and subsequent pipe bursts.
Dealing with a broken sewer line can be a demanding and challenging experience. However, by promptly addressing the issue and involving a professional plumber, you can navigate through the process with minimal disruption. Remember to stay clear of contaminated areas, limit water usage, and take preventive measures to reduce the chances of future sewer line breaks.
By following the steps outlined in this guide, you’ll be well-equipped to handle the situation effectively. Your sewer line plays a vital role in maintaining the hygiene and functionality of your property, so it’s crucial to address any issues promptly. If you suspect a sewer line break, don’t hesitate to take action and seek professional assistance. Your home’s plumbing system will thank you!