A pilot light is a small flame that ignites the gas burner in a water heater, allowing it to heat the water inside the tank. If your water heater’s pilot light has gone out, don’t worry! Relighting the pilot light is a relatively simple process that can be done safely with the right tools and instructions. This article will guide you through the step-by-step process of lighting a pilot light on a water heater.
Step 1: Gather the necessary tools
Before attempting to light the pilot light, make sure you have the following tools handy:
- Long-reach lighter or fireplace match
- Flashlight
- Screwdriver (if required for access to the pilot light)
Step 2: Locate the pilot light and gas control valve
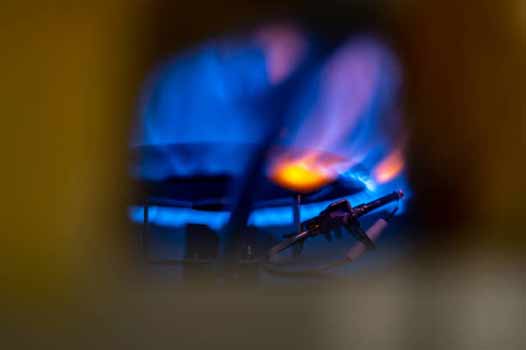
The pilot light and gas control valve are usually located near the bottom of the water heater. Look for a metal panel or access door on the front of the heater. Open it carefully to expose the inner workings of the water heater.
Step 3: Switch the gas control valve to “off”
Locate the gas control valve, which is typically a knob or switch near the pilot light. Turn the knob or switch to the “off” position. This shuts off the gas supply to the pilot light and burner.
Step 4: Wait for gas to dissipate
After turning off the gas control valve, it is important to wait a few minutes for any residual gas to dissipate. This ensures that there is no gas buildup when you attempt to relight the pilot light, reducing the risk of a sudden flame or explosion.
Step 5: Access the pilot light
Depending on the type and model of your water heater, you may need to remove a metal panel or access cover to reach the pilot light. In some cases, a screwdriver might be required to loosen screws or fastenings. Follow the manufacturer’s instructions for your specific model.
Step 6: Use the flashlight to locate the pilot light
With the access panel opened, use a flashlight to locate the pilot light. The pilot light is a small tube-like structure that is usually near the gas burner assembly. It might have a small blue flame when it’s lit, but since the pilot light is currently out, you won’t see any flame.
Step 7: Light the pilot light
Take your long-reach lighter or fireplace match and carefully position it near the pilot light opening. Press the ignition button or trigger to create a spark, aiming it directly at the pilot light to ignite the gas. If successful, the pilot light should ignite and produce a steady flame.
Step 8: Hold the gas control valve
After igniting the pilot light, continue to hold down the gas control valve for 30-60 seconds. This allows the heat from the flame to reach the thermocouple, which is a safety device that senses the presence of the pilot flame. Holding down the valve ensures the pilot light stays lit once the control valve is released.
Step 9: Release the gas control valve
After the thermocouple has warmed up, you can release the gas control valve. The pilot light should remain lit on its own. Take a moment to double-check that the flame is stable and not flickering or going out.
Step 10: Close the access panel and check for proper operation
Once the pilot light is successfully lit, close the access panel or door securely. Make sure it is fastened properly to prevent any gas leakage. Turn the gas control valve to the “on” position. Lastly, test the water heater by turning on a hot water faucet in your home to confirm that the water is heating properly.
Conclusion
Relighting a pilot light on a water heater might seem intimidating, but by following these step-by-step instructions, you can do it safely and efficiently. Always remember to exercise caution and follow the manufacturer’s guidelines for your specific water heater model. If you encounter any issues or your pilot light keeps going out, it’s recommended to contact a plumber near you or service technician to inspect and repair the water heater.