Whether you’re experiencing a leak or simply upgrading your bathroom, replacing a flange can seem like a daunting task. However, with the right tools and step-by-step instructions, you can successfully complete this DIY project and have your toilet working like new in no time. Here we will provide you with a detailed guide on how to replace a flange on your toilet and ensure a smooth and efficient process.
Why Replace a Flange?
Before we dive into the steps, let’s first understand why you might need to replace a flange. The flange is a crucial component of your toilet’s plumbing system as it helps secure the toilet to the floor and connects it to the drain pipe. Over time, the flange can become damaged or worn out, leading to leaks, unstable toilets, or even foul odors in your bathroom. By replacing the flange, you can prevent these issues and maintain the proper functioning of your toilet.
Gather the Necessary Tools and Materials
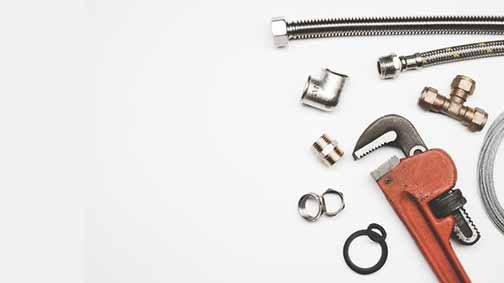
Before you begin the flange replacement process, make sure you have the following tools and materials:
- Adjustable wrench
- Screwdrivers (both flathead and Phillips head)
- Hacksaw or reciprocating saw
- PVC flange replacement kit
- Plumber’s putty
- Plunger
- Old rags or towels
- Bucket
Before you begin the flange replacement process, make sure you have the following tools and materials.
Step-by-Step Guide to Replace a Flange on Your Toilet
Step 1: Turn Off the Water Supply
Before you start any work on your toilet, it’s essential to turn off the water supply. Locate the water shut-off valve near the base of your toilet and turn it clockwise until it stops. This will prevent any water from flowing into the toilet tank while you’re working.
Step 2: Empty the Toilet Tank and Bowl
To avoid any water spillage during the flange replacement, you’ll need to empty the toilet tank and bowl. Start by flushing the toilet, and while the tank is emptying, use a plunger to remove any remaining water from the bowl. Once the bowl is empty, use old rags or towels to soak up any remaining water in the bowl and tank.
Step 3: Disconnect the Water Supply Line
With the water supply turned off and the toilet emptied, it’s time to disconnect the water supply line. Use an adjustable wrench to loosen the nut connecting the supply line to the bottom of the toilet tank. Once loose, carefully remove the supply line and set it aside.
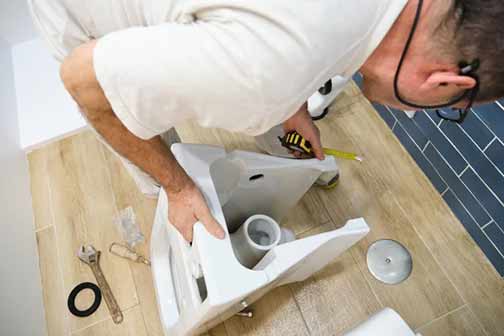
Step 4: Remove the Toilet
To access the flange, you’ll need to remove the toilet from the floor. Start by removing the caps covering the bolts securing the toilet to the floor. Use a screwdriver to unscrew the nuts from the bolts and lift the toilet straight up to detach it from the flange. It’s important to note that toilets can be heavy, so it’s recommended to have an extra set of hands to help with this step.
Step 5: Remove the Old Flange
With the toilet removed, you can now focus on removing the old flange. In some cases, the flange might be attached to the floor with screws, while in others, it might be secured with glue or wax. Use the appropriate tools (screwdriver, hacksaw, or reciprocating saw) to remove the old flange and clean the area around the drain pipe thoroughly.
Step 6: Install the New Flange
Once the old flange is removed, it’s time to install the new one. If your new flange is designed to be screwed into the floor, align the screw holes with the holes on the flange and secure it in place using screws. If your new flange is designed to be glued or waxed, follow the manufacturer’s instructions to ensure proper installation. Make sure the flange sits flush with the floor and is securely attached.
Step 7: Reinstall the Toilet
With the new flange in place, it’s time to reinstall the toilet. Carefully lower the toilet onto the new flange, aligning the bolt holes on the toilet base with the holes on the flange. Once aligned, secure the toilet to the flange by screwing on the nuts and tightening them with a wrench. Be careful not to overtighten, as it could crack the toilet.
Step 8: Reconnect the Water Supply Line
With the toilet securely in place, it’s time to reconnect the water supply line. Attach the line to the bottom of the toilet tank and tighten the nut with an adjustable wrench. Make sure it’s snug but not too tight to avoid any leaks.
Step 9: Turn On the Water Supply
After completing the installation, it’s time to turn back on the water supply. Slowly turn the shut-off valve counterclockwise to allow water to flow into the toilet tank. Keep an eye out for any leaks and tighten any connections if necessary.
Step 10: Test for Leaks
Once the water supply is turned on, it’s important to test for leaks. Flush the toilet and observe if there are any water leaks around the base or in the connection points. If you notice any leaks, carefully tighten the affected areas until the leaks stop.
Replacing a flange on your toilet may initially seem like a complex task, but with the right tools and guidance, it becomes a manageable DIY project. By following the step-by-step instructions outlined in this guide, you can successfully replace a flange and restore the proper functioning of your toilet. Remember to take the necessary precautions, turn off the water supply, and work carefully to avoid any damage. With patience and attention to detail, you’ll have your toilet flange replaced in no time. As with all plumbing repairs and replacements, if you are having trouble and need assistance in replacing a flange, it is best to call a plumber in your area.