Category Archives: toilet repair

How to Replace a Flange on Your Toilet

a man replacing a flange on his toilet.

Whether you’re experiencing a leak or simply upgrading your bathroom, replacing a flange can seem like a daunting task. However, with the right tools and step-by-step instructions, you can successfully complete this DIY project and have your toilet working like new in no time. In this article, we will provide you with a detailed guide on how to replace a flange on your toilet and ensure a smooth and efficient process.

Why Replace a Flange?

Before we dive into the steps, let’s first understand why you might need to replace a flange. The flange is a crucial component of your toilet’s plumbing system as it helps secure the toilet to the floor and connects it to the drain pipe. Over time, the flange can become damaged or worn out, leading to leaks, unstable toilets, or even foul odors in your bathroom. By replacing the flange, you can prevent these issues and maintain the proper functioning of your toilet.

Gather the Necessary Tools and Materials

Before you begin the flange replacement process, make sure you have the following tools and materials:

  • Adjustable wrench
  • Screwdrivers (both flathead and Phillips head)
  • Hacksaw or reciprocating saw
  • PVC flange replacement kit
  • Plumber’s putty
  • Plunger
  • Old rags or towels
  • Bucket
plumbing tools needed to replace a toilet flange.

Before you begin the flange replacement process, make sure you have the following tools and materials.

Step-by-Step Guide to Replace a Flange on Your Toilet

Step 1: Turn Off the Water Supply

Before you start any work on your toilet, it’s essential to turn off the water supply. Locate the water shut-off valve near the base of your toilet and turn it clockwise until it stops. This will prevent any water from flowing into the toilet tank while you’re working.

Step 2: Empty the Toilet Tank and Bowl

To avoid any water spillage during the flange replacement, you’ll need to empty the toilet tank and bowl. Start by flushing the toilet, and while the tank is emptying, use a plunger to remove any remaining water from the bowl. Once the bowl is empty, use old rags or towels to soak up any remaining water in the bowl and tank.

Step 3: Disconnect the Water Supply Line

With the water supply turned off and the toilet emptied, it’s time to disconnect the water supply line. Use an adjustable wrench to loosen the nut connecting the supply line to the bottom of the toilet tank. Once loose, carefully remove the supply line and set it aside.

Step 4: Remove the Toilet

To access the flange, you’ll need to remove the toilet from the floor. Start by removing the caps covering the bolts securing the toilet to the floor. Use a screwdriver to unscrew the nuts from the bolts and lift the toilet straight up to detach it from the flange. It’s important to note that toilets can be heavy, so it’s recommended to have an extra set of hands to help with this step.

Step 5: Remove the Old Flange

With the toilet removed, you can now focus on removing the old flange. In some cases, the flange might be attached to the floor with screws, while in others, it might be secured with glue or wax. Use the appropriate tools (screwdriver, hacksaw, or reciprocating saw) to remove the old flange and clean the area around the drain pipe thoroughly.

Step 6: Install the New Flange

Once the old flange is removed, it’s time to install the new one. If your new flange is designed to be screwed into the floor, align the screw holes with the holes on the flange and secure it in place using screws. If your new flange is designed to be glued or waxed, follow the manufacturer’s instructions to ensure proper installation. Make sure the flange sits flush with the floor and is securely attached.

Step 7: Reinstall the Toilet

With the new flange in place, it’s time to reinstall the toilet. Carefully lower the toilet onto the new flange, aligning the bolt holes on the toilet base with the holes on the flange. Once aligned, secure the toilet to the flange by screwing on the nuts and tightening them with a wrench. Be careful not to overtighten, as it could crack the toilet.

Step 8: Reconnect the Water Supply Line

With the toilet securely in place, it’s time to reconnect the water supply line. Attach the line to the bottom of the toilet tank and tighten the nut with an adjustable wrench. Make sure it’s snug but not too tight to avoid any leaks.

Step 9: Turn On the Water Supply

After completing the installation, it’s time to turn back on the water supply. Slowly turn the shut-off valve counterclockwise to allow water to flow into the toilet tank. Keep an eye out for any leaks and tighten any connections if necessary.

Step 10: Test for Leaks

Once the water supply is turned on, it’s important to test for leaks. Flush the toilet and observe if there are any water leaks around the base or in the connection points. If you notice any leaks, carefully tighten the affected areas until the leaks stop.

Replacing a flange on your toilet may initially seem like a complex task, but with the right tools and guidance, it becomes a manageable DIY project. By following the step-by-step instructions outlined in this guide, you can successfully replace a flange and restore the proper functioning of your toilet. Remember to take the necessary precautions, turn off the water supply, and work carefully to avoid any damage. With patience and attention to detail, you’ll have your toilet flange replaced in no time. As with all plumbing repairs and replacements, if you are having trouble and need assistance in replacing a flange, it is best to call on a professional plumber in your area.

Troubleshooting Guide: What to do when your toilet is leaking from the base

a toilet leak.

Is your toilet leaking from its base, and are you trying to figure out why? This short guide will show you how to troubleshoot and solve the issue.

Why is your toilet leaking from the base, and what can you do about it?

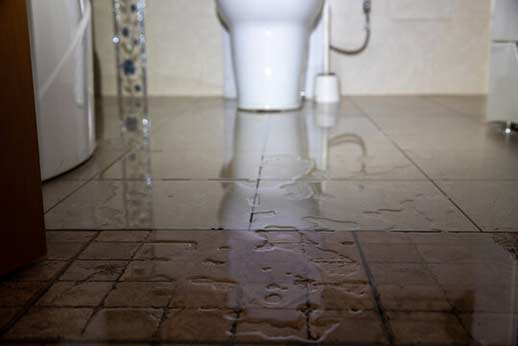
If you see a puddle of water on the floor near the toilet seat, your toilet is probably leaking. This problem may be accompanied by a bad odor. If the water is from your toilet, note that it could be contaminated, warns C&C Campbell Management.

Here are 6 possible reasons your toilet is leaking from its base:

Condensation

It is possible to find water on your toilet floor even when the toilet is not leaking. This happens when the temperature of the water entering the toilet tank is a lot lower than the surface temperature on the outside of the tank. This temperature difference can cause condensation on the outside of the tank.

Water that has collected on the tank surface can trickle down to form a puddle at the bottom of the toilet. If this is the cause of your problem, the surface of the toilet tank will feel wet. To stop condensation, install an exhaust fan in the toilet or run a heater to equalize the temperature inside the toilet. You can also add a condensation liner to the tank.

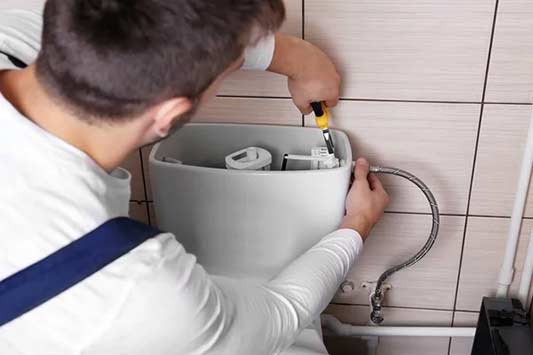
Leaky shut-off valve

The shut-off valve is a small control that lets you turn off the water supply to your toilet. You can usually find it on the bottom left side, behind the toilet. The shut-off valve is a common site for toilet leaks because the device is prone to leak from wear.

To check if the leak is from the shut-off valve, do this:

  • Place a small bowl or cup under the shut-off valve.
  • Flush the toilet and turn off the water supply to the toilet.
  • Wait a few minutes and check for water inside the cup or around the area.

If there is evidence of trickling water, replace the seal or the entire valve.

A leaky pipe

To check for leaks in the pipe connections in your toilet, follow these steps. A dry environment makes it easier to spot leaks;

  • Use a dry cloth to thoroughly wipe down the toilet and all nearby surfaces.
  • Use your hand to feel along the pipes (pay special attention to joints).
  • If you find any wet area, dry it out, wait a bit and feel it again.

Repeat this step across the length of the pipe to be sure there are no other leaks. Unlike other leaks, a leaky pipe will not stop leaking when you flush the toilet. The steps for fixing the leak depend on the location of the damage and how the pipe is installed.

plumber in rosemont.

After tightening the bolts, try to move the toilet seat once again. If the seat doesn’t move, replace the cap. Contact a professional plumber if it moves even after tightening the bolt.

Loose bolts

The toilet seat should be held firmly to the floor by two bolts hidden under dome-shaped caps on the toilet base. If the bolts are loose, your toilet will leak. To check if the bolts are loose, try moving the toilet seat with your hands. If it moves even slightly, the bolts are loose.

To tighten the bolts, remove the dome-shaped caps on the base of the toilet and use a pair of pliers to turn each bolt clockwise. After tightening the bolts, try to move the toilet seat once again. If the seat doesn’t move, replace the cap. Contact a professional plumber if it moves even after tightening the bolt.

A worn toilet seal

A damaged toilet seal or wax ring can cause your toilet to leak from the base. This seal can be found underneath the toilet. Its job is to provide a watertight connection between the toilet and the sewer pipe. Over time, toilet seals can harden and become brittle or they can loosen. Some toilet cleaners will also cause the seal to deteriorate.

To check for leaks around the seal, dry the area thoroughly with a cloth and leave it alone for a few minutes or hours. If the area is wet when you return, it means you have to replace your toilet seal ring. This is not a complicated or expensive repair.

Leaky toilet seat

Your toilet seat may have tiny holes in it without showing any outward signs of damage. This problem is hard to detect. But if your toilet leaks every time you flush it and the issue is not due to any of the above causes, you may consider this as a probable cause. The only solution for a bad toilet seat is to replace it.

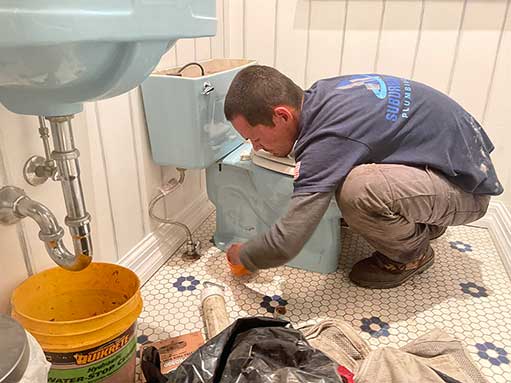
In conclusion, the above are the most common reasons your toilet would leak from its base. If you have taken the recommended steps for troubleshooting the leak and it persists, you may want a professional plumber to look at your toilet.

How to Fix a Leaking Toilet in Chicago: A Step-by-Step Guide

a leaking toilet in chicago.

Welcome to this step-by-step guide on how to fix a leaking toilet in Chicago. Dealing with a leaking toilet can be quite frustrating, but with the right tools and guidance, you can tackle this issue effectively. Whether you are a homeowner in Chicago or a tenant, this guide will provide you with the necessary instructions to resolve the problem and prevent further damage.

Step 1: Identify the Source of the Leak

The first step in fixing a leaking toilet is to identify the source of the leak. Leaks can occur from various areas of the toilet, such as the base, the tank, or the supply line. It is crucial to pinpoint the exact location of the leak before proceeding with the repair.

Step 2: Shut Off the Water Supply

Before attempting any repairs, it is essential to turn off the water supply to the toilet. Locate the shut-off valve, typically located behind the toilet or near the bathroom pipes. Rotate the valve clockwise until the water stops running. This will prevent water from flowing into the toilet during the repair process.

Step 3: Drain the Toilet Tank

Once the water supply is turned off, you need to drain the toilet tank. Flush the toilet to remove as much water as possible from the tank. To eliminate any remaining water, use a sponge or a towel to soak up the excess moisture.

Step 4: Inspect and Replace the Flapper

The flapper is a rubber valve located at the bottom of the toilet tank. A faulty flapper is a common cause of leaks. Carefully inspect the flapper for any signs of damage or wear. If it appears worn out or is not sealing properly, it needs to be replaced. To replace the flapper:

  1. Turn off the water supply to the toilet.
  2. Remove the chain from the flush lever.
  3. Detach the old flapper from the flush valve.
  4. Install the new flapper by attaching it securely to the flush valve.
  5. Reconnect the chain to the flush lever.
  6. Turn on the water supply and test the toilet for leaks.
toilet wax ring replacement in chicago.

Replacing the wax ring can help create a watertight seal between the toilet and the sewer pipe.

Step 5: Check and Replace the Wax Ring

If the leak is coming from the base of the toilet, the wax ring may be damaged or worn out. Replacing the wax ring can help create a watertight seal between the toilet and the sewer pipe. Follow these steps to replace the wax ring:

  1. Turn off the water supply to the toilet.
  2. Drain the toilet tank as described in Step 3.
  3. Disconnect the water supply line from the bottom of the toilet tank.
  4. Remove the nuts securing the toilet to the floor.
  5. Lift the toilet carefully and set it aside.
  6. Scrape off the old wax ring from the toilet flange and inspect it for any signs of damage.
  7. Place a new wax ring on the flange, ensuring it is centered.
  8. Lower the toilet back onto the wax ring, aligning the bolts with the holes in the base.
  9. Tighten the nuts onto the bolts to secure the toilet in place.
  10. Reconnect the water supply line to the bottom of the toilet tank.
  11. Turn on the water supply and check for leaks.

Step 6: Examine and Repair the Supply Line

If the leak is originating from the supply line, it may require examination and repair. Follow these steps to address any issues with the supply line:

  1. Turn off the water supply to the toilet.
  2. Drain the toilet tank as described in Step 3.
  3. Inspect the supply line for any visible leaks or damages.
  4. If there is a leak in the supply line, it needs to be replaced.
  5. Disconnect the old supply line from both the toilet tank and the shut-off valve.
  6. Install a new supply line by connecting it firmly to the shut-off valve and the toilet tank.
  7. Turn on the water supply and check for leaks.
toilet water supply line.

If the leak is originating from the supply line, it may require examination and repair.

Step 7: Test for Leaks

After completing the necessary repairs, it is essential to test the toilet for any remaining leaks. Turn on the water supply and observe the toilet for any signs of water leakage. Inspect the base, the tank, and the supply line thoroughly. If any leaks persist, review the previous steps to ensure all repairs were performed correctly.

Summing it Up

Fixing a leaking toilet in Chicago requires a systematic approach to identify and resolve the issue. By following the step-by-step guide provided above, you can effectively fix the leak and prevent further damage to your toilet and property. Remember to exercise caution during the repair process and seek professional plumbing assistance if needed. With proper maintenance and prompt repairs, you can ensure the longevity and functionality of your toilet in Chicago.

How to Fix a Leaking Shut-Off Valve on Your Toilet

a person fixing a leaking shut off valve on their toilet.

Having a leaking shut-off valve on your toilet can be quite a nuisance. Not only does it waste water, but it can also cause damage to your bathroom floor if left unattended. Fortunately, fixing a leaking shut-off valve on your toilet is a relatively simple task that can be done by most homeowners. In this article, we will guide you through the step-by-step process of fixing a leaking shut-off valve on your toilet, ensuring that you can tackle this common plumbing issue with ease.

Understanding the Shut-Off Valve

Before we delve into the steps for fixing a leaking shut-off valve on your toilet, it’s important to understand what a shut-off valve is and how it works. A shut-off valve is typically located near the base of the toilet and is used to control the flow of water to the tank. When the valve is in the open position, water flows freely into the tank, allowing the toilet to flush. When the valve is closed, water flow is stopped, preventing water from entering the tank.

When a shut-off valve leaks, it means that water is seeping through the valve even when it is closed. This can be caused by a variety of factors, including worn-out washers, loose connections, or a faulty valve body. By following the steps outlined below, you will be able to identify and fix the cause of the leak, ensuring that your shut-off valve functions properly.

Gather the Necessary Tools and Materials

Before you start working on fixing the leaking shut-off valve on your toilet, it’s important to gather all the necessary tools and materials. These may include:

  • Adjustable wrench
  • Slip-joint pliers
  • Replacement washers
  • Teflon tape
  • Bucket or towel

Make sure to have these items readily available before you begin the repair process. This will save you time and prevent any potential frustration of having to search for tools or materials midway through the project.

plumbing tools for repairing a toilet shut off valve.

Step 1: Turn off the Water Supply

The first step in fixing a leaking shut-off valve is to turn off the water supply to your toilet. Look for the main water shut-off valve located near your water meter and turn it clockwise until it is fully closed. This will stop the flow of water to your toilet and prevent any water from leaking during the repair process.

Step 2: Empty the Toilet Tank

Once you have turned off the water supply, flush your toilet to empty the tank and remove any remaining water. This will allow you to work on the shut-off valve without the risk of water spilling or causing any further damage.

Step 3: Inspect the Shut-Off Valve

With the water supply turned off and the toilet tank emptied, you can now inspect the shut-off valve for any visible signs of damage or wear. Check for any loose connections, cracks, or corrosion that may be causing the leak. If you notice any severe damage, it may be necessary to replace the entire shut-off valve.

Step 4: Tighten Loose Connections

If the shut-off valve appears to be in good condition, but you still notice a leak, it is possible that the leak is being caused by loose connections. Use an adjustable wrench or slip-joint pliers to tighten any loose nuts or connections. Be careful not to overtighten, as this can cause further damage.

Step 5: Replace the Washer

If tightening the connections does not resolve the leak, it is likely that the washer inside the shut-off valve is worn out or damaged. To replace the washer, follow these steps:

  • Using an adjustable wrench, hold the shut-off valve body steady.
  • Using slip-joint pliers, unscrew the packing nut located just below the handle of the shut-off valve.
  • Once the packing nut is removed, you will be able to access the washer inside the valve.
  • Remove the old washer and replace it with a new one of the same size.
  • Reassemble the shut-off valve by screwing the packing nut back in place.

Step 6: Apply Teflon Tape

To ensure a watertight seal, apply Teflon tape to the threads of the shut-off valve where it connects to the toilet tank. This will help prevent any potential leaks in the future. Wrap the Teflon tape clockwise around the threads several times, ensuring a snug fit.

Step 7: Test for Leaks

Once you have completed the repair process, it’s important to test the shut-off valve for any remaining leaks. Turn the water supply back on and observe the shut-off valve for any signs of water seepage. If you notice any leaks, repeat the steps above to identify and fix the issue.

To Wrap It Up

Fixing a leaking shut-off valve on your toilet is a relatively straightforward process that can be done by most homeowners. By following the step-by-step guide outlined in this article, you will be able to identify the cause of the leak and repair it effectively. Remember to always turn off the water supply before starting any repair work, and gather all the necessary tools and materials beforehand to ensure a smooth and hassle-free experience. With a properly functioning shut-off valve, you can rest assured that your toilet will operate efficiently and without any leaks.

How Do I Stop My Toilet From Overflowing?

an overflowing toilet in need of repair.

Dealing with a toilet that is overflowing can be a stressful situation. Not only is it messy and unpleasant, but it can also cause damage to your bathroom and potentially lead to water damage in your home. Knowing how to stop a toilet from overflowing and taking immediate action can help prevent further damage. In this article, we will discuss the common causes of toilet overflow and provide step-by-step instructions on how to stop it.

Understanding the Causes

Before we dive into the solutions, it’s essential to understand the common causes of toilet overflow. By identifying the root cause, you can better address the issue and prevent it from happening in the future.

  • Clogged Toilet: The most common reason for a toilet overflow is a clog. When waste and toilet paper accumulate in the pipes, it can cause a blockage that prevents the water from draining properly. As a result, the bowl may overflow when flushed.
  • Malfunctioning Float: The float is a device inside the toilet tank that regulates the water level. If it is not functioning correctly, it may allow the tank to fill excessively, leading to an overflow.
  • Sewer Line Issues: Another possible cause of a toilet overflow is a problem with the main sewer line. If the sewer line is blocked or damaged, it can cause water to back up into your toilet and overflow.

Steps to Stop a Toilet From Overflowing

Now that we have a better understanding of the causes, let’s explore the step-by-step process to stop a toilet from overflowing. Following these instructions can help mitigate the issue quickly and effectively.

Step 1: Turn Off the Water Supply

The first step is to prevent more water from entering the toilet bowl. Locate the water supply valve behind the toilet or beneath the tank. Turn the valve clockwise to shut off the water supply. This will help minimize the amount of water that can overflow.

Step 2: Remove the Tank Lid

Next, remove the lid from the toilet tank. You may need to lift it straight up or unscrew it, depending on the type of toilet you have. Set the lid aside in a safe place to avoid any accidental damage.

Step 3: Check the Float

Inspect the float inside the toilet tank. Ensure that it is functioning correctly and not sticking in the upward position. Gently press the float down to see if it moves freely. If it is faulty or stuck, it may need to be adjusted or replaced. Consulting a professional plumber might be necessary to fix this issue.

Step 4: Clear the Clog

If you suspect that a clog is causing the overflow, you’ll need to clear it. There are a few methods you can try to remove the blockage:

  • Plunger: Use a toilet plunger to create suction and dislodge the clog. Place the plunger over the drain hole and push down firmly. Then, vigorously pump the plunger up and down to create suction. Repeat this process several times until the water starts to drain.
  • Plumbing Snake: If the plunger fails to clear the clog, you can try using a plumbing snake. Insert the snake into the toilet drain and twist it while pushing it forward. This can help break up and remove the obstruction.
  • Enzyme-based Cleaner: Alternatively, you may use an enzyme-based cleaner specifically designed for clearing toilet clogs. Follow the instructions on the product for the best results.

Step 5: Clean Up the Excess Water

If the toilet has overflowed, it’s crucial to clean up the excess water promptly. Use towels or a mop to soak up the water from the floor. Wearing protective gloves is recommended to avoid any potential contact with bacteria.

Step 6: Test the Toilet

After the water is cleaned up and any clogs are cleared, turn the water supply back on by turning the valve counterclockwise. Allow the tank to refill, and then flush the toilet to test if the issue has been resolved. If the toilet flushes normally without overflowing, you have successfully stopped the overflow.

bathroom garbage bin.

Provide a garbage bin in your bathroom for disposing of non-flushable items properly.

Preventing Toilet Overflows

While it’s essential to know how to stop a toilet from overflowing, taking preventative measures can help avoid such situations altogether. Here are some tips to prevent future toilet overflows:

  • Watch What You Flush: Only flush toilet paper and waste down the toilet. Avoid flushing items such as facial tissues, wet wipes, or feminine hygiene products, as they can easily cause clogs.
  • Maintain the Plumbing: Regularly inspect and maintain your plumbing system. Address any leaks, clogs, or malfunctioning components promptly to prevent major issues.
  • Use a Garbage Bin: Provide a garbage bin in your bathroom for disposing of non-flushable items properly.

In Summary

Dealing with a toilet overflow can be a frustrating experience, but by following the steps outlined in this article, you can effectively stop the overflow and prevent further damage. Remember, the key is to act quickly to minimize water damage and attend to any issues that may have caused the overflow. By understanding the common causes and taking preventative measures, you can maintain a functioning and trouble-free toilet system in your home.

How to Fix a Leaking Toilet Base: A Complete Guide

fix leaking toilet base.

Toilets are an essential part of every household, providing convenience and hygiene. However, a leaking toilet base can be a frustrating and potentially costly problem. Ignoring a leaking toilet can lead to water damage, mold growth, and increased water bills. In this comprehensive guide, we will walk you through step-by-step on how to fix a leaking toilet base.

1. Identify the Source of the Leak

The first step in fixing a leaking toilet base is to identify the source of the leak. There are several potential causes, including:

  • Wax ring deterioration
  • Loose or damaged toilet bolts
  • Cracked toilet base
  • Incorrect toilet installation

To determine the cause, carefully inspect the area around the toilet base for any signs of water pooling or dampness. Additionally, check for any cracks or looseness in the toilet itself.

2. Turn Off the Water Supply

Before attempting any repairs, it is crucial to turn off the water supply to the toilet. Locate the shut-off valve, usually located near the base of the toilet or on the wall behind it, and turn it clockwise until it is fully closed. Flush the toilet to drain any remaining water from the tank and bowl.

3. Remove the Toilet

In order to access and repair the leaking toilet base, you will need to remove the toilet. Follow these steps:

  • Disconnect the water supply line from the bottom of the toilet tank.
  • Remove the nuts from the toilet bolts securing the toilet base to the floor.
  • Gently rock the toilet back and forth to break the wax seal and lift it off the floor.
  • Place the toilet on a towel or old newspaper to prevent any water or debris from spreading.

a toilet wax ring replacement.

4. Replace the Wax Ring

A common cause of a leaking toilet base is a deteriorated wax ring. The wax ring creates a watertight seal between the toilet base and the floor. To replace the wax ring:

  • Remove the old wax ring from both the toilet base and the flange on the floor.
  • Clean the flange and the toilet base thoroughly.
  • Place the new wax ring onto the flange, ensuring a snug fit.
  • Carefully lower the toilet onto the wax ring, aligning the toilet bolts with the mounting holes.
  • Press down firmly to compress the wax ring and create a proper seal.
  • Tighten the toilet bolts, being careful not to overtighten and crack the toilet.

5. Inspect and Repair Toilet Bolts and Base

Examine the toilet bolts and the base itself for any signs of damage or looseness. If the bolts are loose or damaged, replace them with new ones. If the toilet base is cracked or damaged, it may need to be replaced. Consult a nearby plumber if necessary.

6. Reinstall the Toilet

Once you have replaced the wax ring and addressed any issues with the toilet bolts or base, it is time to reinstall the toilet.

  • Lower the toilet back onto the flange, aligning the bolts with the mounting holes.
  • Apply downward pressure to compress the wax ring and create a tight seal.
  • Replace the nuts onto the toilet bolts and tighten them until snug.
  • Reconnect the water supply line to the bottom of the toilet tank.
  • Turn on the water supply and allow the tank to refill.

a plumber testing for any toilet leaks.

7. Test for Leaks

After reinstalling the toilet, it is essential to test for any remaining leaks. Flush the toilet and carefully inspect the area around the base for any signs of water seeping out. If you notice any leaks, repeat the necessary steps to ensure a proper seal.

Conclusion

Fixing a leaking toilet base is a manageable task with the right tools and guidance. By following the steps outlined in this complete guide, you can successfully repair a leaking toilet base, preventing further damage and ensuring the continued functionality of your bathroom. However, if you encounter any difficulties or are unsure about any step, it is recommended to seek the assistance of a residential plumber for expert advice and assistance.

error: Content is protected !!