Water Heater Replacement Tips
Replacing a water heater can be a daunting task for many homeowners. However, with the right knowledge and tools, it is possible to perform this task yourself and save a significant amount of money on professional installation. Here we will provide you with some valuable DIY tips for water heater replacement, ensuring a successful and cost-effective project.
Understanding Your Water Heater
Before you embark on the process of replacing your water heater, it is essential to have a good understanding of the different types and models available in the market. The most common types include tankless, storage tank, heat pump, and solar water heaters. Each type has its own pros and cons, and it is crucial to choose the one that best suits your needs.
Additionally, you should also determine the capacity and energy efficiency requirements of your household. This will help you select the right size and model of water heater, ensuring optimal performance and energy savings.
Gathering the Necessary Tools and Materials
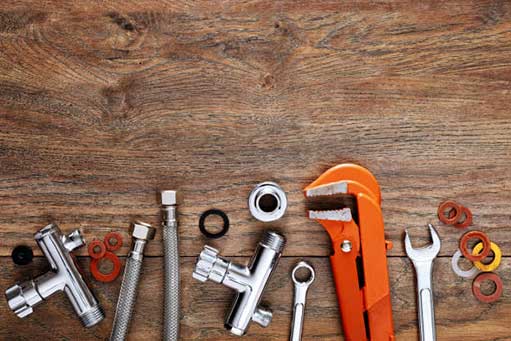
Once you have chosen the right water heater for your needs, it’s time to gather the necessary tools and materials for the replacement process. Here are some essential items you will need:
- Adjustable wrench
- Pipe wrench
- Screwdrivers (both flathead and Phillips)
- Teflon tape
- Pipe cutter
- Flexible hoses
- Pipe fittings
- Plumber’s putty
- Voltage tester
Having all the required tools and materials ready beforehand will make the replacement process smoother and more efficient.
Once you have chosen the right water heater for your needs, it’s time to gather the necessary tools and materials for the replacement process.
Ensuring Safety First
Before you begin replacing your water heater, it is crucial to prioritize your safety. Here are some important safety precautions to keep in mind:
- Turn off the power supply to the water heater at the circuit breaker.
- Shut off the gas supply if you have a gas-powered water heater.
- Allow the water heater to cool down completely before starting the replacement process.
- Wear safety gloves and goggles to protect yourself from any potential hazards.
By following these safety measures, you can ensure a secure and accident-free water heater replacement.
Step-by-Step Water Heater Replacement Guide
Now that you have gathered the necessary tools, materials, and taken the required safety precautions, it’s time to begin the water heater replacement process. Follow these step-by-step instructions:
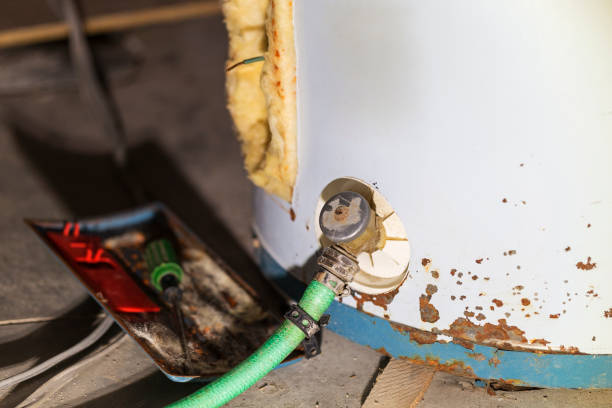
Step 1: Drain and Disconnect the Old Water Heater
Start by turning off the cold water supply to the water heater. Next, connect a garden hose to the drain valve located at the bottom of the tank. Run the other end of the hose to a suitable draining location, such as a floor drain or outside your home. Open the drain valve and allow all the water to completely drain from the tank.
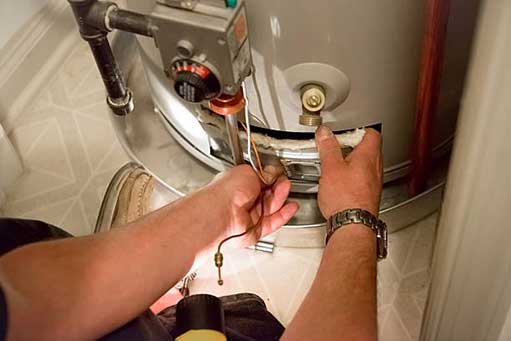
Once the tank is empty, disconnect the water supply line and the gas line (if applicable) from the water heater. Use an adjustable wrench or a pipe wrench for this task.
Step 2: Remove the Old Water Heater
After disconnecting all the necessary connections, it’s time to remove the old water heater. Enlist the help of a friend or family member to assist with the lifting. Carefully maneuver the old water heater out of its location and dispose of it properly according to your local regulations.
Step 3: Install the New Water Heater
Position the new water heater in the desired location. Ensure that it is level and stable. If necessary, use shims or a platform to achieve the right positioning. Connect the water supply line to the cold water inlet on the new water heater using a flexible hose and appropriate fittings. Use Teflon tape to ensure a tight and leak-free connection.
If you have a gas-powered water heater, reconnect the gas line using a pipe wrench and apply a coat of plumber’s putty on the fittings for a secure seal. Make sure to follow gas supplier guidelines and regulations when handling gas connections.
For electric water heaters, make sure to connect the wiring properly according to the manufacturer’s instructions. Use a voltage tester to ensure the power supply is off before making any electrical connections.
Step 4: Fill and Test the New Water Heater
With all the connections in place, open a hot water faucet in your home to allow air to escape from the system. Once a steady stream of water flows from the faucet, close it. Turn on the cold water supply to the new water heater and allow it to fill completely. Check all the connections for any leaks and tighten them if necessary.
Finally, turn on the power supply to the water heater (if applicable) and follow the manufacturer’s instructions to set the desired temperature. Your new water heater is now ready for use!
Flush the water heater annually to remove sediment buildup.
Maintaining Your New Water Heater
Now that you have successfully replaced your water heater, it’s important to perform regular maintenance to ensure its longevity and efficiency. Here are some tips to keep in mind:
- Flush the water heater annually to remove sediment buildup.
- Check the pressure relief valve periodically and replace if necessary.
- Insulate the hot water pipes to reduce heat loss.
- Monitor the temperature settings to prevent scalding or excessive energy consumption.
By following these maintenance tips, you can prolong the lifespan of your new water heater and maintain its optimal performance over the years.
Replacing a water heater may seem like a daunting task, but with the right knowledge and DIY tips, you can accomplish it successfully and save money in the process. By understanding the different types of water heaters, gathering the necessary tools and materials, ensuring safety precautions, and following a step-by-step guide, you can confidently replace your old water heater with a new one.
Remember to prioritize safety, take your time, and seek help from a local plumber if needed. With proper maintenance, your new water heater will provide you with reliable hot water for many years to come.