Author Archives: Chicago Plumbing Experts

What To Look For During A Home Plumbing Inspection

a home plumbing inspection

When buying or selling a house, there is always some distrust between buyers and sellers. That’s because anyone selling a product might find it helpful to slightly – often unintentionally – exaggerate its qualities to get a higher price. Home buyers know this. Therefore, they do not believe everything a property owner says about their home.

That is why home inspections are such a necessity for both the buyer and the seller. Although the home inspector works for the buyer, they play the role of an impartial judge for both sides. Home inspectors are unbiased third parties who investigate the seller’s claims to know if everything they say about the property is accurate, explains Keyrenter Property Management Raleigh. Home inspections protect the buyer.

But the home inspection can also benefit the seller if the seller understands how home inspections work. By taking steps to prepare their home for it, a seller can use the home inspection to bolster buyer confidence in their property. In this way, while serving as a safeguard for the buyer, the home inspection also becomes a plus for the seller.

However, to get the full benefit of a home inspection, both buyer and seller need to know what to expect during the process. One of the central systems of the home that home inspectors will examine is the plumbing. Here, we explain what you – as a buyer or seller – should expect during a home plumbing inspection.

10 things to look out for during a home plumbing inspection

If you are about to buy a home, you must check the inspection agreement to ensure the items listed below are in the inspection. If you are a seller, this list will show you the parts of the plumbing that a professional home inspector will assess.

Toilets

Flush toilets to ensure the flushing mechanism functions smoothly. Check to see if flushing is not slow and if the toilet drains before the bowl refills with water. Try moving the toilet seat to be sure it is bolted to the floor. Inspect pipes and toilet base for leaks.
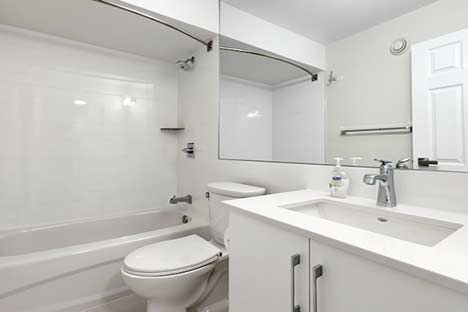
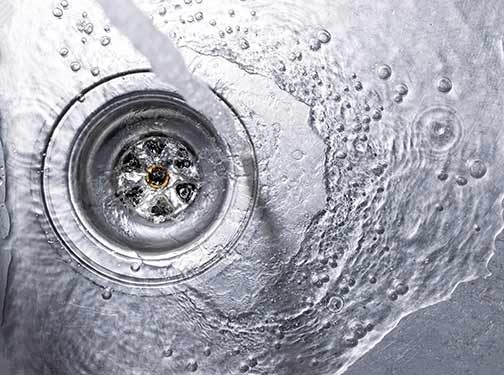
Shower and tub 

Inspect the showerhead; turn it on and off to note the flow rate. Ensure the showerhead does not drip when off. Check the shower drain to see how quickly it drains. Fill the bathtub with water to see if it drains properly. If the shower switches from the tub spigot to the showerhead, ensure water flows as expected.
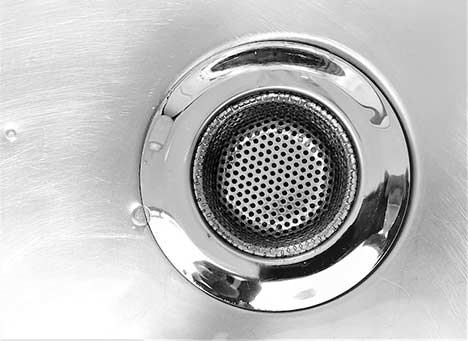
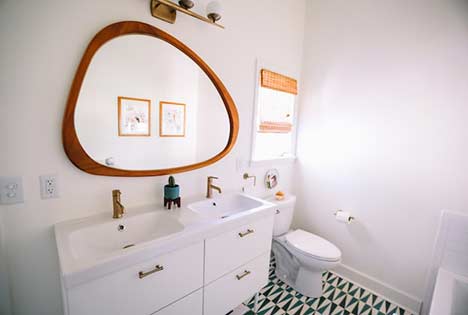
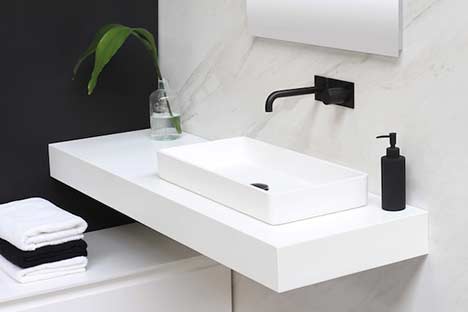
Faucets and sinks 

Check all faucets by turning them on and off; are they easy to turn on and off? After the faucets are turned off, wait to see if they drip. Engage and disengage drain stops to see if the sink drains. Run the cold and hot water, and inspect for leaks.

Water quality 

To check for discoloration, run the water at least five times to see if it maintains color. In addition to color changes, look out for particles inside the water. Discolored water is a sign of old, rusty, or leaky pipes.

Water pressure 

When checking faucets or shower heads, note the water pressure. Low water pressure could be a sign of blocked or leaky pipes. High water pressure will damage pipes and home appliances. Is the water pressure issue from the city supply?

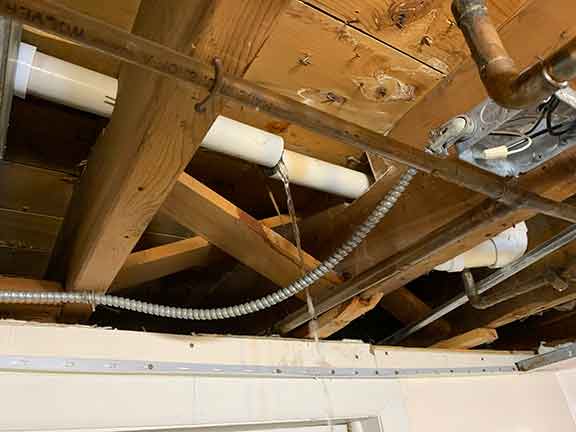
Signs of water damage

Look for traces of moisture, especially in areas hidden from view (such as cupboards, vanities, and under sink areas) or where water pipes run. Look for watermarks or signs of painting a water-damaged surface. 

Hot water system 

Are you getting the right hot water temperature; not too hot or lukewarm? How old is the hot water system in the home? When was the last service date or flush date? What is the condition of the anode rod?

Pipes, gutters, and drains 

What kind of pipes are in the home? Do they make noises when water runs through them? How old are the pipes? What is the condition of gutters and downspouts? Are they firmly in place, without rust or debris? Are there signs of dampness or soft ground around storm drains?

Leak Inspection 

Look for visible signs of leaks in accessible areas (checking for leaks in inaccessible areas might be harder and require specialized inspection). Perform the required tests with the water meter to be sure there are no hidden leaks in the home.
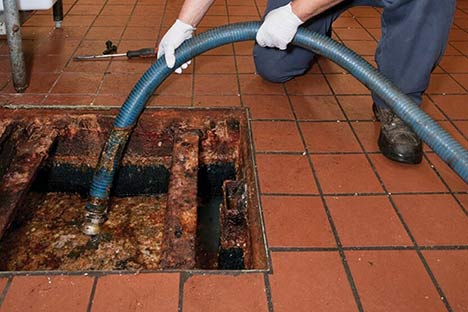
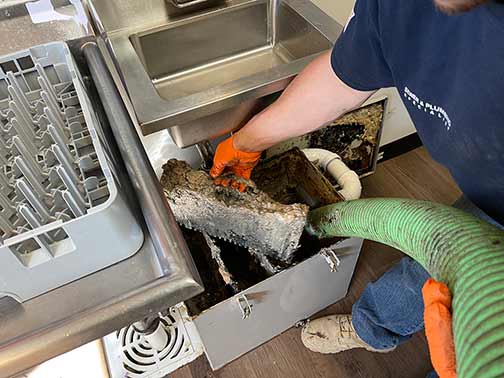
Sewer System 

Detailed sewer inspection is typically not part of the home inspection. But it is advisable to get a professional plumber to conduct a sewer camera inspection. Inspecting the sewer line will reveal the type and condition of the pipes and any existing or potential issues.

Finally, a home plumbing inspection may turn up issues that will require further investigation, but those might not be within the scope of the home inspection. If this happens, it is always a good idea to have those additional inspections done.

5 Ways to Prevent Restaurant Plumbing Problems

5 Ways to Prevent Restaurant Plumbing Problems

Did you know that preventing plumbing issues in your restaurant is vital? 

The resulting issues can be a real pain in the… drain. A leak, clog, or burst pipe can shut down your business, prevent customers from using the restrooms and cause damage to the facilities or equipment. But that is not all. As Windermere Management warns, it can damage your reputation and result in a loss of revenue. Do you know what else could be a problem? The cost of replacement or repairs can be financially draining.

If you do not address such issues immediately, they can escalate to involve more damage. That is because it is a domino effect where one problem causes another. Let’s remember that it may also be hazardous to the health of your employees and customers. That is because a malfunctioning drain causes unsanitary conditions that pose a public health risk. You do not want that on your conscience. 

However, there is good news. Preventing plumbing problems will keep your customers loyal and happy. Your customers will be more comfortable if they access the amenities they need. As a result, they will give positive reviews about your restaurant. 

Here, we will discuss five ways to prevent plumbing problems in your restaurant so that you will maintain business operations, minimize cost, ensure safety, and keep your customers happy. 

Address everything that can cause plumbing issues before they occur 

They say, “an ounce of prevention is worth a pound of cure.” That is especially true when it concerns restaurant plumbing. When you address plumbing issues before trouble strikes, you’ll nip any hidden issue in the bud before it can cause a significant problem. 

We advise that you engage in regular schedule maintenance, so you will catch small clogs or leaks before they become serious issues. Inspect the plumbing system for old or worn-out pipes that require replacement to prevent burst pipes.

Keep an eye on the condition of your equipment and sinks. You can save yourself a lot of headaches and money if you are proactive and address potential issues before they become emergencies. Your customers will be happy, and you will have peace of mind that the restaurant’s plumbing is running smoothly. 

Invest in clog control to prevent restaurant flooding 

As you may know, restaurants deal with a lot of food waste, grease, and other debris that can easily build up to cause clogged pipes. These clogs can cause overflowing sinks, backup toilets, floods, and other severe plumbing issues. 

You can control clog in various ways. One way is to conduct regular maintenance where a plumber performs hydro-jetting to clear off all built-up debris. Also, you can hire a plumber to install a grease trap in the kitchen to help catch and prevent grease from entering your pipes to cause clogs. 

Another essential step will be to train your employees on the proper disposal of grease and food waste. Provide designated containers where they can dispose of grease, food debris, and ether day items that can clog the drains.

Choose tankless water heaters

According to the National Restaurant Association, quick-service dining restaurants require between 500 to 1,500 gallons of water daily, and full-service dining establishments consume as much as 5000 gallons daily. Most of these are hot water. That is why you cannot afford issues with your water heater.

Tankless water heaters are more durable and long-lasting than tanked water heaters. You will never run out of water in the middle of a busy dinner rush. Since it is tankless, you have nothing to worry about leaks. Tankless water heaters require lesser repairs and maintenance than traditional tanked water heaters. In addition, you will save more money on energy bills. 

Control food grease 

One of the common causes of clogged drains in restaurants is trapped grease. That is why it is advisable to hire a plumber to clean the grease trap out. The plumber will install a grease trap and routinely clean the lines. Doing so will prevent clogs from accumulating. 

You should have a dedicated drain for grease as part of the control measures. Avoid pouring food grease into other drains. Ensure you train your employees on how to manage dishwashing and grease. 

Have a quick response team

You will need a rapid response team with a dedicated plumber for your restaurant’s needs. Even when you perform all the above preventive measures, plumbing accidents that require urgent attention may still occur. However, you can handle such issues if you have a plumber that can respond immediately to salvage the situation.

The bottom line

Preventing restaurant plumbing problems is crucial for maintaining business operations, ensuring safety, minimizing costs, and keeping customers satisfied. When it comes to a restaurant’s plumbing, it is always better to be safe than sorry.

What to Do When your Water Heater Breaks?

What to Do When your Water Heater Breaks

Although it doesn’t happen often, water heaters sometimes break, and when they do, they can cause massive damage to your home. If this problem happens and you don’t know how to handle it, you will not only be looking at the cost of fixing extensive water damage to your home but may also be exposed to the risk of electric shock or gas fire, warns Florida Property Management.

What do you do when your water heater breaks? Whether you are dealing with this issue right now and looking for guidance on how to tackle the problem or trying to update your level of emergency preparedness, this post will help you. 

The steps below will teach you how to minimize the damage a broken water heater can do to your home and prevent you from needing a water heater replacement prematurely.

Step one: Turn off the water supply

Your water heater has a cold water inlet pipe and a hot water outlet pipe. These two pipes are often located on the top of the water heater. You can identify the cold water supply line by the shut-off valve (usually a ball valve) on it. The arm of this valve will typically be in a position where it lines up with the cold water inlet pipe; this is the open position. 

You want to turn the valve clockwise until the arm is perpendicular (ninety degrees) to the cold water pipe. If your cold water pipe has a gate valve instead, turning it to the right should close it. This step will keep more water from flowing into the tank and flooding your home.

Step two: Turn off the power or fuel

The next thing is to eliminate the risk of a gas fire or electric shock. You want to cut the power supply by turning the circuit breaker off if this is an electric water heater. For gas-powered water heaters, look for a dial on the top of the water heater and turn it until it is in a horizontal position (ninety degrees). If you cannot find the valve, turn off the gas at the gas line leading to your water heater. 

There is a huge risk of electrocution when a water heater leaks. Please get in touch with your plumber if you are unsure how to turn off the power on an electric water heater. Also, if there is a gas smell in the room, even after you shut off the gas, please call a professional plumber

Step three: Empty the water heater tank

At this point, you have turned off the water supply to the water heater and shut off the electricity or gas. But water is still coming from the tank onto the floor of your home. You want to get your garden hose and fix it to the drainage valve at the bottom of the water heater. Make sure the connection is tight, and then open the drainage valve. 

You will need a screwdriver to open it if it is a ball valve. But you should be able to turn it by hand if it is a gate valve. Ensure the other end of the hose is at a low spot in your home where the water can be released safely. Open the T&P valve of the water heater to let air into the tank and help the water flow out of the tank freely.

Step four: Start cleanup

Once the above steps are completed, you can wait for your plumber to arrive. While you wait for the plumber, you may begin the cleanup process. The sooner you start this, the lower your repair costs will be. However, it is essential that you create a visual record of the damage caused by the event before you start the cleanup. This will be vital for filing your insurance claims. 

Take detailed photos of the water heater’s damage to your home; floors, walls, furniture, etc. After, you may proceed to remove the salvageable items from the area. Depending on how long the leak had been going before you discovered it, you may be able to remove the water with a mop or have to rent a wet/dry vacuum. If necessary, hire a basement flood pumping service to handle the cleanup.

Step Five; File an insurance claim

Unless the accident happened because of your negligence (maybe you had prior warnings of the issues with your water heater), your insurance homeowners’ insurance should cover the cost of replacing the damaged items and fixing your home. 

Even if the damage was minimal and you did not suffer any losses, you should still inform your insurer. The company will send an adjuster to your home to determine the cause of the accident and quantify the losses.

Tips for Making Sure your Sump Pump is Ready in the Spring

Tips For Making Sure Your Sump Pump Is Ready In The Spring

The spring rains are coming; fields will flourish, flowers will bloom, and all the little birds will find a reason to sing. Our days will get longer, the weather will warm up, and the season of renewal will bring us all-around cheerfulness.

Springtime is when nature comes alive, yet springtime can also be a season of tears. That’s because as the snow melts and it starts to rain, something else also begins. Heavy rains become heavy floods that can cause serious damage to homes, warns East Bay Management.

But if you have a sump pump in your home, you do not need to worry about springtime floods, do you? Whether your sump pump is in the basement, crawlspace, or backyard, it should be able to protect your home from flooding, right? Sadly, this is only sometimes the case.

Your home can still get flooded even when you have a sump pump. Remember that your sump pump has been frozen through winter and might not just be ready for spring. To protect your home, you should take these steps to ensure your sump pump is ready for spring.

Tips for getting your sump pump ready for spring

In the winter, there isn’t much water flowing into your sump basin, and the sump pump won’t have anything to do throughout the season. In that time, however, many things can go wrong with the sump pump, but you will not know it until your basement becomes flooded.

To keep this from happening, do these:

Check the power

There are two kinds of electrical connections you will find on sump pumps. Some sump pumps have two electrical cords: a float cord and a sump cord. The sump cord plugs into the back of the float cord plug. To test a sump pump with two plugs, follow these steps:

Unplug both cords and plug the pump cord into the wall outlet. When you turn the power on, you should hear your pump activate (it will make a humming sound). If this happens, the electrical connections are fine; connect the two cords back as they were.

If your sump pump has only one cord, inspect it for signs of damage and do step two below to ensure the electrical connections are okay. Remember to secure the sump pump cords with tape or zip ties to keep them from getting tangled with the float.

Check the float system

Whether the sump pump float is a flappy ball that swings out as the water rises or a single pull float that goes up and down, they both operate on the same principle. The float should automatically kick-start the motor as the water level in the basin rises.

If the float is stuck, your sump pump will not activate when the basin fills with water (even if the motor is in good condition). You can test the float by pouring a few gallons of water into the basin until the water is high enough for the float to activate the pump.

After the pump powers on, wait till the pit is emptied, and the motor turns off; repeat the process. If the sump pump fails to activate, you may have a bad switch, the float could be stuck, the pump might not get power, or the motor is faulty. In some cases a replacement of the sump pump may be your only option.

Test the check valve

The check valve may be positioned inside the pit or on the wall. Its location doesn’t matter if it performs its function. The check valve keeps water being pumped out of the pit from flowing back into the pump and running the impeller backward.

To test the check valve, pour water into the sump pit once again until the pump powers up. Wait until the water is removed from the pit and the motor switches off. Now listen to see if you can hear water flowing inside the pipe. If it is, your check valve needs to be fixed.

A faulty rubber seat often causes a bad check valve. The problem can be solved by replacing the check valve. Check valves are easy to replace; anyone could do it. But if you need help with how to do this, it is best to contact a plumber.

Clean the sump basin and inlet screen

Some mud and debris may be at the bottom of the sump basin. You want to clear these away to reduce the chances of your sump pump getting jammed. Clean the basin by scooping out the dirt with a scooper.

If the inlet screen of your sump pump is blocked with debris, it will impair the pump’s efficiency. To clean the inlet screen, gently remove it from the pump and rinse it in water until it is clean. Replace it as carefully as you removed it.

How to Remove Rust From Your Sinks, Toilets and Shower

How to Remove Rust From Your Sinks

If you’re tired of constantly dealing with rust stains around your sinks, toilets, and shower, it’s probably time to take action. We know that removing rust can be more than just an inconvenience. It causes damage to your fixtures and can even lead to more significant problems down the road. If you have a steel wool pad or Brillo pad in your home – or even if you don’t – these simple steps will help remove rust from your sinks and showers.

Pour white vinegar over the rust on your sink, toilet, and shower

Pour white vinegar over the rust on your sink, toilet, and shower. Vinegar is a great cleaning agent and will help remove rust. It’s also a natural product that doesn’t harm the environment.

  • Rub the vinegar over the rust. You can use a soft cloth or an old toothbrush to rub it in.
  • Leave the vinegar on for 15 minutes. Let it sit longer if you want, but 15 minutes is usually enough to loosen up the rust.

Wait about 15 minutes for the vinegar to penetrate

Don’t worry if your sink or toilet is stainless steel, as this won’t react with the vinegar. After 15 minutes, scrub with a sponge or abrasive pad to remove any leftover grime. Rinse the sink thoroughly and dry it with a towel. If you have a white sink, avoid using vinegar. Instead, use an equal amount of baking soda and water to clean the sink.

Clean sink

Cleaning the sink or toilet with vinegar

If you are moving in or out of the home and want to remove rust, try this method. Experts from Divine Moving and Storage suggest leaving your home clean before the move. This way, packing and transporting belongings becomes way easier.

Scrub the rust off with a kitchen brush

After letting the vinegar sit for a few minutes, it’s time to scrub. Use a kitchen brush to scrub away any remaining rust until you remove most of it. If you don’t have a kitchen brush, use steel wool or aluminum foil instead. If all else fails, there’s always the Brillo pad method:

  • Fill a shallow bowl with warm water and pour in some white vinegar. 
  • Dip a Brillo pad into the solution, then rub it onto the cast iron skillet’s surface until you remove most of the rust. 
  • Rinse off the pan using warm water and dry it completely before storing it away in a cool, dry place.

Grab some steel wool, aluminum foil, or a Brillo pad

Scrubbing with steel wool or aluminum foil will work well on rust stains. However, be sure not to use these items on the ceramic surfaces of your sink. They will scratch it. The best way to remove rust from a sink or toilet is by using a pumice stone. That will help eliminate hard water stains and rust deposits on your porcelain surfaces. Another option is to use a commercial product to remove rust stains.

modern bathroom design.

Be careful with ceramic surfaces

Scrub the area until most of the rust is gone

Scrub the affected area with a steel wool pad or Brillo pad. If you’re cleaning sinks, toilets and shower drains, use a wire hanger, metal spatula, or plumber’s snake. When scrubbing with a steel wool pad or Brillo pad, just apply pressure – don’t use too much force, as it will damage your sink’s finish. Let the area dry completely before using soap and water for final cleaning (or other methods). If you’re cleaning drains, use the wire hanger or plumber’s snake to push the debris down the drain. Flush with hot water after removing clogged particles.

Rinse and dry with a paper towel

Rinse and dry with a paper towel. Don’t use a cloth or rag, as this leaves lint behind and could potentially transfer bacteria or fibers from other fabrics. If the item is heavily soiled, you may want to use a small amount of detergent or soap. Be careful not to use too much, as this can leave residue behind on the fabric and make it harder for it to absorb water later. 

Clear off any debris in the drain or on your sink before you remove rust

Once you’ve got everything prepared, here’s what to do:

  • Clear off any debris in the drain or on your sink with a bent wire hanger, metal spatula, or plumber’s snake (if you’re cleaning a drain).

Pour 1/2 cup baking soda directly down the drain

1/2 cup baking soda will do the job this way:

  • Pour the baking soda directly down your drain.
  • Wait 20 minutes for it to do its thing.
  • Flush the drain with hot water to remove any residue left behind, and shine things up a bit.

Stop up your sink and fill it with hot water

Stop up your sink and fill it with hot water. Use a magnet to collect any scraps and bits of scrap metal you accidentally picked up while removing the rust. If any pieces are too small or fragile for the magnet, just pour them down the drain after draining out your hot water.

Clean washbasin

Keeping hygiene is half of the work

Maintaining your sink is also essential during a detailed cleaning. For example, if you bought a new home, you want to make sure it’s spotless when moving in. Once you unpack, getting rid of unwanted bacteria from your sinks will be a good idea. You should remove any pieces of food or similar items from it and then fill them with hot water. In the end, don’t forget to sanitize your sink in the kitchen and bathroom.

You’ll need the right tools to remove rust from your fixtures

Removing rust from your fixtures can be easy if you have the right tools. First, remove your fixture from the wall and place it on a towel or piece of plastic. Turn off the water supply to prevent any water damage. Then, use a wire hanger or plumber’s snake to remove as much rust as possible. You may also want to try using steel wool or Brillo pads, but this can scratch glass surfaces, so be careful. Finally, some products might help loosen stubborn rust stains, but we recommend speaking with a local plumber before using them if possible.

In Conclusion

If you’re unsure how to remove rust from your fixtures, don’t worry. We got all the answers right here in this article – best of luck with it, and happy cleaning to you.

How Clogging Leads to a Sewer Backup

How Clogging Leads to a Sewer Backup

A sewer backup is the most disgusting drainage problem you can ever have in your home. Every year, tens of thousands of homeowners find themselves dealing with this issue in their homes. Yet, in most cases, sewer backups can be prevented if the problem is detected on time.

What is a sewer backup?

Most homes have a sewer line that carries wastewater from the sinks, drains, and toilets in the home to the main sewer lines beneath the streets. A sewer backup happens when the contents of this sewer line backflow into your home instead of flowing into the main sewer lines.

When this happens, all the content of the sewer line (including raw sewage) will start coming up inside the home via the floor drains, toilets, and sinks. A sewer backup releases foul-smelling unsanitary water into the house, causing untold problems for the home’s inhabitants, warns Compass Property Management.

What causes a sewer backup?

Sewer backups happen due to clogs inside a home’s sewer lines. Clogs make it impossible for wastewater to pass through the drainpipes. Having nowhere to go, and as more water is added from the house, the sewer line eventually fills up and spills its contents into the home.

There are many reasons why your home’s sewer lines may become clogged. Some of these reasons are outside your control because they result from natural events. But most sewer line clogs are caused by misuse of your home’s drains or failure to maintain the sewer lines properly. If your sewer line does in fact have a clog, the best way to remove it is by way of a professional hydro jetting service.

Here are a few ways drain clogs can cause sewer backups:

Non-flushable items inside the drains

The only thing that should be flushed into your home’s toilets is toilet paper. When items like wipes, feminine hygiene products, fabric, dental floss, or so-called flushable products enter the toilet, they can block the sewer line. 

Hair can also block your sewer line if it gets into sink and shower drains. Soap scum is another major cause of drain clogs. It forms when soap and minerals inside hard water come into contact. Soap scum becomes a hard lining on drainpipe inner surfaces.

Cooking oil and grease buildup

A major cause of sewer line blockage is cooking oil or grease buildup inside drainpipes. Fats, oils, and grease (FOG) congeal into a hard mass as they cool inside the sewer line. This hard, sticky mass can directly block the channel or stick to the surface of the pipe. 

Once in place, the greasy lining will start to trap debris until the diameter of the pipe narrows to a point where water can no longer flow freely. If this situation is not reversed, it can culminate in a sewer backup.

Use of chemical drain cleaners

Chemical drain cleaners can dissolve the clogs inside your sewer lines. But while they remove clogs in the short term, they also cause long-term damage to sewer lines. That’s because cleaners contain caustic chemicals. 

These chemicals are responsible for the corrosive nature of cleaners that allows them to eat away the clog inside the pipes. The problem is that the chemicals can also weaken the drainpipe, causing sections to collapse, thereby blocking the pipe.

Old pipes 

If a sewer line has old pipes, it is more susceptible to clogs, and the risk of sewer backups in the home will be greater. This is particularly true for sewer lines made of clay or metal pipes because those start to degrade as soon as they are buried in the ground. 

Long terms exposure to moisture, from within and without, eventually causes the pipes to leak or even collapse, in turn calling for an unexpected sewer line repair expense. If the surrounding soil finds its way into the pipe, it can result in the sewer backing up into the home.

Earth movements

The soil around a sewer line can cause it to become clogged if that soil moves in a way that alters the position of the pipes. Upward or downward movements in the soil can change the level of the sewer line and make it difficult for water to flow freely. 

If the water inside the pipe is forced to slow down, it will deposit debris in that pipe section. This can continue until enough dirt accumulates in that lowered pipe section to block it and cause a sewer backup emergency.

Tree roots

Tree roots may pierce a sewer line and block it. Most times, this happens due to small leaks in the pipe, which attract the attention of tree roots. To access the nutrient-rich water inside the pipe, the tree roots break into the sewer line and block it. Tree roots can also block a sewer line by growing over or above it and moving it out of place. This creates a depression inside the pipe, where debris is dumped until the entire sewer line is blocked.

Grease Trap Maintenance – The Do’s and Don’ts

a plumber performing grease trap maintenance

If you own a commercial kitchen, restaurant, or food service operation, chances are high that there will be a grease trap inside your drainage systems. Grease traps are essential for buildings used as restaurants, cafés, bars, hotels, bakeries, or schools.

Grease traps help prevent the damage that FOGs (fats, oils, and grease) would do if allowed to indiscriminately enter the municipal sewers and natural waterways. Grease traps are receptacles that catch the grease inside wastewater before the wastewater enters the drainage systems.

But while grease traps protect public sewer systems and the natural environment, grease traps also need to be protected. With proper maintenance, says Service Star Realty, your grease trap will become efficient and pose serious problems for your business and the people who use the premises.

Grease trap cleaning and maintenance is important for the following reasons:

  • It prevents terrible odors that can emanate from a grease trap and foul up the air inside the building. Foul odors affect the health of your employees/customers and can even ruin your business.
  • Prevention of damage to drainage systems as a result of the accumulation of solidified FOG (fats, oils, and greases) inside the drainpipes.
  • Prevention of costly grease trap or drainpipe repairs; the inevitable consequence is if you fail to maintain the grease trap in a timely fashion.
  • Avoid hefty fines from the authorities due to toxic spillage from a malfunctioning grease trap that pollutes natural water systems and harms local wildlife.

How to maintain your grease trap, the dos, and the don’ts

Don’t: Use enzymes or solvents to clean your grease trap

Solvents and enzymes promise a quick way to clean your grease trap. But these shortcuts can cause you major problems. Grease traps already contain microorganisms and natural enzymes that break down the fats, oils, and grease inside them. 

You don’t need to add enzymes artificially, as they can disrupt the natural process. Cleaning solvents or agents like bleach, drain cleaners, or chemicals will destroy the active enzymes inside the grease trap.

Don’t: Pour boiling water into the grease trap

Pouring boiling water into a grease trap or a trap-connected sink will defeat the purpose of having a grease trap. This is because when wastewater enters a grease trap, it slows down to let the less dense FOG in the water rise to the surface. However, the FOG melts and runs quicker when you pour boiling water into the grease trap. This makes it easier for fats, oils, and grease to escape the grease trap.

Don’t: Neglect to clean the grease trap

While grease traps break down the fats, oils, and grease that enter them, this process is not quick enough to keep the trap free of FOGs. Your grease trap will eventually fill up and require cleaning. How you clean the grease trap and how often you do it depends on the size and location of the trap. The regulations in your area also play a role in how often you clean the grease trap.

Do: Install your grease trap properly

The size of the grease trap and how it is installed matter. Grease traps come in various sizes; the right size for your business depends on how much mess is generated in your kitchen. An undersized trap will result in overflows and backups. 

To size the grease trap for a business, check the number of sink outlets and other equipment (glasswasher and dishwasher) in the kitchen, as well as the rate at which water flows from the kitchen (measured in gallons per minute-GPM). Proper installation of the grease trap will prevent slow draining. Also, if there is little to no grease accumulating inside the trap, the grease trap must be installed appropriately.

Do: Dispose of food solids properly

Train your staff to always dispose of waste and food solids in the trash; they should not let them wash into the sink. Do not use the grease trap as a waste disposal unit. Install strainers in the sinks to facilitate this process. Allowing food solids to wash into your grease trap will fill up faster and become clogged with waste.

Do: Hire professionals

Hiring professionals to clean your grease trap is the best way to ensure the system’s efficiency. Experts protect your business by eliminating any risk of heavy fines by the authorities. Hiring professionals for this job will save you money; you won’t have to acquire expensive equipment that you only need occasionally. Professionals will also prolong the life of your grease trap by cleaning it thoroughly.

Do: Know the law

Laws guiding the use of grease traps vary by location. These laws cover the right size of a grease trap for specific premises, how often it should be cleaned, how it should be cleaned, and how the waste collected from the grease trap should be disposed of. To avoid penalties or business closure, know what the law says about how to use your grease trap.

How Does Plumbing Leak Detection Work?

How Does Plumbing Leak Detection Work

Every single year, at least 8.1 out of every 10 homes will suffer some form of a plumbing leak. These leaks have a wide variety of causes aging pipes/connections, corrosion, severe water hammer, high water pressure, clogged pipes, rapid temperature changes, and many more. When leaks happen, the effect can devastate the physical structures of the home, its contents, and the people who live in it, warns Draper Realty

There is no limit to how much damage a plumbing leak can do to a house. Common consequences of plumbing leaks to your home and your health include:

  • Water leaks can destroy the content of your homes, such as when water soaks into the carpet, cabinets, or stored items in the abasement.
  • Water leaks will destroy the home’s aesthetics by discoloring its walls or ceilings and causing the drywall to bulge.
  • Water leaks subject your family to avoidable health risks by encouraging the growth of mold and mildew inside the home.
  • Water leaks may undermine the house’s structural integrity if the water finds its way into the foundation or other building structural elements.
  • Water leaks will affect your home’s value, making it lose its appeal to buyers.

Why are plumbing leaks so common?

The answer is twofold: First, it is because of the size of the plumbing and its presence in almost every part of the house. We use water for many things in the home, which multiplies the potential for problems. Second, plumbing leaks are common because many parts of the plumbing system are hidden from view. So, when there are problems, it can be challenging for the homeowner to see them.

How can you prevent plumbing leaks?

Given that the biggest issue with plumbing leaks is that you seldom see when they happen, how can you protect your home from water damage by preventing leaks in the plumbing systems? 

Is there a way for homeowners to monitor the movement of water inside the water pipes in their homes when those pipes are hidden behind walls, on the floors, or in the ceiling?

This is precisely what a leak detection system does. When installed in the home, it serves as the homeowner’s first line of defense against leaks. Leak detection systems sense when there is a problem in the plumbing system and take immediate action to prevent disaster. The best thing about leak detection systems is that they do their work without human intervention.

How do leak detection systems work?

Leak detection devices can detect water leaks in your plumbing because they measure the amount of water that flows through the pipes, the rate at which the water flows, and how long the water flows. When the leak detection device senses a deviation from how water usually flows through your plumbing pipes, it will shut off the water supply.

Leaks detection devices are programmable; homeowners can set the parameters for when they want the system to turn off the water supply to their homes. For instance, the system can be programmed to shut the water off if it flows at a certain rate for a certain length, or it can detect small leaks, such as when a toilet in the home is running.

There are two ways a leak detection system measures the water flowing inside a pipe:

  • Some leak detection devices use a mechanical system consisting of a small turbine. This turbine spins as water flows over it; how fast the turbine turns depends on the rate of flow of the water. There can be a slight loss of pressure with these systems.
  • Other leak detection devices use sonar to detect the water flow rate inside the pipes. There is no need for an impeller to be immersed in the water. This means the leak detector does not interfere with the flow of water; there is no pressure loss.

Leak detection devices are typically installed at the point of entry, where the water enters the house. The leak detection will not detect leaks if those leaks happen in the upstream portion of a plumbing system. Therefore, it is crucial to install it as close to the point of entry as possible; that way, it can detect all leaks inside the home.

Most leak detectors can be connected to Wi-Fi and monitored in real-time on a smartphone. The phone app shows you the water flow rate inside your pipes, and you get alerts when things go wrong. Most importantly, you can turn the water off remotely by using the phone app from any part of the world with an internet connection.

Leak detection systems are a homeowner’s biggest ally in their fight against leaks in their home’s plumbing. A leak detection system means peace of mind; it gives homeowners control. Installing a reliable leak detection device costs between $500 and $1,000. But that is a minor investment compared to the tens of thousands of dollars the system can save you. 

How Leaking Pipes Can Damage Your Home

How Leaking Pipes Can Damage your Home

Clean water is delivered straight to your home and readily available whenever needed. That has to be one of the greatest conveniences of modern life. Unlike people who lived less than one hundred years ago, we do not have to fetch water from a well or nearby river and store it in containers inside the home for later use.

Instead, vast networks of pipes crisscross our cities to carry water from treatment plants to our doorstep. From that point, another network of pipes distributes the clean water to the appliances and faucets inside the home. The invention of modern plumbing surely ranks as one of the greatest innovations of all time.

But as good as modern plumbing systems are, they are not without problems, warns Foothills Properties Management & Realty. The number one issue with plumbing systems is that they tend to leak. Plumbing systems have hundreds of connections, and each one has the potential to spring a leak. That is why yearly, around 1 trillion gallons of water are wasted through home plumbing leaks.

Every drop of water leaking from a plumbing system costs homeowners money. In one year, this cost can amount to hundreds of dollars. But this is not the only consequence of a burst pipe inside the house. By far, the greatest cost of a plumbing leak is the damage out-of-control water can cause to the physical structures of the home.

That is why 1 in 60 insured homes will file for water damage in any given year, and 20% of all insurance claims are connected to water damage. The result is that of the $10 billion worth of insurance payouts made every single year by insurance companies, damage by leaking pipes contributes a huge portion. So, how exactly do leaking pipes damage your home?

How leaking pipes damage your home

Water pipes leak for several reasons, aging plumbing systems, corrosion, sedimentation inside pipes, sudden temperature changes, loose fittings and connections, excessive water pressure, and much more. 

When a water pipe leaks, the water inside the pipe is released into the surrounding environment and can cause three kinds of damage.

Damage to the contents of the home

By far, the least-devastating damage caused by a leaking pipe is when the water destroys the content of the house. This happens when items like carpets, clothes, paintings, or furniture stand in the path of running water and get soaked as a result. As costly as this damage is, it is minor compared to the other ways water can damage your home.

Pipe leaks leading to cosmetic damage

Water from a leaking pipe can significantly damage the home’s appearance. If the leaking pipe is hidden behind a wall and the leak is not detected, the wall can become discolored as a result. 

Water can also cause wall paint to start to bubble, peel, or flake. It can make the wallpaper start to peel or warp. Leaking pipes can also cause the de-laminating of plywood and other materials in the home. All these will diminish the appeal of the home.

Pipe leaks leading to structural damage

By far, the worst effect of a leaking pipe is when the water attacks the physical structures of the house to either weaken or destroy them. This often happens when a pipe leak goes undetected for a long time. There is no limit to how much harm water can cause to the structural elements of the building.

If this problem is not addressed promptly, it can destroy the building. Examples of structural damage caused by leaking pipes include:

  • Floorboard warping: This happens when water collects beneath the floorboards. The boards swell as a result and start to warp. This often manifests as bumps or lumps in the carpet or wood floors.

  • Wood rot: If contact between water and the home’s wooden components persist, those components can start to rot. This can happen to doors, door jambs, floorboards, cabinets, roof structures, and other wooden features of the building.

  • Damaged insulation: The insulation inside walls should always be kept dry. If water gets into the insulation, it loses its insulating properties and the ability of the HVAC to regulate the home’s temperature will be compromised.

  • Drywall damage: Water can saturate the drywall to the point where it begins to bulge and sag. If the drywall and framing materials of the house are weakened, the entire ceiling or upper floors can collapse.

  • Foundation damage: The greatest threat that water from a leaking pipe poses to a house is the threat of foundation damage. If water seeps into the foundation of the building, it can corrode the steel frames inside the foundation. If this happens, the foundation can start to crumble or break away.

To sum up, a seemingly minor issue like a tiny leak from a pipe is enough to destroy the entire structure of a building completely.