Welcome to our comprehensive guide on sump pump installation! Your basement is a valuable space that provides numerous benefits, from extra living area to storage space. However, water damage can quickly turn your basement into a nightmare. It is crucial to safeguard your basement from potential water damage, and one of the most effective ways to do so is by installing a sump pump.
In this step-by-step guide, we will walk you through the process of installing a sump pump in your basement, ensuring that you have all the information you need to protect your home and belongings from water damage.
Understanding the Importance of a Sump Pump
Before we dive into the installation process, let’s first understand why a sump pump is crucial for your basement’s protection. A sump pump is a device that helps prevent water from infiltrating your basement by collecting excessive groundwater and directing it away from your home’s foundation.
During heavy rainfalls or when the water table rises, groundwater can seep into your basement through cracks in the foundation or basement walls. If left unchecked, this water can lead to a host of problems, including mold growth, structural damage, and damage to your belongings.
A sump pump is installed in a specially constructed pit, known as a sump pit, in your basement. It collects water that enters the pit and pumps it away from your home, typically to a drainage system or a storm sewer.
Gathering the Necessary Tools and Materials
Before you begin the installation process, it is important to gather all the necessary tools and materials. Here is a list of items you will need:
- Sump pump
- Sump pit
- Check valve
- PVC pipes (with appropriate diameter)
- PVC cement
- Tape measure
- Hacksaw or PVC pipe cutter
- Screwdriver
- Adjustable wrench
- Teflon tape
- Bucket
- Gloves
- Safety goggles
The first step in the installation process is to choose the right location for the sump pit.
Step 1: Choosing the Right Location for the Sump Pit
The first step in the installation process is to choose the right location for the sump pit. Here are some factors to consider when selecting the location:
- Identify the lowest point in your basement: The sump pit should be placed in the lowest point of your basement where water is most likely to accumulate.
- Keep the sump pit away from obstacles: Ensure that the location you choose is free from any obstacles, such as utility lines or water pipes.
- Accessibility: It is important to choose a location that allows easy access for maintenance and repairs.
Step 2: Digging the Sump Pit
Once you have determined the location for your sump pit, it’s time to start digging. Follow these steps to dig the pit:
- Using the tape measure, mark the dimensions of the sump pit on the basement floor.
- Put on your gloves and safety goggles for protection.
- Using a shovel or a digging tool, carefully dig the pit according to the marked dimensions. The depth of the pit should be approximately two feet.
- Remove any debris or loose dirt from the pit using a bucket.
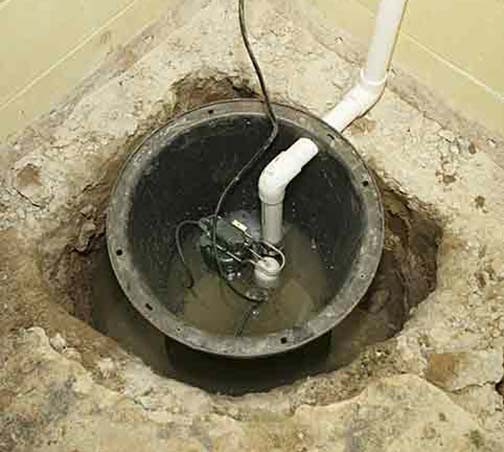
Step 3: Installing the Sump Pit
Once the pit is dug, it’s time to install the sump pit. Follow these steps:
- Place the sump pit in the center of the hole you dug.
- Ensure that the pit is level and stable.
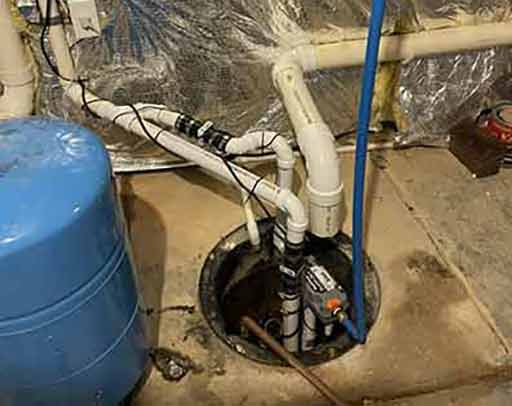
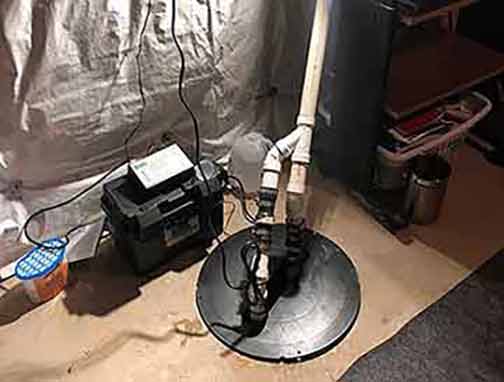
Step 4: Installing the Sump Pump
Now that the sump pit is in place, it’s time to install the sump pump. Here’s how:
- Remove the cover from the sump pit.
- Place the sump pump inside the pit.
- Position the pump in a way that the float switch is unobstructed and can move freely.
- Attach the check valve to the pump’s discharge pipe, ensuring that it is securely tightened.
- Connect the PVC pipe to the check valve and extend it to the desired location for water discharge.
- Secure the PVC pipe using PVC cement.
With the sump pump successfully installed, it is important to test its functionality and perform regular maintenance to ensure it continues to operate effectively.
Step 5: Testing and Maintenance
With the sump pump successfully installed, it is important to test its functionality and perform regular maintenance to ensure it continues to operate effectively. Here are some essential steps:
- Fill the sump pit with water until the float switch is activated.
- Observe the pump as it starts pumping water out of the pit.
- Check for any leaks in the discharge pipe or the connections.
- Remove any debris or sediment that may accumulate in the pit.
- Test the sump pump periodically to ensure it is in proper working condition.
Conclusion
Congratulations! You have successfully installed a sump pump in your basement, providing an essential layer of protection against flooding and water damage. By following this step-by-step guide, you have taken a significant step towards safeguarding your basement and preserving the value of your home.
Remember, proper installation and regular maintenance are key to ensuring your sump pump operates effectively. If you encounter any issues or feel unsure at any point during the installation process, it is always recommended to seek assistance from a local plumber.
Now that you have the knowledge and tools, take action to protect your basement from water damage and enjoy peace of mind, knowing that your valuable space is safe and secure.