Category Archives: Uncategorized

BRRRR Like a Pro — Smart Moves for Real Estate Investors Who Want Better Long-Term Equity

Smart Moves for Real Estate Investors Who Want Better Long-Term Equity

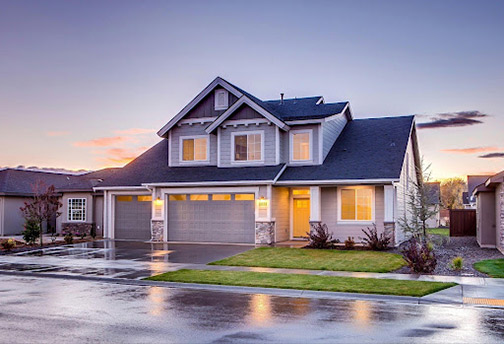
Real estate investors love the BRRRR method — Buy, Rehab, Rent, Refinance, Repeat — because it’s both a strategy and a flywheel for financial growth. Done right, it builds long-term wealth with minimal upfront capital after the initial cycle. Done wrong, it becomes a cash-draining trap. Let’s explore the essentials that separate successful investors from those who burn out after the first “R.”

TL;DR

BRRRR is not a get-rich-quick system — it’s a disciplined wealth-building formula.

  • Buy right: Value is made on the buy.
  • Rehab smart: Focus on ROI-driven improvements.
  • Rent well: Screen tenants and optimize occupancy.
  • Refinance wisely: Don’t overleverage.
  • Repeat strategically: Scale only after systems are in place.

Also — protect your investments legally (form an LLC), maintain your properties, and never underestimate the importance of finding a reputable company for critical repairs like plumbing.

The BRRRR Method Breakdown

PhaseCore FocusKey QuestionTypical PitfallSuccess Tip
BuyAcquisitionIs this below market value?OverpayingAnalyze multiple comps before closing.
RehabRenovationWill this boost ARV?Over-renovatingStick to cosmetic & safety upgrades.
RentTenantingWill it cash flow?Rushing to fill unitsPre-screen rigorously.
RefinanceLeverageDoes the equity justify it?Refinancing too earlyWait until stabilized income.
RepeatScalingCan I manage the next one?Growing too fastBuild a process before scaling.

The BRRRR How-To Checklist

1. Research the market — Use sites like Realtor.com or Redfin to spot underpriced homes.
2. Budget realistically — Factor in not just the purchase price but also holding costs, closing fees, and rehab overruns.
3. Vet contractors — Always get three quotes and check references on Angi.
4. Rehab with purpose — Focus on upgrades that increase rentability or appraisal value.
5. Rent for reliability — Consider property management software such as Avail to automate tenant screening and payments.
6. Refinance strategically — Build equity first. Don’t refinance until your property stabilizes.
7. Repeat — only when ready — Use tools like BiggerPockets to model returns and scale methodically.

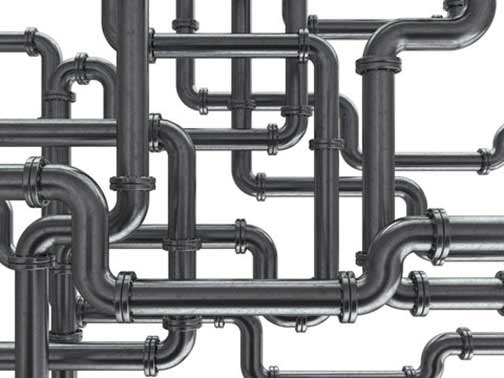
Plumbing Repairs: The Silent Wealth Preserver

While most investors focus on roofs, paint, and flooring, plumbing issues can devastate cash flow if ignored. Leaks, clogs, and outdated pipes often lead to property damage and angry tenants — both of which cost you time and money.

When tackling repairs or system updates, prioritize finding a reputable company with proven experience in residential investment properties. A trusted contractor doesn’t just fix problems; they preserve your ROI by preventing future disasters.

As your BRRRR portfolio grows, forming an LLC provides structure, liability protection, and tax advantages. It separates your personal assets from your rental operations and signals credibility to lenders. Setting up an LLC through ZenBusiness can save you significant time and cost compared to hiring an attorney, letting you stay focused on scaling instead of paperwork.

Pro Tips & Hidden Truths (Bulleted List Edition)

  • Don’t fall in love with the property; fall in love with the numbers.
  • “Forced appreciation” beats “market appreciation.”
  • Cash-out refinances can feel good but erode long-term returns if misused.
  • Always build an emergency fund — 3–6 months of rent per unit.
  • Track everything with Stessa or QuickBooks.
  • Never skip an inspection.
  • Protect your credit — lenders love discipline, not drama.

FAQ — Investor Concerns, Answered

Q1: How much money do I need to start with BRRRR?
A: It varies by market, but expect 20–25% down for your first deal plus rehab costs.

Q2: Is BRRRR still profitable with higher interest rates?
A: Yes, if you buy at deep discounts. Rising rents often offset higher financing costs.

Q3: Should I manage my properties myself?
A: Only if you enjoy it and live nearby. Otherwise, use management platforms like Buildium or hire a property manager.

Q4: How long should I wait before refinancing?
A: Typically six to twelve months, once rental income stabilizes and you’ve improved the property’s value.

Q5: What’s the biggest rookie mistake?
A: Misjudging rehab budgets — always pad estimates by 15–20%.

Glossary

  • ARV (After Repair Value): The property’s appraised value after renovation.
  • Cash-Out Refinance: Pulling equity from a property by taking a new loan.
  • Cap Rate: A property’s net operating income divided by its purchase price.
  • Equity Cushion: The margin between your property’s value and debt.
  • Turnkey Property: A home already rehabbed and rented out to tenants.

Product Spotlight: Home Depot Pro Xtra for Real Estate Investors

When managing multiple rehabs under the BRRRR model, even small savings add up. Home Depot Pro Xtra for Pros lets investors track project spending, earn volume discounts, and get paint or tool rewards automatically. It’s especially useful when running simultaneous renovations or working with multiple contractors across markets.

The BRRRR method is a rhythm — not a race. Start small, document every step, and learn from each cycle. As long as you treat real estate investing like a business, maintain quality properties, and make decisions grounded in math (not emotion), your “Repeat” will lead to compounding returns and long-term financial freedom.

Building Green: How to Start and Grow a Sustainable Construction Business

How to Start and Grow a Sustainable Construction Business

Starting a business rooted in green building principles isn’t just about tapping into a growing market—it’s about making a commitment to healthier cities, more responsible practices, and a viable climate future. You’re not launching any business. You’re laying a foundation for the structures that will define how people live, work, and gather in a warming world. From the very first step, your choices—materials, partners, language, logistics—carry long-term impact. The road isn’t smooth, and the answers aren’t always clear, but the shift toward sustainable building is real, urgent, and full of opportunity for those willing to do the work with intent and integrity.

Know What You’re Really Building

You can’t build a sustainable business if you’re unclear on what, exactly, you’re sustaining. Environmental commitment is not a branding angle—it’s a compass. Before touching code or concrete, take the time to identify your green building niche. Whether you focus on passive homes, net-zero retrofits, or affordable energy-efficient housing, your niche will determine your vendor relationships, materials pipeline, marketing language, and project scale. And while the temptation to stay broad might feel strategic, clarity is what gets you trusted—and hired.

Build Trust With Certification

In the world of sustainable construction, words don’t carry weight unless they’re backed up by structure. That’s where third-party frameworks come in. From the outset, commit to aligning your process with rigorous standards by pursuing LEED certification. Not just for show—these systems guide your choices on HVAC, insulation, site placement, and waste handling. They also provide clients with something rare in an evolving market: confidence.

Too many promising green firms flame out because their paperwork couldn’t keep up with their ambition. Don’t let that be you. Before your first client meeting, make sure you’ve developed a sustainability plan that accounts for not just permits and zoning, but also how your day-to-day practices align with your public-facing claims. This includes energy sourcing, subcontractor screening, and disposal methods. Sustainability must be baked into both your operations and your governance if you want the business to stand.

Expand Your Business Skills 

Sustainable construction demands more than technical skill—it asks you to run a business that holds up under pressure. Budgeting, procurement, compliance, and hiring all stack into a daily operational puzzle that can’t be solved on instinct alone. Builders who pursue formal business training often avoid the bottlenecks that stall growth or erode margins. For those ready to level up their operations, earning a degree in business can sharpen the systems thinking needed to lead a green company. Programs designed around working professionals make it possible to build while learning, and this may help align your execution with your ambition.

Make Sustainability the Strategy, Not the Accessory

If “going green” is still a separate line item in your business plan, you’ve already missed the point. To succeed in this space, sustainable thinking has to shape how you operate, not just what you offer. That means material choices, vendor sourcing, timelines, and transport must be viewed through a systems lens. Firms that thrive long-term adopt sustainable construction methods that balance environmental benefit with logistical pragmatism. Think beyond solar panels and start thinking about sourcing gypsum from closer quarries, or choosing fast-renewable woods.

Don’t Overlook Smart Plumbing Partnerships

A sustainable build is only as efficient as its systems—and that includes what’s flowing under the floors and behind the walls. Plumbing choices shape water efficiency, energy transfer, and long-term operating costs more than most realize. Working with teams who understand this, like Chicago Plumbing Experts, helps reinforce your green intent at the infrastructure level. From fixture selection to pipe layout, their work supports both environmental goals and client satisfaction. Every detail matters when you’re building for performance that lasts.

Build With the Future in Mind

If you want to stay relevant five years from now, you need to think beyond today’s materials catalog. Green building isn’t static—it’s experimental, adaptive, and often nonlinear. Start to explore bio‑based building materials now: hempcrete, recycled steel, and carbon-sequestering concrete alternatives aren’t just trendy—they’re soon to be baseline. You don’t need to adopt every emerging tech, but you do need to know what’s out there, where it’s being used, and how it fits your clients’ needs and risk profiles. Early adoption isn’t about hype. It’s about positioning yourself at the intersection of credibility and innovation.

Launching a sustainable construction business isn’t about finding the greenest paint swatch. It’s about aligning your values with systems that can scale, then proving—project by project—that sustainability works in the real world. You don’t need to have every credential on day one. But you do need a compass, a backbone, and a long view. In this field, trust is your most renewable resource. Build it well. Build it often. And build it like you want it to last.

Discover why Chicago Plumbing Experts are the top choice for reliable and efficient plumbing solutions in the Windy City. Learn more about our comprehensive services and experience unparalleled customer satisfaction!

Revolutionize Your Home’s Plumbing: The Case for Repiping

Revolutionize Your Home’s Plumbing: The Case for Repiping

Plumbing systems are the most important life-sustaining system in a house, notes Heritage Management Services. They deliver clean water, which is essential for the well-being of your family, wherever it is needed inside your home. At the same time, they remove wastewater that can pose a health risk to your household.

Your home’s plumbing never stops to take a rest; it works night and day, in summer and winter. However, this demand eventually takes its toll on the system, with the result that after some years, your plumbing will start to show signs of aging, with an increasing tendency to malfunction.

When this happens, the plumbing problems in your home will increase in both frequency and intensity. There is a chance that you will start to see previously unexperienced issues like:

  • Frequent leaks: Leaks can happen even in newly installed plumbing systems. However, with aging systems, you are likely to see multiple leaks in your home at the same time, with recurring leaks in the same places.
  • Low water pressure: Gradual/sudden drops in water pressure are a common issue in aging plumbing. This is due to years of corrosion and buildup that narrow the pipe channels, restricting water flow.
  • Discolored water: Brown, rusty, or yellow water from your faucets and plumbing fixtures is evidence that rust and other contaminants (including soil) are present in your home’s water supply.
  • Corroded pipes: Visibly corroded water pipes and drain lines can result from installing mismatching metal pipes in the plumbing or aging plumbing systems.
  • Noisy pipes: As the plumbing ages, the fittings that once held the water pipes in place may become loose, leading the pipes to bounce around and make strange noises inside your home.
  • Water damage: Unexplained watermarks on your ceilings, walls, and flooring may be from your aging pipes. In the worst cases, these problems can result in structural damage to your building.
  • Spikes in your water bill: A sudden increase in your home’s water bill without an accompanying increase in your water usage often indicates the presence of hidden leaks in your plumbing.
  • Bad-tasting or smelly water: Sometimes, leaks and corrosion will betray their presence in your plumbing system by leaving an unpleasant taste or smell in your water supply.

What can you do about these problems? You may try to solve the individual issues listed above. But if you do that, you will be ignoring the cause and focusing on the symptoms of the problem. That will only cost you money and time, without yielding any meaningful results.

If the plumbing pipes in your home are old and near or past the end of their service life, the best solution to the problem is to repipe your home. Repiping your home will solve your plumbing issues and update the plumbing system to make it more resilient and efficient.

Repiping your home: what you need to know

Repiping your home will reset your entire plumbing system by replacing outdated pipes and connections with new ones. This comprehensive refresh will address the lingering issues in your plumbing while minimizing the risk of future problems.

What does the repiping process look like?

  1. Assessment and pipe removal

Factors that will affect the cost and duration of the project include the size and layout of your house, as well as the location of the pipes and how accessible they are. Bigger homes will have more pipes, and this will require more men and materials. If there are pipes in the hard-to-reach areas of the house, such as crawlspaces and closets, removing and replacing them will involve significantly higher labor costs.

  1. Selecting pipe materials

Typically, you will have three options: copper, PEX, or CPVC pipes. Each material has its unique pros and cons. Copper pipes are resistant to bacteria and long-lasting, but they are expensive. PEX pipes are corrosion-resistant and less prone to bursting, but they are susceptible to UV light and rodent damage. CPVC pipes are not flexible and have lower heat resistance, but they are affordable and easy to install.

  1. Plan for disruptions

Repiping your home will upset your household’s normal schedule. There is a possibility that walls and floors will be opened to access the pipes inside them. This not only means disruptions to your water supply, but you will have to deal with a lot of noise and dust, with the risk of damage to your furniture and belongings. If you choose to move out of your home temporarily, that will be an additional cost.

As you may already see, repiping your home’s plumbing is a major cost. This is not a project you want to start unless you are sure of the quality of the plumber you are hiring for the job. What are some of the things you want to look out for in your chosen plumber?

They must be licensed and fully insured to cover the potential risks and liabilities that come with repiping a home. They should have expertise in these kinds of projects and be willing to let you verify that claim. Lastly, they should be transparent and detailed in their pricing.

What Your Plumbing Is Telling You: A Guide to Identifying Noises

What Your Plumbing Is Telling You: A Guide to Identifying Noises

Why does your home make strange noises, especially at night when it’s all quiet and you’re trying to sleep? No, your house is not haunted by a five-hundred-year-old ghost, and your building is not about to collapse.

The noises you hear are probably just your plumbing acting up and creating all these weird effects, says LRES Casselberry Management. Below, we explain why the pipes and plumbing fixtures in your home are making strange noises and what you can do about them.

  1. High water pressure (humming and vibrating sounds, water hammer)

If the water pressure inside your pipes is too high, you will hear strange noises from your plumbing. High water pressure causes pipes to hum and vibrate. You may also hear the sound of banging, something known as water hammers. Water hammers often happen when you turn a faucet on; the sudden rush of water hitting the pipe components is what causes the pipes to clang and vibrate.

Pipes will also clang and rattle if the flow of water stops abruptly as the faucet is turned off. To solve this problem, find the root cause of high-water pressure in your home. If the problem is from the city water supply, there is not much you can do. Installing a water pressure regulator or pressure-reducing valve (PRV) will help to even out the water pressure inside your pipes.

  1. Clogged water pipes (clanging and banging sounds, water hammer)

Sediment buildup inside water pipes, as a result of hard water or corrosion, can cause your plumbing to make strange noises. Because of their narrowed channels, water pressure inside these clogged pipes will be higher. Sediment can cause abrupt stoppage or slowing of water, resulting in sudden surges in pressure and the resulting water hammers.

The force of water hitting clogged sections inside the pipes can also knock pipes and pipe connections out of position, causing those loose sections to make noises. Mineral buildup in the air chambers of water pipes can cause strange noises in the system. To address these issues, you must deal with the root cause of the buildup within your pipes.

  1. Loose plumbing components (rattling, whistling, and squealing)

Loose components, such as fasteners and washers, can make strange noises in your plumbing. For instance, worn-out or loose washers might make a squealing noise as surging water forces them to rub against the other parts of the system.

Copper pipes also tend to make whistling and squealing noises as they rub against nearby drywall or the wooden features of your home. This is largely due to their malleability and ability to expand and contract quickly.

To fix annoying sounds from copper piping, insulate the pipes or reduce the temperature of your hot water slightly. To deal with noises from loose plumbing components, find the moving parts and replace or tighten them.

  1. Noisy water heater (clanging, hissing, rumbling, whistling)

A noisy water heater tank is a potentially life-threatening problem; it should not be taken for granted. If your water heater tank is making strange noises, water pressure and temperature levels inside the tank may be reaching dangerous levels.

This problem is caused by high rates of sediment buildup inside the tank, maybe as a result of hard water or corrosion. The accumulated buildup within the tank traps heat, causing the water inside the tank to constantly overheat. High temperatures from excessive buildup also cause the water heater tank to expand and contract erratically.

These are the reasons why your water heater tank makes strange noises. An overheating water heater is not only prone to leaks, but it is an explosion waiting to happen. To fix the problems, drain the water heater, ensure the TPR valve is working, and have a professional plumber check the heating element or anode rod.

  1. Clogged drain lines (bubbling, gurgling and sucking sounds)

A clogged or blocked drainage line is likely to make strange sounds. Your drains will also make strange noises if the vent stack is blocked. These sounds come from the trapped air inside the system. Not having a way to exit the pipes, sewer gases and vapors can force their way out through toilets, sinks, and floor drains.

The sounds you hear inside your home may come from the trapped water inside your drain lines pushing its way out through the onrushing water in your toilet. To solve this problem, avoid behaviors that allow items such as grease, food debris, paper products, etc., to enter the drainage pipes.

Also, get rid of the materials blocking your drain lines by hydro jetting the pipes. If there are tree roots within the pipes, you may want to remove the trees or set up tree root barriers.

Beyond fixing the strange noises in your plumbing, is there a way to stop this problem from happening? Yes, there is. A comprehensive plumbing inspection done annually by a qualified plumber will help you identify the potential cause of strange noises in your plumbing.

By finding these problems early, before they become a nuisance, you can stop them from degenerating into annoying sounds that keep you up at night. Yearly plumbing inspections also allow you to preempt other budding issues in your plumbing.

Landlord’s Guide to Leaky Faucets in Chicago

Landlord's Guide to Leaky Faucets in ChicagoFaucet leaks in a rental property are inevitable and at some point, they will happen. Quite frequently, a faucet leak is not considered a big problem because it doesn’t cause flooding. But a leaking faucet can waste an unbelievable amount of water. One faucet, dripping at the rate of one drop per second, can waste 250 gallons of water a month or 3,000 gallons a year.

That is money your tenant does not have to spend, says Taylor Street Management, especially when you consider that a leaky faucet is not hard to fix. A faucet is not a complicated device. All you need to fix the leak is a basic understanding of how faucets work, a few tools, and some patience. 

In this guide, we explain the steps you should take to fix a leaky faucet in your rental property.

What causes faucet leaks?

kitchen-faucet-repair

Basically, faucets are an assembly of parts designed to hold water back or release it, as needed. The major internal components of faucets are the O-ring, valve seat, washer, and gasket. If any of these components are damaged, the faucet will leak. The main causes of a leaking faucet are loose or worn-out O-ring, worn-out washer, or corroded valve seat.

Problems with faucet components are unavoidable; they are the result of corrosion and aging. Sometimes you may also have problems with the metal or plastic parts of the faucet. But these kinds of issues are less common. To fix a leaking faucet, the first step is to know which of the four types of faucets you are dealing with.

Types of faucets

drain-cleaning-chicago

  • Compression faucets: These have separate handles for hot and cold water. You have to tighten the handles to turn off the water. They are the oldest and least expensive types of faucets. Compression faucets are prone to leak. 
  • Cartridge faucets: Similar to compression faucets but slightly easier to operate. This has a removable cartridge with holes that align with the water inlet. The O-ring for this type of faucet is located on the cartridge.
  • Ball-valve faucets: This is the most common faucet used in kitchen sinks. They are less common in bathrooms. Ball-valve faucets have springs and gaskets in the water inlet port which must be replaced every few years.
  • Ceramic disk faucets: The newest and most reliable faucets in the market. They are the least prone to leaks because the disk valve is firmly screwed to the valve seat. They are also the most expensive to repair if damaged.

How to fix the types of leaky faucets

plumbing-repair

The steps depend on the type of faucet, but for all faucets, the first step is to shut off the water supply. After that, you have to disassemble the faucet.


How to fix compression faucets

There are usually two possible causes when a compression faucet leaks. The first and more common one is due to the rubber washer inside the faucet being worn out. This washer is located on the end of the faucet valve stem. A compression faucet may also leak from the handle. If this happens, the packing inside the handle needs to be replaced.

To fix the faucet:

  • Unscrew and pull off the handle
  • Using a wrench, unscrew, and remove the retaining nut
  • Remove the valve and unscrew the washer at the end of it
  • Replace the washer
  • If the leak is from the handle, replace the packing inside the retaining nut
  • Reassemble

How to fix cartridge faucets

Cartridge faucets may be single-handled or double-handled. The procedures for fixing leaks inside both types of cartridge faucets are essentially the same. A double-handled cartridge will naturally take more time. To fix the leaks, it is best to replace all the rubber parts along with the O-rings. If the cartridge itself is damaged, it should be replaced along with the gaskets.

Here is how to do it:

  • Remove the handle and unscrew the cartridge retainer
  • Pull out the cartridge
  • If the faucet has a retaining pin rather than unscrewing nut, you will need needle-nose pliers
  • Use a flathead screwdriver to get the gasket out of the water inlet and replace it with new ones
  • Grease all rubber parts before you replace them
  • How to fix ball-valve faucets

These are very easy to repair but their replacement parts will vary according to the model of your faucet.

To repair a ball-valve faucet:

  • Remove the handle with a hex wrench or screwdriver
  • Lift out the ball valve after you have removed the bonnet
  • Check the valve for damage. Replace if it is damaged
  • Using a flathead screwdriver, lift the gaskets and springs out of the inlet hole
  • Insert the new gasket after you have greased it and inserted the springs
  • Grease the ball and return it to its place

How to fix ceramic disk faucets

These will rarely leak, but if they do you should replace the disk and rubber gaskets.

To do that:

  • Unscrew the disk
  • Replace the gasket
  • Insert the new disk
  • Screw it into place
error: Content is protected !!