Understanding the Immediate and Long-term Impact of Burst Pipes
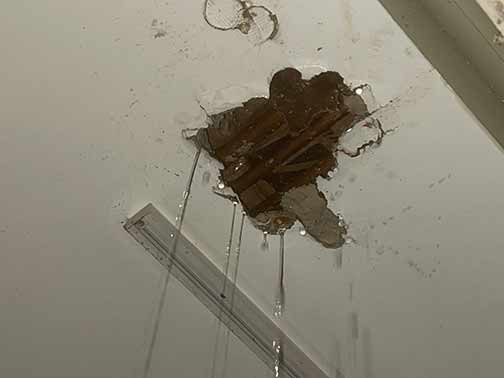
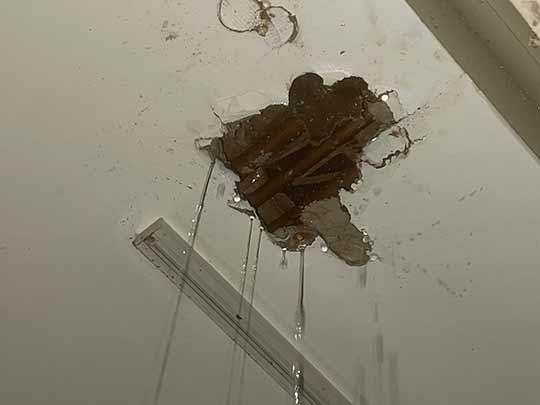
When pipes burst, the immediate impact can be devastating, both financially and emotionally. The sudden rush of water can cause significant damage to property, leading to costly repairs and potential loss of personal belongings. The inconvenience and stress of dealing with such an emergency cannot be overstated, especially when it happens at the worst possible time. Understanding the impact of burst pipes is crucial for homeowners and property managers alike, as it highlights the importance of proactive measures and swift responses.
Beyond the immediate chaos, the long-term implications of burst pipes can be equally concerning. Water damage can lead to mold growth, structural damage, and a decrease in property value. The emotional toll of losing cherished personal items and the disruption of daily life adds to the stress. Recognizing these impacts underscores the necessity for preventive strategies and regular maintenance to safeguard against such catastrophic events.
The Unpredictable Inconvenience of Plumbing Emergencies
Plumbing emergencies often occur at the most inconvenient times, such as during holidays, late at night, or when the homeowner is away. These emergencies can disrupt daily routines, cause significant stress, and require immediate attention to prevent further damage. The inconvenience is compounded by the challenge of finding a reliable plumber on short notice, especially during peak times when many service providers are already booked. This highlights the need for having a trusted emergency contact and being prepared for such situations.
The unpredictability of plumbing emergencies adds to their inconvenience. A burst pipe in the middle of a family gathering can quickly turn a joyous occasion into a stressful one. Similarly, discovering a plumbing issue upon returning from a vacation can be a homeowner’s nightmare. These scenarios emphasize the importance of having contingency plans and being prepared for any plumbing emergency, regardless of the timing.
Exploring the Common Causes of Burst Pipes
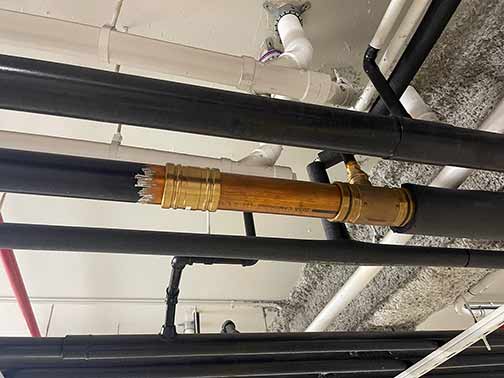
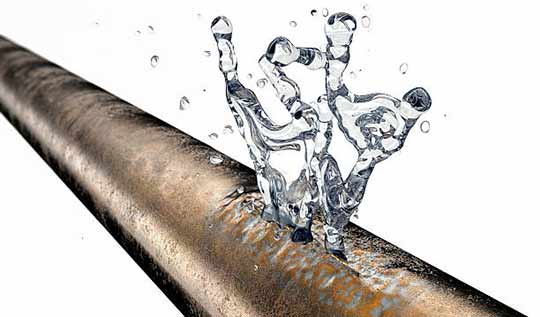
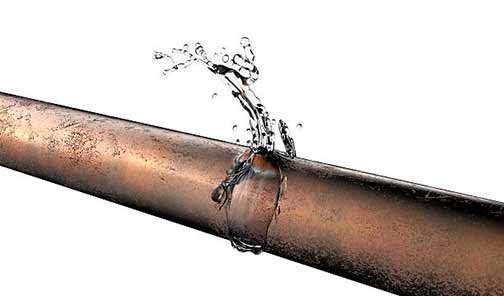
Burst pipes can occur due to a variety of reasons, with the most common being freezing temperatures, high water pressure, and corrosion. During winter, water inside the pipes can freeze, expand, and cause the pipe to burst. High water pressure, often due to a faulty pressure regulator, can also lead to pipe bursts. Corrosion, which occurs over time due to chemical reactions between the metal pipes and water, can weaken the pipes, making them susceptible to bursting. Understanding these causes can help in taking preventive measures to avoid such emergencies.
Additionally, poor installation practices and aging infrastructure contribute to the risk of burst pipe emergencies. Pipes that are not properly insulated or those that have been incorrectly installed are more prone to failure. Furthermore, older plumbing systems, which may have outdated materials, are at a higher risk of bursting due to wear and tear over time. By identifying these common causes, homeowners can take proactive steps to mitigate the risk of burst pipes.
The Critical Importance of Routine Maintenance in Plumbing
Routine maintenance is essential in preventing plumbing emergencies. Regular inspections by a professional plumber can identify potential issues before they escalate into major problems. Maintenance tasks such as checking for leaks, inspecting pipe joints, and ensuring proper insulation can significantly reduce the risk of burst pipes. Additionally, routine maintenance ensures that the plumbing system operates efficiently, potentially saving homeowners money on water bills and costly repairs in the long run.
Moreover, routine maintenance provides an opportunity to upgrade outdated plumbing components and improve the overall efficiency of the system. By investing in regular check-ups, homeowners can extend the lifespan of their plumbing infrastructure and avoid unexpected emergencies. Routine maintenance is not just about fixing issues; it’s about creating a robust and reliable plumbing system that stands the test of time.
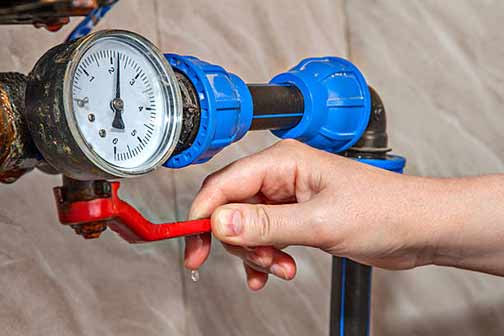
Homeowners should know the location of the main water shut-off valve and ensure it is easily accessible.
Vigilance: A Key to Preventing Plumbing Disasters and Protecting Homes
Vigilance plays a critical role in preventing plumbing disasters. Homeowners should be aware of the signs of potential plumbing issues, such as unusual noises, water discoloration, or reduced water pressure. Early detection of these signs can prevent minor issues from developing into major emergencies. Additionally, being vigilant about the condition of exposed pipes, especially during extreme weather conditions, can help in taking timely preventive actions.
Vigilance also involves educating oneself about the plumbing system and understanding its components. By being informed, homeowners can better identify potential risks and take necessary actions to address them. Furthermore, fostering a vigilant mindset encourages proactive measures, such as regular maintenance and timely repairs, which are crucial in preventing plumbing disasters and protecting homes.
Emergency Preparedness: Essential Steps to Take When Pipes Burst
Being prepared for a plumbing emergency is crucial in minimizing damage and stress. Homeowners should know the location of the main water shut-off valve and ensure it is easily accessible. In the event of a burst pipe emergency, turning off the water supply immediately can prevent further damage. It’s also advisable to have a list of emergency contacts, including a reliable plumber, to ensure quick response. Keeping essential tools and materials, such as a wrench and pipe repair tape, can also be helpful in managing the situation until professional help arrives.
Emergency preparedness extends beyond immediate response actions. It involves having a comprehensive plan that includes regular emergency drills and keeping an emergency kit ready. This kit should contain necessary items such as flashlights, batteries, and first aid supplies. By being prepared, homeowners can handle plumbing emergencies with confidence and minimize the impact on their property and well-being.
Implementing Long-term Solutions to Prevent Pipe Bursts
Implementing long-term solutions can significantly reduce the risk of pipe bursts. By upgrading old pipes to more durable materials, such as PEX or copper, can enhance the plumbing system’s resilience. Installing pressure regulators and ensuring proper insulation of pipes can also prevent common causes of pipe bursts. Additionally, investing in smart home technology, such as leak detection systems, can provide early warnings and prevent potential disasters. These long-term solutions, while requiring initial investment, can save homeowners from costly repairs and stress in the future.
Long-term solutions also involve adopting sustainable practices that promote water conservation and efficiency. By implementing water-saving fixtures and appliances, homeowners can reduce the strain on their plumbing systems and contribute to environmental conservation. These solutions not only prevent pipe bursts but also create a sustainable and efficient home environment.
The Essential Role of Professional Plumbers in Preventive Maintenance
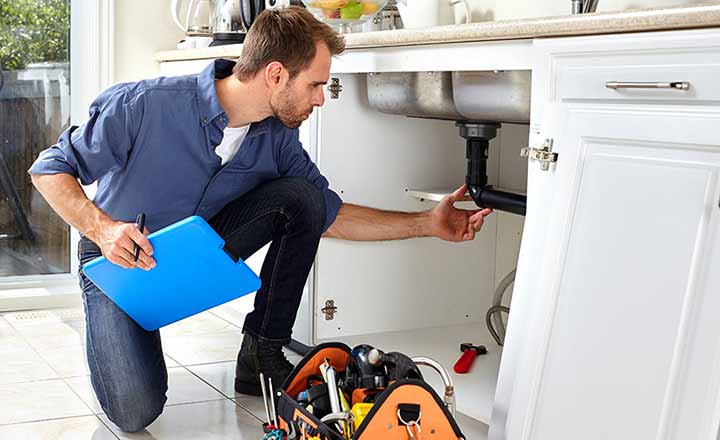
Professional plumbers play a vital role in preventive maintenance and emergency response. Their expertise allows them to identify potential issues that may not be apparent to homeowners. Regular consultations with a professional plumber can ensure that the plumbing system is in good condition and any potential problems are addressed promptly. In the event of an emergency, a professional plumber can provide the necessary skills and tools to repair the damage efficiently and effectively, minimizing disruption and cost.
Beyond emergency response, professional plumbers offer valuable insights and recommendations for improving the plumbing system. They can suggest upgrades, provide maintenance tips, and educate homeowners about best practices. By partnering with a professional plumber, homeowners can benefit from expert guidance and ensure their plumbing system remains reliable and efficient.
To Wrap It Up
In conclusion, while plumbing emergencies can be highly inconvenient and stressful, proactive measures can significantly reduce the risk of such occurrences. Routine maintenance, vigilance, and emergency preparedness are key strategies in managing and preventing plumbing disasters. By understanding the causes and impacts of burst pipes, homeowners can take informed actions to protect their property and ensure peace of mind. Investing in preventive measures and professional services not only safeguards against emergencies but also enhances the overall efficiency and longevity of the plumbing system.
Ultimately, embracing proactive measures offers homeowners peace of mind and confidence in their plumbing systems. By taking a proactive approach, homeowners can enjoy a safe and comfortable living environment, free from the worries of unexpected plumbing emergencies. The value of proactive measures extends beyond immediate benefits, providing long-term protection and sustainability for homes and families.