Author Archives: Chicago Plumbing Experts

Why is the Plumbing Gurgling Under My Sink

Why is the Plumbing Gurgling Under My Sink.

A gurgling sound from your sink is a sign that the plumbing is not installed correctly or that there are issues with the sink vent. It can also signify that your home’s sewer line is blocked. How do these issues happen, and if your sink makes a gurgling sound when it drains, how do you solve the problem?

It is normal for water to make a splashing or swishing sound when it leaves your sink. But a gurgling sound coming from your sink is abnormal. When gurgling sounds come from the sink, there is also a chance that you will have a problem with sewer gases finding their way into your home, warns Castle Management.

Why is your sink making a gurgling noise

The three main reasons why the sink might make a gurgling sound when water flows into it are:

  • The sink is not vented
  • The sink vent is blocked
  • There is a blockage in the sewer line

The sink is not vented

Your home’s plumbing operates under the force of gravity and air pressure. When water enters the drain opening, the only way it can flow through the pipes is by displacing the air that is already in the pipes. Since water is denser than air, gravity can make it force the air inside the pipe downwards. This creates suction pressure behind the water.

When this happens, a zone of low-pressure forms within the pipe, creating a vacuum. Since vacuums do not generally exist in nature, air must enter the pipe to offset the imbalance in air pressure. If the pipe is properly vented, that air will come from outside the home through the vent. If the pipe is not vented, the air is sucked out of the P-trap, creating a gurgling sound.

Along with gurgling sounds from the drain, sewer gases may also escape from the drain opening and foul up the air inside your home. To solve this problem, you can install a vent under the sink after the P-trap. This can be connected to the central vent outside the home. It could also be a mechanical vent that sits under the sink and draws air from the surrounding area.

The sink vent is blocked

The pipe vent moves air from outside into the pipe and replaces air displaced when you flush water into the drain. But the vent can’t do this if it is blocked. A blocked sink vent is as good as not having a sink vent at all. The same problems when there is no sink vent happen when the sink vent is blocked.

Vents can get blocked if an animal dies inside it or gunk accumulates within the pipe. How do you know if your vent pipe is blocked? Several signs accompany this issue, including strange noises from the drain sink. Other signs to expect when a sink vent is blocked are slow drains and sewer gases finding a way into your home.

If you think your vent pipe is blocked, you need to clean it. Where the blockage is inside the pipes, this can cost between $100 and $200. The problem will only worsen if your vent pipe is blocked and not cleaned immediately. More debris can be sucked into the clogged pipe, making the problem worse and harder to deal with.

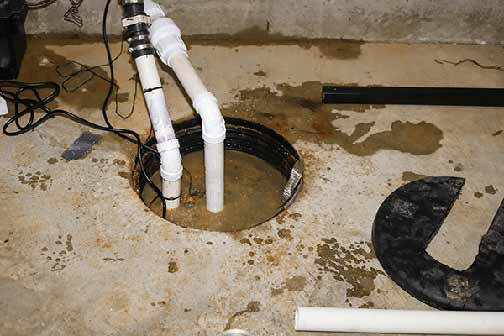
Blockages inside the sewer line

The sewer line that carries wastewater from your home to the municipal sewer lines is also connected to all the drains in your house. When there is a problem with the main sewer line, it can throw all the drains in the home out of order. A blocked sewer line can also manifest as gurgling sounds from the sink.

To know if the gurgling sound from your sink is caused by a blockage inside the main sewer line, check if all the sinks in the home are making this gurgling sound. Typically, all the sinks in the home will be affected if the problem is from the main sewer line. When this is the case, cleaning your sewer lines by way of hydro jetting is the only way to solve the problem.

What causes blockages in the main sewer line? There are many reasons why this can happen, but the more common ones are washing fats, oils, and grease into the drain; flushing food waste into the gutter; tree roots puncturing or growing around the sewer line, and corrosion inside the sewer line. Using chemical drain cleaners to clear your drain can also damage the main sewer line.

To conclude, if you hear gurgling sounds coming from your sink every time you flush water into the drain, you may be sure that your sink is not vented, the sink vent is blocked, or there is a problem with your main sewer line. To know the exact cause of the problem, you may want to have a plumber perform a sewer camera inspection.

Burst Pipes: How to Prevent Them

how to prevent burst pipes

How exactly do you prevent burst pipes? A burst pipe in your home is one of those plumbing emergencies you think cannot happen to you until it does. Every year millions of homes in the USA suffer damage from burst pipes. This year alone, it is estimated that as many as 250,000 households will face this issue, with the average insurance claim for each home at around $15,000.

When a water pipe breaks and releases water into your home, as Keyrenter McAllen explains, not only does the incident disrupt your daily life, but you are also faced with thousands of dollars of out-of-pocket costs, along with the paperwork of an insurance claim. This is in addition to how the incident can inflate your insurance premium. What can you do to avoid the aggravations of a burst pipe in your home?

How to keep pipes from bursting

There are three main reasons why pipes burst:

  • The pipes could be defective due to age, corrosion, or other reasons.
  • Improperly installed pipes are more likely to rupture or leak.
  • But the main reason that water lines burst in cold weather.

If pipes are exposed to very low temperatures during winter, the water inside them can freeze. Frozen water expands up to 10%. If that water is inside a pipe, it will have no place to go and can exert up to 40,000 pounds of pressure inside the pipe, and that’s enough to burst any pipe. Even worse, the pipe may not burst at the site of the freeze, further complicating issues.

How do you keep pipes from bursting because of cold temperatures?

Insulate walls and rooms

Crawlspaces, exterior walls, attics, and basements; pipes in these areas of the home are particularly susceptible to freezing. That’s because most attics and basements are not heated, while crawlspaces and exterior walls are exposed to the cold weather outside the house. Insulating exterior walls, attics, crawlspaces, and basements will keep the pipes that run in them from freezing.

Let warm air circulate

Keep the doors of under-the-sink closets open to allow the warm air inside your home to circulate to these areas. If the closet doors are shut, cold air will seep into the area from the outside, and the pipes could freeze. Keeping closet doors open when temperatures are low is a simple way to keep pipes from freezing during winter.

Keep faucets trickling

Pipes are less likely to freeze and burst if water flows through them. The constant movement of water through the pipes ensures that cold water does not stay long enough in one place to freeze. The easy way to do this is to leave faucets slightly open so that a dribble of water constantly flows from them.

Install heat tape

If a pipe is prone to freezing and taking the above steps does not solve the problem, use heat tape. Wrap this around the pipe to warm it when temperatures get low. Note that covering pipes with foam insulation will not do much to keep them warm. Heat tape is a more effective solution.

Disconnect garden hoses

Disconnect any garden hose connected to your external faucet. Drain the hose and store it for use in spring. Open the tap to let any water inside it drain; turn off the shut-off valve inside your home before you do this. Lastly, keep the faucet open throughout winter. It is also a good idea to install freeze-proof fixtures in this part of the house.

What to do when a pipe bursts

What if your pipe has burst, what can you do about it? The first order of business when you have a burst pipe is to try and minimize damage. The following steps will help you do that.

Know the location of the water shut-off valve

This fixture will cut off the water supply to the entire home, buying you time during an emergency. You should know where it is located beforehand. In most homes, you can find it after the water meter. But you may also find it in a small box outside your home if the house is in an area with moderately cold winters.

When you find the water shut-off valve, explain its use to your household and teach everyone in the home how to operate it. Attaching a bold label to the shut-off valve is an excellent idea to make it easy to identify. This small step can help you reduce expensive water damage to your home if a pipe burst.

Use self-bonding tape for emergencies

If the pipe bursts at night, you may be unable to get a plumber immediately, or the cost of getting a plumber may be too high. In that case, you can apply silicon self-binding tape to the pipe to seal it. This will let you turn the water on for short periods to get through the night. Calling an emergency plumber can apply a permanent solution.

How Do Plumbers Detect Leaks?

How Do Plumbers Detect Leaks

Facing leaks in the home can be a severe issue. One that can be tough to detect and even harder to fix sometimes. It also requires a lot of patience and money to invest. If left unchecked, it can be an even bigger disaster. Not two of the leaks are the same. They can also be very easy or challenging to detect. Some are well hidden that you do not even know you are suffering from one. It can often be seen as a spike in the water bills and can be the only way to spot it. The best solution is to hire professional plumbers and have regular inspections. But how do plumbers detect leaks? This article will discuss some methods and technology plumbers use to detect water leaks.

How to detect leaks

Apart from detecting the leakage with your eyes, leaks can be extremely tough to spot, even for a trained eye. Leaks can be found deep in the plumbing system, below ground, or in walls, so no matter how much of a good vision you have, you still won’t be able to detect them. Modern technology has allowed us to improve our “shortcomings” and make our lives much easier. Here are some of the methods modern plumbers use:

  • visual “eye” detection
  • sound detection
  • detection by pressure
  • video-feed detection

According to plumbers at chicagoplumbingexperts.com, these methods have proven to be the best and most adequate means of discovering leaks in plumbing systems. They also state that using the correct tools is the key and should always be left to professionals to handle it. 

Detecting leaks

The first thing every expert plumber will do when coming to your home is to make an inspection. That means that he will take his time to assess and discover any potential leaks by eye. He will search the most common and less common spots where leaks can occur. This method is the basis of every plumbing inspection and a staple to many regular check-ups and inspections you must undergo. A well-trained eye will spot any abnormalities that might be occurring. Another interesting method that they implore is sound detection. Although it can be challenging to assess the spot where leaks could be, it can be a great tool in narrowing down the general location of the leaks. After the inspection, he will continue the search with modern tools.

a plumber detecting leaks

Visual and sound detection is how plumbers detect leaks.

Video inspection

The video inspection is the most precise leak inspection there is. Video inspection consists of small cameras mounted atop long and flexible optic cables. With them, skilled experts can access the plumping system through the outlets and search for leaks. The image will then be sent directly to the monitor, giving a live feed from the optic cable. Although it may be slow, this method guarantees precision findings. It enables the plumber to access the system’s otherwise inaccessible parts and precisely locate the leaks. As stated by evolutionmoving.com experts, this method is also helpful when you have pipes that go through inaccessible walls blocked by furniture. Instead of moving all the furnishings for a better view of the pipes, you can just use the sewer camera inspection service.

Video inspection is a good way of finding leaks

Plumbers detect leaks with listening discs

Another handy tool every plumber should have is the listening disc. Detecting leaks through walls and furnishings has never been easier. These discs search for sound frequencies of the leaking water. The plumber listens to the water running through the system and detects changes. That has become a primary method to pinpoint the vicinity and location of the possible leak. The plumber will see that location on the screen and determine how to proceed next. Another great ability of these discs is that they can detect sounds through thick materials such as brick, concrete, and stone.

Hurt your chances of a sale

Many things can hurt the price and chances of sale for your home. Owning broken or lousy plumbing is one of them. It is even on the top of the list of things that hurt your property the most. Bad plumbing can hurt your chances for sale drastically. It also devalues the house and can lead to buyers unwilling to invest in your property. It has become a staple for buyers to do a routine check or inspection of the plumbing system. Since it is very costly and tough to replace you home plumbing pipes or spend hours and thousands of dollars on repairs, many buyers don’t bother to invest. That is why owning a flawed or broken plumbing system hurts the chances of a sale.

Plumbers detect leaks with soiling probes

Soling probe is an excellent method of detecting leaks. Leaks in the sewer lines can be complicated to spot. The lines also go through lawns and yards, making it even more difficult. That is where soiling probes come in. These gadgets track the pressure in the pipelines and help pinpoint the leak’s location. It detects pressure spikes through the earth, grass, and even concrete, emitting a beeping sound. The sound gets louder as the device approaches the point of leakage. Due to the different sounds, a seasoned plumber can then detect the exact leaking point and nature of the leak and prepare for the repair process accordingly.

Thermal imaging cameras

Like the video inspection we discussed in the previous paragraph, thermal cameras work similarly. These “heat scanners” help detect the most complex leaks hidden in walls, concrete, or hot water systems. These thermal cameras find heat spots and signatures and make them visible on the monitor. This way, you can spot things an eye can’t see, such as moisture. They are exact and can easily find any leaking spots. These cameras are ideal for covering larger areas quickly, so you won’t be spending much time trying to assess the possible location of leaks.

thermal image

One of the best methods of finding leaks is using thermal imaging cameras

5 Reasons to Call a Professional Plumber for Drain Cleaning

5 Reasons to Call a Professional Plumber for Drain Cleaning

So, you think something inside your drain obstructs the channel and would like to clear it out. But how are you going to do that? What is the best way to clean your drains? Should you do it yourself or hire a professional plumber?

Doing it yourself typically means using a chemical drain cleaner. But while this is a quick method to get water flowing through the drains again, there are good reasons why it is not a good option, warns Rent Appeal, especially if you consider the long-term impact of this solution.

Most homeowners use chemical drain cleaners because they think they save time and money. But the sad truth is that chemical drain cleaners do not save you money. Using them in your drains will cost you more money in the future.

How is that?

Why you should never use chemical drain cleaners

Chemical drain cleaners contain corrosives, principally sulfuric acid and caustic soda.  These chemicals are so corrosive that after about five seconds of being inside your drains, they will not only start to eat away at the debris inside the pipes but also corrode them.

But the damage to your plumbing is not immediately evident when you use a chemical drain cleaner. That’s because drain cleaners thin out the pipes, making your plumbing fragile, more susceptible to leaks, and exposing your home to a greater risk of water damage.

The other reason not to use chemical drain cleaners is for personal safety. When using drain cleaners, you must wear rubber gloves and protective goggles. Additionally, you must pour the chemical very slowly because if it splashes on your skin, it will cause burns.

However, even if you succeed in pouring a drain cleaner into your drain without getting it on your skin or your eyes, drain cleaners sit inside your drain pipes for a long time. If the drain cleaner inside the pipe mixes with other cleaners, it can release deadly gases into your home.

So, if drain cleaners are harmful, what is the alternative?

You can buy a hand auger or plunger for nearly the same amount you pay for a chemical drain cleaner. These effectively remove clogs near the drain opening and can be used repeatedly. There are also lots of natural drain cleaning methods you can use.

But these methods do not address the root cause of the clogs in your drains. They only work as short-term fixes. The best long-term solution for keeping your drains in good condition is to hire a professional plumber. Why should you take this option?

Benefits of hiring a professional plumber

Solve problems effectively

Unlike when homeowners try to solve issues in their plumbing, a professional plumber does not just focus on the symptoms of the problem. A professional plumber will find the root cause of the problem by way of a sewer camera inspection service.

Also, unlike chemical drain cleaners, which do not distinguish between the debris inside the pipes and the PVC, metal, or enamel of your plumbing, the professional plumber can pinpoint the cause of the problem and solve it effectively.

They can educate you

Most blockages inside your drains are caused by the improper use of the drains, such as when you flush fats, oils, and grease (FOGs) into the drain or misuse of the garbage disposal. 

A professional plumber can prevent future problems by identifying behaviors contributing to your plumbing issues. They can give you advice that will help you avoid future problems and save costs.

Detect problems early

Most plumbing problems start as minor issues with early warning signs of the impending catastrophe. Blockages happen when those initial signs are overlooked. A professional plumber can save you money by catching problems at the beginning stages and solving them before they become significant costs; instead of compounding your plumbing issues, as chemical drain cleaners would, professional plumbers help you avoid problems.

Routine maintenance

A local plumber can help you do routine maintenance of your plumbing. Rather than wait for problems to happen before you pay attention to your drains, regular maintenance of the system will prevent issues. 

For instance, a camera inspection of your drains does not cost much, but this simple step will save you the thousands of dollars you would have spent to fix damage caused by a sewer backup.

Professional advice

A professional plumber will help you keep your plumbing up to date. From information about new regulations to innovative plumbing products that have just entered the market, your plumber is more in touch with the industry. 

They can ensure that instead of merely spending money to keep the system running, you can invest your money to improve your plumbing system. A professional plumber can help you build a resilient system with fewer problems and lower costs.

To sum up, why should you call a plumber for drain cleaning services? The straightforward answer is that only a professional plumber can clear the debris inside your drains by way of sewer rodding or high-powered hydro jetting service. Chemical drain cleaners and other methods will not do it.

Why You Should Always Opt for a Local Plumber in Chicago

Why You Should Always Opt for a Local Plumber in Chicago

Your home’s relationship with your plumber is like your relationship with your family physician. Although the relationship is professional, it has a personal dimension. Because the doctor has watched your body transition through various stages of life, they are intimately familiar with your body’s health needs.

In the same way, Abacus Avenue Management explains, you also want your plumber to have a familiar knowledge of your home’s plumbing system. When there is an issue with the water pipes or drains, you don’t want someone who will deal with those problems in isolation from other issues in the system. You want them to adopt a holistic approach that considers your home’s history.

How do you build that relationship between yourself, your home, and your plumber? A simple way to do this is to find a professional and experienced plumber who is local and stick with them. When looking for a plumber, you can choose between a national/regional company and a plumber who operates within your community.

Why you should always choose a local plumber

Here are six reasons you are better off working with a local plumber.

Reputation

A good reputation is probably the most important quality you want in your plumber. You will understand just how important this is if you have ever had a plumber make a problem worse than it was in the beginning. 

It is easier to verify the claims of a plumber if that person is local versus when they are not. Your neighbors may be able to share first-hand experiences of working with the plumber. 

It is also more accessible to follow up on the references a local plumber shares with you. When dealing with a non-local plumber, you often only have the company’s word regarding their reputation.

Personal touch

When working with a local plumbing company, you can put a face to the company’s operations. You know exactly whom you are dealing with because you meet the company’s owner and the staff. You can build a relationship with the organization. This is important when solving plumbing issues in your home since people are nicer to people they know. 

You cannot get this kind of treatment when you hire a non-local company. First, the chances that you will meet the owner or principal officers of the organization are very slim. Second, the company’s employees are constantly being rotated, and you never know whom you will get.

Flexibility

The employees of the non-local company who fix the plumbing issues in your home often don’t have the power to make crucial decisions. But a local company can make decisions on the fly; it is easy to agree with them on what needs to be done and how it should be done.

A local plumber does not have to wade through layers of red tape before acting. In a couple of minutes, you can decide with your plumber; this is very important when dealing with plumbing emergencies. A local plumber’s flexibility can save you tons of time and money. 

Availability

When dealing with plumbing issues in the home, it is vital to have a plumber who is available 24 hours. Because the plumber lives in your community and you have a personal relationship with them, it is easier to get your local plumber to come to your home at odd hours. 

Access to 24-hour service every day of the week can make all the difference when dealing with emergencies such as burst pipes, clogged drains, sewage backups, or plumbing issues with the potential to cause massive damage. Not having to wait hours for a plumber will save you money.

Affordability

Local plumbers are more affordable and more effective than non-local plumbers and chain companies such as Roto-Rooter and the like. Why is this? Local plumbers treat customers like friends and family. This is quite unlike non-local plumbers, where the customer is a number or faceless name. 

Additionally, non-local plumbing companies have considerable overheads to worry about, and their primary concern is the bottom line rather than maintaining the relationship with their customers. As a result of these differences, the local plumber charges less money for their services, even though they are better.

Informed

Finally, a local plumber will have an intimate knowledge of the area. They know the common plumbing problems and the solutions that have worked for them in the past. The local plumber is used to the water issues peculiar to your area and the piping systems used in homes. 

They do not have to look long and hard to understand the problems in your home, even if they are visiting for the first time. Overall, this can amplify the plumber’s efficiency and also help you cut costs.

When looking for a plumber to service your home, look no further than your friendly, local plumber.

Are you looking for a local plumber in Chicago? We can help! Contact us at 773-599-9181 or by form below:

Why Fall is the Best Time for Drain Cleaning

a drain cleaning service being performed

The leaves on the trees are starting to change their colors, and the amount of rainfall we get has slowly begun to drop. Fall is here, and it is time to prepare for winter. This is the time to do all those maintenance chores you have been postponing all summer.

To prepare your home for winter, says RedSail Property Management, you should ensure your heating is working, and that there are no cracks or openings in the building where warm air can escape. You also want to check the plumbing for emerging issues, and, most importantly, this is the time to clean your drains.

Drain cleaning is best done in the fall to avoid complications during winter or unpleasant surprises at the start of spring. The chances of sewer backups increase when your drains are not cleaned at this time of the year. Why is fall the best time to clean your gutters?

Why fall is the best time for drain cleaning

  • There is more debris during fall and winter

The potential for yard waste to build up inside the drains is highest in autumn when trees shed their leaves. As more leaves, twigs, and dirt find their way into the drains, the risk that they will block your drains is greater. 

If the water table rises during this time and your drain is not clean, you could find yourself dealing with a sewer backup. The cost of fixing the damage caused by a sewer backup is massive compared to what it will cost you to clear the drains.

  • To prevent trouble after Halloween 

The fleshy insides of pumpkins, sticky Halloween candies, and holiday baking ingredients are just a few of the things that can find their way into the drains during Halloween. 

Your drains are not equipped to handle this stuff, and there is a chance they will get overwhelmed with the garbage. Thanksgiving, which happens less than a month after Halloween, also releases much waste into the drains. All that debris needs to be taken out before the onset of winter.

  • Preparation for upcoming winter activities

As you get closer to winter, you may find that your shower, sinks, and toilet drains are slower. This results from accumulated debris from the yard, Halloween, and Thanksgiving. If you don’t do something to solve the problem, you may have more significant issues when there are more people in your home in the coming holiday season. If you have plans to cook a holiday meal, you want to make sure those plans are not upset by a clogged drain or backed-up sewer.

  • Trees alter their behavior

Trees get their moisture from above ground during spring and summer because there is enough precipitation in the atmosphere for their needs. But as rainfall gradually ceases and fall sets in, tree roots also change their behavior. 

They turn their attention to sources within the soil for nourishment. One of the places they are likely to turn to is your sewer line. If your sewer line is clogged, it increases the chances of leaks and the possibility of tree roots finding their way into the pipe.

  • It is practical

It makes sense to clean your drain during fall for several practical reasons. For one thing, it is back to school season, the home is quieter, and the kids are less likely to get in the way of your plumber. 

Secondly, the groundwater level at this time is optimum for drain cleaning; there is a lower risk of soil being washed into the drain. Finally, most businesses are winding down for the year, and you can clean the drain in readiness for next year’s activities.

The right way to clean your drains

When there is a clog in one of the drains in your home, it is normal to first try to solve the issue by applying a DIY solution. While do-it-yourself measures are effective for certain drain problems, they will not solve the deep-seated blockages covered earlier. Moreover, some DIY methods, like chemical drain cleaners, will damage your drains.

You need a professional plumber to clean the drains without damaging your pipes. The plumber will not just remove the debris inside your pipes; they will also give you an idea of the general condition of your drains. The plumber will also identify budding issues with the drains and advise you on the best ways to avoid them.

Professional plumbers use the following drain cleaning methods:

  • Sewer camera inspection: A video camera is inserted into the drain opening and fed into the sewer line to capture the inside of the pipes and help the plumber determine the location and extent of blockages.

Troubleshooting an Electric Water Heater

Troubleshooting an Electric Water Heater

Are you having trouble with your electric water heater and trying to figure out the problem? Water heater repairs are a big headache, and they can throw your entire home out of order. As JTS Management points out, knowing how to detect the root of the problem when a water heater malfunctions can be a great help.

How do you troubleshoot a water heater if it is not working? To do that, you must be familiar with the water heater’s components. You also need a step-by-step process for checking the water heater. This post provides the information you need to do all of these.

How to troubleshoot an electric water heater

Part one: Testing the water heater elements

  • Step one: Shut off the power

You need to locate the breaker that says “water heater,” “tank,” or “HWT” inside your circuit breaker box and flip it to the off position. You may also want to unplug the water heater from the wall if you can see the power outlet where it is plugged in.

  • Step two: Open the access panels

Remove the covers of the upper and lower access panels to reveal the element and thermostat. After you do this, you will want to remove the insulation. After, carefully remove the plastic cover over the part and thermostat.

  • Step three: Check that power is off

Before figuring out the problem with your water heater, you need to verify that the power is off. To do this, touch the electric wires inside the access panels with a volt-stick. If there is power in the water heater, the volt-stick will light up.

  • Step four:  Test the upper element 

Remove the two wires connected to the upper element and then do a resistance test to see if the upper part is working. For this, you will need a voltmeter. Simultaneously touch the voltmeter probes to the two terminals on the upper element where the wires were attached: one probe to one screw and the other probe to the second screw. If the meter registers resistance, the element is fine, but you need to replace the part if it registers no resistance.

  • Step five: Test the lower element

Repeat the above steps with the lower element

  • Step six: Test for grounded element

This test follows the same process as the ones already done. You will need the voltmeter, but you want to set it to ohms this time. Touch the probe to one of the terminals on the element and, instead of the other terminal, touch the second probe to the steel surface on the inner wall of the water heater behind the element. If the element is in good condition, the voltmeter will not register any resistance. If the voltmeter reads resistance, the element is grounded and needs to be replaced.

Part two: Testing the thermostat

The thermostat controls the heating element in the water heater. The thermostat maintains water temperature inside the tank by opening or closing the contacts that allow power to flow to the elements. If a water heater has two heating elements, it will also have two thermostats.

When testing the water heater thermostat for defects, you are looking for continuity. This is a continuous electrical path that should be present within the device. If there is no continuity, the thermostat is damaged and needs to be replaced. Here is how to test the thermostat in a water heater.

  • Step one: Getting ready

You will need a multimeter for this test. If using an analog multimeter, set the dial to the lowest level for ohms of resistance. Calibrate the meter by pinching the needles together and adjusting the needle to read zero. If using a digital multimeter, rotate the dial to the lowest level for ohms of resistance or resistance with tone.

  • Step two: Check the power supply and remove the access panel cover

Follow steps two and three in Part One above.

  • Step three: Reset the thermostat

The upper thermostat has a reset button; this can trip if the water in the tank is overheating. Overheating is often caused by thermostat contacts that have fused, shorted heating elements, or the thermostat is out of calibration. Push the reset button to reset the thermostat.

  • Step four: Test the thermostat

Isolate the thermostat from the circuit by disconnecting the wires. Note the position of each wire before you do this. Next, touch one multimeter probe to one left side terminal on the thermostat and the other probe to the other left side terminal. For digital meters, the thermostat is okay if the reading is zero (or almost zero) ohms. But if using an analog meter and there is no movement in the needle, the thermostat has no continuity and should be replaced. If all else fails, call a plumber for an electric water heater repair. In some cases a full replacement of your water heater may be in order.

What To Do When A Pipe Bursts?

What To Do When A Pipe Bursts

Even though you don’t see them often, there are water pipes inside the walls, floors, and ceilings of almost every room in your home. These pipes make it possible to enjoy one of the biggest wonders of modern life; access to clean water on demand.

But just as your home’s plumbing can make your life convenient, the plumbing can also cause massive destruction to your home, warns RENEW Real Estate. This happens when a plumbing pipe ruptures and spills the water inside it into the home. Burst pipes are a constant possibility with modern plumbing.

Every year, 250,000 American homes suffer property damage due to a burst pipe, and the average insurance claim for each of those homes is $15,000. What causes water pipes to burst, and how can you prevent it? More importantly, what should you do when a pipe bursts?

What to do if a pipe bursts in your home

Follow these steps to minimize water damage to your home when a burst plumbing pipe emergency occurs.

Step one: Find the main water shut-off valve and turn it off

This will turn off the water supply in your home. The main shut-off valve is usually located in the basement, near the water heater and after the water meter. Turning off the main shut-off valve will prevent further water damage to your home. If the burst pipe section has its own shut-off valve, you may also turn off the water supply at that point.

Step two: Turn off the electricity if necessary

If there is a chance that the spilled water may come into contact with a power outlet or an electrical feature in the house, you may want to disconnect the power supply to your home. This precautionary step will prevent electric shocks, short-circuiting, and damage to your home appliances.

Step three: Remove your personal belongings from the path of the water

If there are any items that the water may damage near the area of the leak, move them out of the reach of the water. This is important because if you have to make an insurance claim for damage caused by the leak, your insurer will not cover damage to those items. Removing them will reduce the cost of fixing the damage.

Step four: Take photos of the scene

You will need a visual record of what happened if you want to file an insurance claim. Take photos of the damaged pipe (or the general location of the leak if you don’t know where the burst pipe is) and the spilled water on the floor of your home. After you do the steps below (before and after you call your plumber), take photos of the scene.

Step five: Drain water from pipes

Open the faucets in your home to drain any water inside the system. Don’t do this step if you did not turn off the home’s water supply from the main shut-off valve. Only open your faucets if the water supply to the entire house is suspended. Draining the pipes will prevent accidental spillage when the damaged section of piping is either removed or repaired.

Step six: Dry up the water

Remove the water as quickly as possible by mopping it up with a mop bucket. Move items near the site of the spill to dry up any water that has collected beneath or behind them. Use a fan or dehumidifier to dry the area after mopping the water. The longer water remains on the surfaces, the more time it can penetrate and damage them; that’s why you want to be very thorough when drying your home.

Step seven: Call an emergency plumber

Do not try to fix the damaged pipe by yourself. Repairing the damaged pipe yourself could expose your home to the risk of future water damage if that damaged section of plumbing is not mended correctly. You may not get compensation from your insurer if you fix the pipe yourself and it bursts again. You are better off letting an emergency plumber handle the issue to avoid future problems.

Step eight: Learn how to prevent pipes from bursting

To save yourself the aggravation of cleaning up your home, fixing a damaged pipe, and filling out insurance paperwork after a burst pipe, here are the things you can do to prevent the problem:

  • Be aware of where your main shut-off valve is. In the time you take to look for the main shut-off valve in the wrong places, water can do massive damage to your home.

  • Tag the main water shut-off valve and let everyone in your household know where it is and how to use it.

  • Take the right steps to protect your water pipes during winter. Many pipes burst due to frozen water inside them during winter.

Tips to Make Sure Your Sump Pump is Ready for Fall and Winter

Tips to Make Sure Your Sump Pump is Ready for Fall and Winter

If your home has a sump pump, you probably know how valuable it is for protecting your home from a flood. The sump pump is your first line of defense against flooding in the basement. Without it, you would live in perpetual fear of flooding your basement.

But beyond this, the sump pump also protects the foundation by keeping water out of the base of your building. This helps to preserve the structural integrity of your house, explains Best Rental Services. Because of the critical role of the sump pump, it is vital to know how to maintain it.

Sump pumps are not always in operation; your home may go for months or an entire year without the sump pump ever being called into action. But the sump pump may be needed in early spring when there is snowmelt or in summer when there is heavy rainfall.

When the sump pump is needed, you want to be sure that it stands ready to serve. A lot of the flooding in homes could have been avoided if the homeowner had taken steps to ensure that their sump pump was working.

The presence of a sump pump in your basement does not mean your home is protected from flooding. You must check to see if the system is working as it should. This step will save you from stress and help prevent unnecessary damage to your home.

Tips to keep your sump pump ready

A typical sump pump has the following features:

  • A sump pit where the components of the sump pump sit. The sump is simply a tank for holding water. The sides and bottom of the sump pits are made of concrete, and on top is a plastic layer to make the sump waterproof.
  • A submersible water pump that is driven electrically. This will have an electric cord connecting it to a power outlet on the wall. You want to make sure this electric circuit is protected with a ground fault circuit interrupter (GCFI) to prevent electrocution.
  • A drainpipe through which the water outside the home enters the sump pit. The drainpipe collects moisture from the footing drains around the house and sends it to the sump, keeping water from building up and finding its way into the home.
  • A discharge pipe goes from the sump pit to the roof or wall of the basement and exits outside the house.  It is connected to another line that opens to the city sewers or a location on the property where water can be discharged safely.
  • Inside the discharge pipe is a check valve that only allows water to move upwards. The check valve contains a flap that closes when water tries to flow backward. It keeps the water trapped inside the discharge pipe out of the sump.

Here are the steps for testing your sump pump and keeping it ready:

  • Before testing the sump pump, make sure you clean your sump pit. Debris can get into the pit from the drainpipe or the sump pump cover. If debris is left in the pit, it can clog the pump or interfere with the operation of the float and switch.
  • Pour water into the sump pit using a garden hose or a 5-gallon bucket. Whichever method you use, you want to pour the water slowly so that you can observe the movement of the float. Ensure the water goes directly to the bottom of the pit and not to the pump.
  • Watch as the water level goes up to ensure the float rises smoothly. The float should rise steadily until it is high enough to push the switch, and the pump should come on without faltering. Many sump pump failures and sump pump repairs happen because of failed controls.
  • When the switch trips and the pump come on, listen to the operation of the pump. There should be no squealing or unusual sounds from the pump. If your pump does not operate smoothly or does not turn on at all, you may need to repair or replace the sump pump entirely.
  • Keep listening to the pump until it shuts off. The pump should shut itself off when the water level falls low enough. You have a problem if the pump does not turn off after the water level is low and the float is not pushing against the switch.
  • Finally, as the pump shuts off and the water inside the discharge pipe attempts to flow backward, you should hear the check valve closing inside the discharge pipe. If you don’t hear this sound, you may see water trickling back into the pit.
  • Repeat the steps above to be sure you did not miss anything and that your sump pump is okay.

How to Replace a Shower Head

Water coming out of a shower head.

The shower head is one of those things that we often forget about when it comes to potential damages and repairs. Unfortunately, they are very prone to damage and wear, and it’s good to replace them from time to time. If the time has come to install a new shower head, you’re in the right place. Going on a hunch is not recommended for bathroom repair, and replacing a shower head is no exception. That’s why our team at Chicago Plumbing Experts has decided to share some valuable tips on how to replace a shower head. And, of course, if you don’t feel like doing it yourself, know that there are always experts available out there who will do an excellent job whenever called upon

When is the right time to replace a shower head?

Even if your shower head seems to be in excellent condition, many processes can be ongoing under the surface. The area inside a shower head is rich soil for bacteria to form. Showerheads are a prime location for bacteria because of their ever-present moisture. Eventually, it can even become a health hazard. So, even if you don’t see any problems, replacing a shower head once every 6 to 8 months is advisable. And, it goes without saying that if the shower head is broken or any other type of problem is visible, you should replace it right away. Continuing to use a broken showerhead could cause damage to your bathroom or even lead to injury

A man sitting in front of a laptop and thinking.

If you’re wondering how often you should replace the shower head, the answer is every 6 to 8 months.

For example, if your shower head smells bad, this is a signal to replace it as soon as possible. Sometimes you might not even be able to locate the source of the foul smell, and it turns out it is your shower head. The bacteria we mentioned can cause this. However, various gasses from pipes that the functional shower head was supposed to deal with can also cause the smell. Therefore, replacing a shower head might remove the bathroom odors you were facing. As you can see, it’s clear why you should address all shower head issues quickly. After all, a shower head is something you and your family use daily, so it’s not a good idea to procrastinate with the replacement.

Choosing a new shower head

Before you learn how to replace a shower head, you’ll need to buy a new one first. Nowadays, there are so many different types of shower heads to choose from, and it will all depend on your preferences. Here are some of the most common types:

  • Fixed shower head
  • Handheld shower head
  • Filtered shower head
  • Rain shower head
  • Massage shower head
  • High-pressure shower head

It’s worth noting that there are some more expensive types out there with tons of additional features. But the basic types are perfectly fine as well; after all, they are the cheaper options. Plus, when it comes to bathroom upgrades, getting a new and slightly different shower head than you used to have, is an excellent place to start. There are plenty of cheap bathroom upgrades and easy ways to spruce it up, and you’ll enjoy the showers even more. Therefore, consider doing a few simple DIY upgrades, starting with the shower head.

Water pouring from a shower head.

There are many types of shower heads out there, so before you learn how to replace a shower head, find a model that suits you the most.

Removing the old shower head

In most cases, you can easily remove the old shower head by hand. A few simple counterclockwise movements should be enough to do work. If your shower head is fixed, you’ll need a screwdriver. But, once again, it is pretty easy to remove it. Ensure the water is off so the whole process doesn’t become a mess. After removing the shower head, clean the area where you will put your new shower head. This is the beginning of the pipe called the shower arm. Unfortunately, as with any other pipe in your home, the shower arm could be damaged in many ways. If the pipe is damaged and you don’t know how to fix it, perhaps you should contact a plumber for some help. On the other hand, the damage might not be visible. If you suspect the pipes are malfunctioning, maybe you should call a local plumber to inspect the plumbing in your home

It might be useful to put Teflon tape on the shower arm before putting a new shower head

Putting Teflon tape on the beginning of the shower arm pipe is highly recommended. It prevents leaks that would almost certainly occur over time if there weren’t any tape. You’ll probably find a piece of old Teflon tape after removing your old shower head. It would be best if you didn’t leave the old tape because that wouldn’t provide any benefits. So, carefully remove the old Teflon tape and add a new one. When applying the new tape, 2 or 3 turns should be enough for the necessary protection. As for the way of putting this tape, we have another suggestion. Apply the tape in a clockwise motion because you will use the same motion to set a new shower head later. Therefore, you’ll avoid inflicting any damage to the tape. Save any excess tape for the next time you replace the shower head.

A yellow roll tape and a cutting tool on a blue surface.

Don’t forget to get some Teflon tape before replacing a shower head.

Installing the new shower head

Finally, it’s time to put on a new shower head and finish things up. The new shower head will be easy to put by doing it in a clockwise motion. However, it would help if you protected the shower arm from twisting and turning. So, our suggestion would be, and experts at zippyshellcolumbus.com agree with us on this, to put a towel on the shower arm and use pliers to grasp it up to secure it. Make sure to fasten the new shower head firmly. Slowly turn on the water and check for any leaks.

Enjoy your new shower head!

Well, there you go. Now you know how to replace a shower head. It isn’t too complicated, but learning a thing or two about the process was certainly worth it. Now, all that’s left for you to do is enjoy your new shower head