Category Archives: Uncategorized

Water Heater Replacement Guide for Beverly, Chicago Homes

a plumber getting ready to install a water heater

Water heater replacements are a reality no homeowner can escape. That’s because all water heaters have a projected lifespan, something Orlando rental experts often remind property owners to plan for. This is the average number of years the maker expects the appliance to last. Depending on the type of water heater, this period typically ranges from 8-12 years for traditional units and 15-20+ years for tankless units.

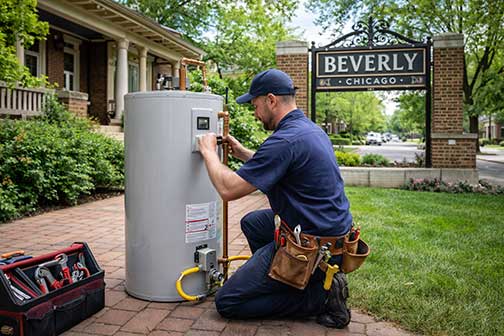
If you are like most homeowners, you probably hate replacing your water heater because of the cost. But water heater replacements are also an opportunity. They give you the chance to review your home’s hot water needs and correct existing issues. If you are about to replace the water heater in your Beverly, Chicago home, the information on this page can help you.

How to know if your water heater is due for replacement

  • How old is the unit? If your water heater is nearing 10 years (traditional units) or 15 years (tankless models), you should start getting ready to replace it.

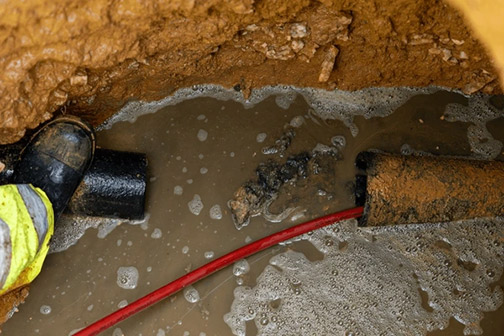
  • Is it leaking? If there are signs that the water heater tank is leaking, like water pooling at the base, you should replace it.

  • Is your hot water discolored? If your hot water has a yellowish/brownish hue, it means the tank is heavily corroded and ready to be replaced.

  • Do you hear strange noises? Loud popping, banging, or rumbling noises from your water heater indicate the presence of heavy sediment buildup in the tank.

  • Do you run out of hot water quickly? If there are persistent hot water shortages that didn’t used to happen previously, you may need to replace the water heater.

What to think of before replacing your water heater

  1. Your home’s water usage

The volume of hot water your family needs may have increased since your last water heater installation. To get the most out of your new water heater, make sure the new unit has the capacity to meet your household’s demand.

  1. Tankless vs. traditional

Should you go for a tankless unit or a storage water heater? Tankless units are costlier, but they offer better efficiency, while traditional models are ideal for homes with high demand, and they are easier to maintain and repair.

  1. Fuel source and efficiency

Common fuel options for water heaters include electricity, natural gas, propane, or solar. Are these fuel options easily available in your area? Think of the efficiency of your chosen water heater; ensure it is Energy Star-rated. 

  1. Acquisition and installation costs

These can range from $1000-$2500 for traditional water heaters and $14000-$3900 for tankless models. Labor costs make up a large part of these costs. If you are replacing your water heater with a new one of the same size, your installation costs will be significantly lower.

  1. The recovery rate

This is a critical factor to consider before buying a new water heater. The recovery rate is how many gallons of water the unit can heat in one hour (GPH) to a temperature rise of 100°F. Another factor to consider is the unit’s First-Hour Rating (FHR).

  1. Warranty

Typically, you want the warranty to cover manufacturing defects in tanks and parts for 6–12 years. The different types of coverage to look out for are tank warranty, part warranty, and labor warranty.

Steps to replace your water heater
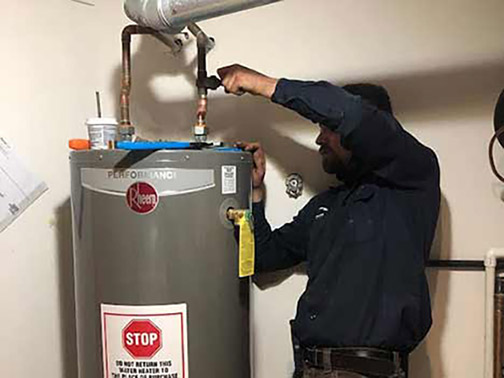
  • Drain the water heater tank: Attach a hose to the drain valve near the bottom of the tank to drain it. This step only applies to traditional models.

  • Disconnect the water lines: Using a wrench or channel-lock pliers, disconnect the cold and hot water lines.

  • Disconnect the electrical or gas lines: Open the junction box and unscrew the wire connectors/cable clamp, or disconnect the gas line from the gas control valve.

  • Disconnect the water heater vent: If working with a gas water heater, disconnect the vent pipe from the draft hood using a wrench.

  • Replace the old unit with the new one: Clean the area before moving the new water heater into place, ensuring that all connections line up properly.

  • Install the relief valve and other fittings: Depending on the type of water heater, install the TPR valve or temperature relief valve and other fittings.

  • Reconnect the water lines: To prevent leaks, wrap the ends of the two pipes with plumber’s tape when doing this.

  • Reconnect the gas or electrical lines: Reconnect the electrical cables or gas lines. Check the gas connections for leaks by brushing soapy water on the joints.

  • Reconnect the vent: Reconnect the gas vent as detailed in the device’s instruction manual and local code requirements.

  • Complete the Installation: Complete the installation by turning on the thermostat and opening the cold-water supply.

Finally, keep in mind that water heater installations are best done by a professional Beverly Chicago plumber. Manufacturers require this to retain the warranty on the equipment. Working with an expert also helps to ensure your safety. Moreover, an expert installer can work with you to help you choose the best water heater for your household.

How Wicker Park (Chicago) Residents Can Avoid Sewer Backups

a sewer backup in chicago's wicker park neighborhood

The city of Chicago is well known for its extreme and sometimes unpredictable weather, with heavy snowmelt and intense rainfall often resulting in sewer backups in homes and street or yard flooding. These problems affect all Chicago neighborhoods, including its affluent suburbs, but are often discussed by Arise real estate experts as being worse in places like Wicker Park for several reasons.

Wicker Park shares the same characteristics that make most of Chicago prone to weather-induced plumbing disasters. But there are Wicker Park-specific issues that increase the likelihood of these problems in this West Side Chicago neighborhood.  Why are Wicker Park homes so susceptible to sewer backups, basement flooding, and other similar issues?

Why Wicker Park homes are vulnerable to sewer backups

Aging sewer systems: A large number of Wicker Park’s homes were built in the late 1800s to early 1900s with sewer lines made of clay and cast-iron pipes. These pipes lack the capacity to handle larger flows from modern plumbing systems, and they are still in place in many homes. Also, because they tend to corrode, crack, and collapse over time, sewer lines with these types of pipes are more vulnerable to blockages and backups.

Combined sewer systems: Wicker Park is one of the many neighborhoods in Chicago that still rely on a combined sewer system. These sewer lines carry stormwater and household wastewater inside the same pipes, with the result that if they are overwhelmed by heavy rainfall, their contents can flow backwards into connected private sewer lines. This often results in sewage backups in connected homes.

Low-lying terrain with poor drainage: Wicker Park sits on relatively flat land that is low-lying with soil that has very high clay content. This low terrain means the water table is near the surface, which limits the ground’s ability to absorb runoff. The predominance of clayey soils in this area further limits the rate at which water infiltrates into the ground. All of these combine to make Wicker Park flood-prone.

Tree root intrusion into sewer lines: This is a common issue in locations with lots of mature trees. The roots of these trees can break into nearby sewer lines to access the nutrient-rich water inside them. Old clay and cast-iron pipes are particularly susceptible to tree root intrusion because they are already fragile due to age. Tree roots slow the flow of water and trap debris, increasing the risk of blockages in these pipes.

Increased pressure on sewer systems: In the last few decades, Wicker Park has seen significant real estate redevelopments with lots of single-family homes converted to multi-unit buildings. The increase in water usage from these properties has occurred without a concurrent upgrade of their sewer systems, placing enormous strain on the line’s limited capacity and resulting in frequent blockages and backups.

What can Wicker Park homeowners do about these problems?

Protecting your Wicker Park home from sewer backups

The obvious way to fix the problems is to address their root causes. But let’s say, for instance, the city decides to upgrade the sewer infrastructure in Wicker Park, that still leaves the issue of the area’s low terrain, its clay-heavy soils, and the problem of tree root invasion. There is not much homeowners can do about these issues, but there is a lot they can do to protect their sewer lines.

  1. Watch what you flush

A lot of the problems that happen in a home’s sewer lines are self-inflicted. Households commonly allow things into their sinks or toilets that end up blocking the drainage pipes. Never let the following enter your drains: grease, coffee grounds, eggshells, cat litter, starchy foods, stringy veggies, paper wipes/towels, condoms, and feminine hygiene products.

  1. Install a backwater valve

This critical device lets sewage flow from your home into the city sewer lines, but it will stop backups from the city’s infrastructure from entering your home. Because it has valves that close when there is a reversal in the flow of water, this device ensures that water flows in only one direction inside your sewer lines. 

  1. Address tree root intrusion

Prevent tree root invasion of your sewer line by cutting any tree roots around your sewer line and installing tree root barriers. Tree root barriers provide a physical barrier between the sewer line and nearby tree roots. Leakages in your sewer line also encourage tree roots to invade the line; they should be addressed.

  1. Schedule regular sewer line inspections

By giving you up-to-date insight into the problems in your sewer line, sewer line inspections ensure you are not flying blind. The best sewer line inspection method is a sewer camera inspection. Conducting this inspection annually helps you stay ahead of potential issues in your sewer line.

  1. Arrange annual professional sewer line cleaning

Professional sewer line cleaning will remove debris, including tree roots, limescale, grease, sludge, and other stubborn buildup, from inside your sewer line. The two most effective professional sewer cleaning methods are hydro jetting and sewer rodding.

Finally, these steps are best undertaken as preventive rather than corrective measures. In other words, you will spend less money if you take action to deal with these issues before they actually cause a sewer backup in your home.

Combined Sewer Systems and Flood Risk in Suburban Chicago

suburban flooding with storm overflow

A combined sewer system is a municipal plumbing network where stormwater runoff (rain plus snowmelt) and sewage are transported through the same network. In other words, instead of separate storm and sanitary sewer systems, much like how cities organize utilities and services such as Sarasota rental options, both sewage and runoff pass through the same lines to reach the city’s water treatment plant.

This was how municipal sewer lines were designed in the early 19th & 20th centuries. However, towards the end of the last century, most cities began to move away from this flawed design because of the risks associated with the system. But in many communities across the USA, significant parts of these old systems can still be found.

For instance, in the greater Chicago area, older parts of the city and many suburbs built before the 1950s still rely on these older plumbing networks. As a result, homeowners in these locations still live under the constant threat of the issues that plague these systems. Why are combined sewer systems such a problem?

Combined Sewer Overflows (CSO) and how it affects your home

The fatal flaw of combined sewer systems is that they are prone to overflow. The systems were designed and built in an age when climate change, population pressures, and urban sprawl were not yet the huge problems as they are today.

As such, they lack the capacity to contain the massive flows of stormwater created by climate-driven events (intense rainfall & snow). Also, due to the rapid increase in impervious surfaces across the city, more water flows into the sewer line than is absorbed into the ground.

The result is that Chicago’s combined sewer systems frequently receive more stormwater than they were originally designed to handle. If the infrastructure becomes overwhelmed by this excess flow, it can divert unsanitary wastewater into local waterways and homes.

This is known as a Combined Sewer Overflow (CSO), and it can have devastating consequences on nearby homes, natural waterbodies, and the well-being of citizens. What are some of the immediate and remote impacts when a combined sewer system overflows?

  1. Basement backup and flooding

The most direct effect of a combined sewer overflow is raw sewage and stormwater backing up into homes through the lowest drains on the first floor of buildings (floor drains and toilets). This happens as the wastewater in municipal sewer lines reverses flow into the private sewer lines connected to it, pushing the contents of the home’s sewer line backward until it exits into the house.

  1. Property damage

Flooding and sewage backup from combined sewer overflows inflict serious damage on homes. The first appears in the form of immediate damage to flooring, drywall, furniture, and personal belongings. Future damage shows up as damage to the structural elements of buildings, with a possibility of foundation problems and other types of catastrophic failures.

  1. Serious health hazards

Long after the flooded basement has been cleaned up, the occupants of the home remain exposed to the risk of serious illnesses. The home also experiences an increased risk of mold and mildew with their attendant health problems. On a wider scale, an overflowing sewer line often discharges raw sewage into nearby water bodies, degrading the water quality, harming fish & local wildlife, and increasing the risk of epidemics.

Protecting your home from combined sewer overflows

To protect your home and family from excess flow from the city’s sewer lines, these are the best strategies:

  1. Install a backwater valve

This is a critical piece of plumbing for homes that are vulnerable to flooding due to overflowing municipal sewer lines. The device ensures that wastewater can only flow in one direction inside your sewer line. As long as water flows in the proper direction, the built-in valve inside the device will stay open to allow sewage flow. But once it senses a reversal in flow, the valve closes, ensuring that sewage does not back up into your home.

  1. Install and maintain your sump pump

Sump pumps protect your home by quickly removing water that enters your basement before it can damage your building. Beyond installing a sump pump, you want to ensure it is in good condition at all times. Consider adding a battery-powered backup sump pump for more protection in case your primary sump pump is out of commission due to a power outage during heavy storms.

  1. Assess the condition of your sewer line

If your sewer line is clogged, blocked, or improperly sloped, your home has a higher risk of basement flooding and CSO backups. You can address this possibility by inspecting the line with a sewer camera inspection. If the inspection report reveals that your sewer line is clogged with tree roots, grease, sludge, or any debris, your best step is to have it cleaned using sewer rodding or hydrojetting.

Lastly, you need an experienced Chicago plumber to help you keep your home safe from the dangers posed by the city’s combined sewer system. That’s because for homeowners in flood-prone locations, the vigilance never ends. However, a local plumber with his ear to the ground can help to keep your home’s flood mitigation systems up-to-date against emerging challenges.

How Hard Water in Chicago Suburbs Contributes to Drain Buildup

hard water drain buildup in pipe

If your home’s plumbing suffers from frequent drain clogs and blockages, the problem might not be due to how you and the members of your household use the drains. Like evaluating long-term housing arrangements with TPG lease solutions, it’s important to look beyond the obvious causes. Local water chemistry could have a big part in those problems.

Local water chemistry refers to the quality of the water entering your home from the municipal water supply, in terms of the water’s pH, mineral content, etc. The chemistry of your local water supply largely depends on where it is sourced.

For Chicago and parts of Illinois that get their water from Lake Michigan, the primary issue for homes here is water hardness. Water hardness occurs when water has high concentrations of dissolved minerals, especially calcium and potassium.

This high mineral content alters the behavior of water, making everyday things like doing the laundry, washing dishes, or even taking a shower very difficult. Hard water also leaves a residue on human hair and skin, causing dryness and itchiness.

But some of the most devastating effects of water hardness can be found deep inside your drainage system. Due to the effects of hard water on its systems and structures, homes with hard water may experience more drainage problems than usual.

How hard water affects your home’s drainage system

  1. Scale buildup in pipes

As hard water travels through your drainpipes, it dumps some of the dissolved minerals it is carrying. These tiny mineral particles cling to the inner pipe walls and, over time, harden into a hard deposit called scale. Scale changes the texture of your pipe surfaces from smooth to rough, making it easier for debris to build up inside the line. This increased rate of buildup makes your drains more vulnerable to clogs and blockages.

  1. Reduced pipe diameter

Sustained mineral scale buildup inside your drainage pipes slowly narrows their diameter. Even when the pipes are not blocked, wastewater has difficulty flowing through these narrowed lines. This causes drains empty slowly, and backups become more frequent in your home. especially after periods of heavy water usage. The reduction of the effective diameter of the drainpipes makes the home susceptible to drainage issues.

  1. Soap scum intensifies blockages

Soap scum is a chalky deposit of calcium and magnesium stearate that forms when soap interacts with hard water. This gross off-white substance builds up on tubs, showers, and fixtures. But it also finds its way into the drainage system, where it combines with grease, hair, mineral scale, and other debris to form a rocklike material that blocks drainage pipes and sewer lines. These types of clogs are exceptionally difficult to remove.

  1. Damage to older pipe systems

The impact of hard water is worse in older plumbing systems due to their existing issues. Older plumbing lines with cast iron or galvanized steel pipes, such as those found in many Chicago homes, are more prone to corrosion and mineral adhesion. These weaknesses are exacerbated by hard water, making these pipes, which are already brittle from old age, more likely to clog, leak, and collapse.

Protecting your drains from hard water

  1. Install a water softener

The most effective solution for your home’s hard water issues is installing a water softener in the house. Water softeners solve the problem by stripping out the calcium and magnesium ions from hard water. Hard water is softened when the hardness minerals inside it are swapped with sodium or potassium ions through a process known as ion exchange. However, this step won’t fix the damage already done to your drainage pipes.

To remove limescale buildup, soap scum, and other debris inside your pipes, you need the following solutions.

  1. Sewer camera inspection

A sewer camera is a specialized, waterproof camera used to check the physical condition of drainage lines.  This non-invasive inspection method allows a professional plumber to detect the type of problems in a drainage system without damage to the pipes. Based on the inspection results, they can determine the location, cause, and severity of the issues in the system, as well as the best drain-cleaning method.

  1. Professional drain cleaning

After a camera inspection, the next step is to clean the line using a professional drain-cleaning method. This removes all stubborn clogs in the line, whether caused by grease, sludge, tree roots, soap scum, or mineral scale. Professional drain cleaning methods don’t carry the risk of pipe damage associated with chemical drain cleaners.

There are two main drain-cleaning methods preferred by professional plumbers: sewer rodding and hydrojetting.

  • Sewer rodding: This drain-cleaning method uses a flexible cable with a steel cutting head at one end and a powerful motor at the other. This cable is inserted into the clogged line, and the rotating cutting head is used to clear out the debris inside the line.

  • Hydro jetting: This method uses high-pressure water to remove the debris from a drainage pipe. This water is delivered directly to the location of the clog using a flexible high-pressure hose with a stainless-steel nozzle at the end.

These are the best methods for reversing the effects of hard water on your home’s drainage system. If you are dealing with frequent drainage problems in your Chicago home, they could be due to the city’s well-known hard water issues. However, you will never know for sure until a professional Chicago plumber looks at your drainage pipes.

Plumbing Problems Caused by Cast Iron Pipes in Chicago Suburbs

a set of cast iron pipes

Cast iron pipes are common in Chicago homes, especially in houses built before the mid-1980s. Back in those days, pipe materials like cast iron, galvanized steel, and lead were the preferred options for constructing water service lines, drainage pipes, and sewer systems—an issue often highlighted in broader housing discussions such as Raleigh rental insights.

However, these pipe materials are now known to have a maximum lifespan of 50-70 years, with a host of issues appearing as the pipes age. Consequently, cities like Chicago are encouraging homeowners with cast-iron pipes in their plumbing to replace them.

What are the issues with cast iron pipes in plumbing systems?

Plumbing problems caused by cast iron pipes in your Chicago home

While they are well-known for their legendary strength, cast-iron plumbing pipes are plagued by the following issues:

  1. Tuberculation and corrosion

Cast-iron pipes are very reactive. Through a process known as tuberculation (or rust), cast-iron pipes react with atmospheric oxygen and bacteria to form large blister-like layers of iron oxide within their channel. This reddish-brown buildup of rust reduces the pipe diameter, slowing drainage and sometimes turning the water brown if the process occurs in the freshwater lines. In Chicago, this problem is aggravated by extreme freeze-thaw cycles and acidic soils that increase the pressure on the pipes.

  1. Pipe blockage and mineral scale buildup

All drainage systems, regardless of the type of pipe material used, are prone to the buildup of debris. But rust and corrosion make cast iron pipes more vulnerable to buildup. The normal process of buildup that occurs in all drainage systems, combined with the accumulation of rust materials in cast-iron pipes, makes them more susceptible to clogs and blockages. These problems are exacerbated by Chicago’s hard water, which deposits minerals in the pipes, further aggravating the issues.

  1. Structural failure

Rust, corrosion, and the effects of biochemical processes within the surrounding soil and the wastewater running through the drainage line make cast-iron pipes brittle as they age. Initially, small cracks appear in the pipes, but over time, these widen and become large cracks that undermine the structural integrity of the line. These problems make cast-iron lines more likely to collapse, with dire consequences for the health and comfort of those living in the home.

  1. Tree root intrusion

This is another problem common to all drainage systems, but also disproportionately affects cast-iron pipes. Tree roots seeking access to the warm, nutrient-rich water inside a drainage line may exploit weak pipe sections to invade a line. The tendency for cast-iron pipes to leak and crack makes them a perfect target for tree root intrusion. Cast-iron pipes with tree roots inside them may eventually collapse from the pressure. This problem is particularly common in tree-lined Chicago suburbs.

The eventual impacts of these problems on the plumbing system and the home’s occupants include:

  • A bigger risk of water damage and mold in the home, due to a higher possibility of burst drainage pipes.

  • Bad odors in the home, such as sewer gases or raw sewage leak from broken drainage lines and enter the basement or collect under slabs

  • Sewage backups and overflowing toilets often become a persistent issue in the home, due to frequent and severe blockages in the line.

Overall, these problems increase the home’s plumbing maintenance costs. They can also result in higher insurance premiums.

If you are dealing with these problems in your Chicago home, how can you fix them?

Fixing plumbing problems caused by cast-iron pipes

  1. Sewer camera inspection

The first step is to assess the physical condition of your pipes using a sewer camera. This helps you understand the kind of issues you are dealing with. Through this inspection, you can determine the extent of pipe damage and the kind of debris/blockages inside your lines. With a sewer camera inspection, it is certain that, instead of wasting time and money, you will be applying the correct solutions to the problem.

  1. Professional drain-cleaning

If your pipes are not severely damaged but contain a lot of debris, the suitable option is to clean the line. This can be done using hydro jetting or sewer rodding, which are effective for removing a variety of clogs. The right cleaning method depends on the structural soundness of your pipes and the kind of blockages inside them. The sewer camera report will guide you in making this decision. This is one of the reasons to conduct a sewer camera inspection before attempting to clean your drainage line. 

  1. Pipe relining or replacement

If the camera inspection shows that your pipes are severely damaged, the best option is to replace them. However, unless up to 60% of the system is badly damaged, you do not have to replace the entire line. You can replace only the damaged sections using a trenchless repair method, which does not require pipe excavation. On the other hand, if the pipe is extensively damaged, your best option is a full replacement using excavation methods.

To conclude, just because you have cast-iron pipes in your plumbing system, it does not mean that your home is condemned to suffer constant drainage problems. A lot depends on the steps you take today to resolve the problems in your plumbing systems.

Paying for Major Home Repairs Without Derailing Your Finances

a handyman making repairs

Homeowners face a common reality: roofs leak, HVAC systems fail, and foundations crack—often without warning. Major home repairs can cost thousands of dollars, and the stress usually comes from timing as much as price. The good news is that there are practical ways to prepare, pay, and move forward without jeopardizing long-term financial stability.

Key takeaways

  • Emergency savings reduce stress and borrowing costs when repairs hit unexpectedly.
  • Multiple financing options exist, each suited to different timelines and credit profiles.
  • Planning ahead gives homeowners leverage, flexibility, and better terms.

Why preparation matters more than most people think

Big repairs are rarely optional. When heat goes out in winter or water damage spreads, delay often multiplies costs. Preparation shifts repairs from crisis mode into decision mode, where you can choose the least expensive and least disruptive option.

Start by understanding the age and condition of your home’s major systems. A 15-year-old roof or aging plumbing isn’t a surprise failure—it’s a scheduled expense that simply lacks a calendar reminder.

How to build a repair-ready plan

Before exploring loans or credit, homeowners benefit from a simple readiness checklist:

  • Review inspection reports or maintenance records for high-risk systems.
  • Set aside a dedicated repair reserve, even if contributions start small.
  • Get baseline quotes from contractors before emergencies arise.
  • Check your credit profile so you know what financing doors are open.
  • Confirm insurance coverage and exclusions for common repair scenarios.

Preparation doesn’t eliminate costs, but it reduces panic-driven decisions—often the most expensive kind.

Common ways homeowners pay for major repairs

There is no universal “best” payment method. The right choice depends on urgency, total cost, and how long you need to repay the expense.

The table below shows how different funding paths typically stack up.

OptionBest forTradeoffs
Emergency savingsFast repairs, no debtRequires discipline to build
Credit cardsSmaller, urgent fixesHigher interest if not paid quickly
Personal loansMid-range projectsFixed payments, credit-based
Home equity loans/linesLarge repairsUses home as collateral
RefinancingMajor upgradesLonger-term commitment

Each option solves a different problem. The mistake is choosing one based on speed alone rather than total cost.

Using an FHA refinance to fund repairs

For homeowners who already carry a mortgage, refinancing can serve as a reset rather than a setback. An FHA cash out plan allows you to replace your current mortgage with a new FHA loan, which may be easier to qualify for than conventional options and can spread repair costs across predictable monthly payments. Most FHA loans require mortgage insurance premiums at closing and ongoing for the life of the loan, which should be factored into long-term affordability. In addition, FHA refinances typically require that you’ve made at least six monthly payments on your existing mortgage before applying. This approach works best when repairs are substantial and refinancing aligns with broader financial goals.

Timing repairs to protect value

One overlooked factor is timing. Delaying structural or moisture-related repairs often leads to cascading damage, while cosmetic issues can sometimes wait. Prioritizing repairs based on risk—not appearance—protects home value and keeps financing needs smaller.

When possible, bundle repairs. Contractors often price more favorably when work is consolidated, and financing one larger project can be cheaper than stacking multiple small loans.

Smart questions financing homeowners ask

Should I drain my emergency fund or finance the repair?
Using savings avoids interest, but it can leave you vulnerable to the next surprise. Many homeowners split the difference by using some cash and financing the rest. The right answer depends on how quickly you can rebuild savings.

Is refinancing just for people already struggling?
No. Refinancing can be strategic, especially when it lowers overall monthly costs or funds necessary upgrades. It’s often about restructuring, not rescuing. The key is understanding the full loan terms.

Do home equity options put my house at risk?
They use your home as collateral, which adds risk if payments lapse. However, they often offer lower rates than unsecured loans. Stable income and conservative borrowing reduce that risk significantly.

Can insurance cover major repairs instead of loans?
Insurance usually covers sudden, accidental damage—not wear and tear. Roof age, plumbing condition, and maintenance history matter. Always verify coverage before assuming a claim will pay out.

What if my credit isn’t ideal right now?
Some options, including FHA-backed loans, may have more flexible requirements. Improving credit even slightly can open better terms. Timing repairs alongside credit improvement can save thousands.

Should I fix everything at once or phase repairs?
Critical repairs should happen immediately to prevent further damage. Non-essential upgrades can wait until finances recover. Phasing work can reduce borrowing and stress.

Closing thoughts

Major home repairs are disruptive, but they don’t have to be destabilizing. Preparation creates choice, and choice creates savings. By understanding funding options, prioritizing work, and aligning repairs with long-term goals, homeowners can protect both their property and their financial footing. The house stays solid—and so does the plan.

Sewer Smoke Testing in Chicago: Quick, Safe, and Revealing for Every Home

a sewer smoke test in chicago

Sewer line problems in your home, like leaks and cracks, are notoriously hard to find. Most times, you are not even aware that your sewer line is damaged until you start to see the signs of the issues through the malfunction of the various drains in your home.

Essentially, especially those seeking reliable HCM housing support, homeowners often wait until their drains block, overflow, or emit offensive odors into the house to realize they have a sewer line break. Usually, this is after the issue has already caused costly damage to their plumbing and building.

Sewer smoke testing solves this dilemma.

Sewer smoke testing not only helps homeowners avoid the costly disruptions that come with invasive methods of detecting sewer line problems, but it also finds those sewer line problems before they escalate into bigger issues.

How does sewer smoke testing work, and how do you know when you need it?

How sewer smoke testing works

Sewer testing uses non-toxic smoke to discover gaps, cracks, and bad joints in a sewer line, as well as detect dried-out P-traps that release sewer gases into the house. It is one of the most effective methods for detecting sewer lines and plumbing problems in the home.

Here are the steps to do a sewer smoke test in your home:

  1. Isolate the home’s sewer line

To prevent smoke from going up the sewer line, through the city sewer main, and into your neighbors’ sewer line before exiting inside their home, it is important to isolate your sewer line from the city main sewer line. This is done by inserting a test ball into the sewer line via the cleanout and inflating it, so that it seals the pipe. This will keep the smoke from entering the city’s main sewer line.

  1. Insert the hose

The smoke testing machine hose is inserted into the sewer cleanout. To make sure smoke does not escape from the cleanout, the hose should fit snugly around the opening of the sewer cleanout. If there is a gap between the hose and the cleanout, the technician or plumber will seal it with tape or pack rags around it to form a tight seal.

  1. Cap plumbing vents

To create pressure in the plumbing system, the plumbing vents are closed with a foil cap. This step is not always necessary, unless the conditions require it. Without it, it is still possible to detect leaks or cracks in the sewer and plumbing system.

  1. Begin the test

To make smoke, the plumber uses a smoke candle. These come in white or gray and last 30 seconds or 60 seconds, depending on the type. The candle is placed in front of the smoke machine and lit.  As the candle begins to smoke, the testing machine will suck in the smoke and push it into the cleanout.

  1. Call the fire department

Before starting the test, the plumber calls the fire department to inform them of the smoke test at your address. Skipping this step means that neighbors might see smoke coming from your roof vent and call the fire department to your house. Informing the fire department on time prevents chaos and fines.

  1. Check for smoke

This test will fill your plumbing system and sewer line, not your house, with smoke. If smoke is seen inside the house, there are leaks in your plumbing; perhaps a dried-out P-trap, a broken toilet seal, or leaks and cracks in your sewer line. If you have a broken sewer line, you will also see smoke emerging from the ground outside your home.

Benefits of smoke testing

  1. Detects points of inflow and infiltration

These are locations in the sewer line through which rainwater and groundwater can enter the pipes to overload the system and increase the risk of sewer backups.

  1. Detects plumbing leaks

If there are damaged vents, leaky pipes, loose toilet or faucet seats, improperly installed drain traps, and dried-out P-traps in the home, a sewer smoke test will uncover them.

  1. Detects sewer gas intrusion

Smoke testing helps identify openings – such as leaks, cracks, or weak spots – in your plumbing that can allow dangerous sewer gases (including hydrogen sulfide, methane etc.) to enter your home.

  1. It is affordable and effective

Sewer smoke testing is fast, cost-effective, and can find problems in your sewer line efficiently. It helps you avoid the issues associated with more invasive detection methods.

When should you get sewer smoke testing?

You need sewer smoke testing if:

  • You have sewer odors in your home: If there is a persistent odor of sewer gases inside your house.
  • You’re dealing with chronic drain issues: Despite your best efforts, your drains are slow or clog frequently.
  • You have high water bills: The water bill is inexplicably high, even though your water usage stays the same.
  • You have newly installed plumbing: A smoke test helps you check for problems in new plumbing installations.
  • You are buying a new home: When buying a new home, a smoke test helps you troubleshoot the plumbing and sewer system.

Periodic sewer smoke tests also help you detect budding issues in your sewer line. Are you dealing with constant sewer lines and plumbing issues in your home? Do you think a smoke test will help you solve these problems, but you would like more information? Reach out to us if so at 773-599-9181.

Buying a Homestead-Friendly Home in Retirement: What Today’s Retirees Should Know

a man tending to his garden

Retirees exploring a home that supports gardening, small-scale farming, or other homesteading hobbies usually start with one idea: freedom. Freedom to grow food, enjoy the land, and settle into a lifestyle with fewer interruptions. But finding the right property takes more than daydreaming — it requires clarity about the land, the home’s infrastructure, and how those choices shape your daily rhythms.

Quick Snapshot

Retirees choosing a homestead-friendly home should prioritize land size, water access, zoning rules, and long-term maintenance needs. A property that matches physical ability, climate, and lifestyle goals will make homesteading both enjoyable and sustainable.

Where Land Meets Lifestyle: Finding a Property That Fits You

For retirees, the best homestead starts with daily rhythm, not acreage. Think about how much time you want to spend outside, what level of physical effort feels comfortable, and how close you need to be to stores or healthcare.

Prioritize properties that support easy movement: short distances between house and garden, gentle slopes, and layouts that reduce bending or hauling. When the environment matches your energy and routines, homesteading becomes enjoyable rather than demanding.

Comparing Property Types

Property TypeBest ForProsWatch-Outs
Small rural lot (0.5–2 acres)Gardeners, light livestockManageable upkeep; close to townLimited expansion
Mid-size acreage (3–10 acres)Mixed gardening + hobby farmingPrivacy; flexibilityMore fencing, tools, and energy systems needed
Large acreage (10+ acres)Retirees wanting small-scale farming or forestryAbundant space; high autonomyHigh labor intensity; costly equipment
Suburban edge homesGardeners who want convenienceUtilities + stores nearbyStricter zoning; noise

Soil, Water & Sunlight: The Hidden Trio

Healthy soil reduces long-term effort, making gardening easier on aging joints and energy levels. Look for loamy or sandy-loam soils and avoid steep slopes that erode easily. Next, examine water — wells, rainwater collection rules, irrigation rights, and seasonal flow patterns. Reliable water is non-negotiable.

Sun exposure matters as well. A south-facing garden area can offset so-so soil and expand your growing possibilities. Don’t be afraid to bring a compass or use a phone app during your property tour.

When Your Hobby Turns Into a Business 

Some retirees naturally evolve from hobby gardeners into small-scale producers — selling eggs, jams, seedlings, or handmade goods. When that shift happens, a bit of business knowledge goes a long way. This may help you understand leadership, operations, and project coordination can transform a hobby into a sustainable micro-business. Earning a business management degree strengthens those skills, and online programs make it easier to balance hands-on work with coursework. 

What to Review Before Making an Offer

  1. Water security – Well condition, flow rate, irrigation access.
  2. Zoning & livestock rules – Confirm what’s allowed (chickens, goats, structures).
  3. Sunlight exposure – Overhead trees, orientation, and seasonal shade patterns.
  4. Soil quality – Drainage, organic matter, potential for raised beds.
  5. Mobility-friendly layout – Distance from garden to home; slope of land.
  6. Maintenance load – Fencing needs, mowing area, orchard pruning, roof height.
  7. Neighbor distance & noise – Both proximity and privacy matter for homesteading.
  8. Energy systems – Solar potential, backup power, wood-burning safety.
  9. Outbuilding condition – Barns, sheds, greenhouses, and workshop stability.
  10. Access to services – Healthcare, grocery stores, farm-supply shops.

Habits That Make Retiree Homesteading Easier

  • Start small: Expand beds or add animals only when comfortable.
  • Use ergonomics: Raised beds, wheeled carts, and adaptive tools reduce strain.
  • Schedule rest days: Consistency beats intensity.
  • Get community support: Garden clubs and co-ops lighten costs and effort.
  • Keep an emergency plan: Weather, health, and seasonal shifts require backup strategies.

Local Regulations & Lifestyle Fit

Counties vary widely in how they treat home-based agriculture, accessory structures, and water use. Some areas embrace small homesteads; others restrict fencing, livestock, or roadside sales. Always read the county code. Make sure it aligns with your vision — or you may inherit limitations you didn’t expect.

Lifestyle fit matters just as much. Rural quiet may feel wonderful in the morning but isolating at night. Likewise, semi-rural areas might mix peaceful surroundings with more traffic or noise. Walk or drive around at different times of day to sense the local rhythm.

Common Questions Retirees Ask When Homesteading

Is homesteading realistic with reduced mobility?
Yes — with smart design. Raised beds, drip irrigation, and consolidated garden areas reduce daily strain.

Do I need farming experience to start?
Not at all. Many retirees start with small gardens, then expand as confidence grows.

Is it expensive to maintain acreage?
It depends on size and infrastructure. Small properties are usually manageable; larger ones may require equipment or hired help.

Can homesteading save money?
Often it does, especially with vegetables, herbs, and eggs. But initial setup costs (soil, fencing, tools) should be budgeted.

Closing Thoughts

Choosing a homestead-friendly home in retirement isn’t about finding the “perfect” property — it’s about matching land, lifestyle, and long-term comfort. With careful evaluation and a flexible plan, retirees can build a home environment that supports creativity, sustainability, and calm daily routines. The right homestead enhances not just your hobbies, but your overall quality of life.

Is It Time to Replace Your Water Heater? Cold Showers Could Be a Clue

a plumber performing a water heater replacement

Yes, if your water heater is no longer doing the very thing it was designed to do (heat water), it may be time to replace it. Keyrenter West Seattle notes that every homeowner knows that the water heater in their basement (or wherever yours is) and indeed every home appliance has an expiration date.

But how do you know when your water heater reaches the end of its service life? The fact is, there is no specific “Use Before” date for your water heater. Instead, the manufacturer has a projected number of years that they expect the unit to function optimally.

As this time period approaches, your water heater may become less efficient. For traditional water heaters, this estimated lifespan is 8-12 years (for gas units) and 10-15 years (for electric units). For various reasons, tankless water heaters last slightly longer, 15-20 years.

Beyond aging, other factors play a role in how long a water heater lasts. The first is maintenance. How well a water heater is cared for is the biggest factor in its performance. The water quality in your area and the demand placed on the unit are two more critical factors.

What are the signs that your water heater is nearing the end of its useful life and due for retirement?

5 signs that it is time to replace your water heater

  1. Not enough hot water

If the water heater used to produce enough hot water for your family’s needs (showers, dishes, and laundry) but no longer does, it is a sign that the unit is failing. Basically, if your home’s water usage pattern has not changed (the size of your household has not increased), but you find yourself running out of hot water faster than you used to, you may need to replace the water heater.

  1. Strange noises

Strange noises from your water heater are a sign of bigger issues with the unit. It is normal for a water heater to make a humming sound when working. But if you hear whistling, popping, cracking, or hissing sounds from the unit or the sound of boiling water, there may be a lot of sediment buildup inside the tank. If you can’t remove the buildup by flushing the tank, you will need to replace the unit.

  1. Rusty or discolored water

This means you have a lot of rust and corrosion going on inside the water heater tank or its connected water pipes. If your water heater tank is rusting from the inside, it will add a metallic taste and a brownish or yellowish color to your hot water. It is only a matter of time before that tank starts to leak. Meanwhile, the deteriorating tank may leak toxins into your hot water supply.

  1. Leaks around the base

If you constantly find pools of water near your water heater, you should be worried. This often means there is a leak in the tank, connecting pipes, or TPR valve. Leaks in the TPR valve and the water heater’s connecting pipes can be fixed. But if the water heater tank is leaking, especially from its base, there is nothing you can do about it. The only solution is to replace the unit.

  1. High energy bills

An aging or failing water heater will use more energy, causing your bills to spiral out of control. That is because the unit must work harder to heat the same amount of water as before, with the result that it will use up more energy than it should. If you see strange spikes in your home’s energy bill, that could be a sign that it is time to replace your water heater.

How to prolong the life of your water heater

The following three maintenance steps will help to prolong the life and efficiency of your water heater if you do them periodically.

  1. Flush the tank

This should be done once every year, especially if the water quality in your area is poor. Flushing will remove any mineral buildup and debris inside the water heater tank. Buildup of debris in water heater tanks is a major contributor to rust and inefficiency.

  1. Replace the anode rod

Also known as the sacrificial anode rod, this feature helps protect the water heater by attracting corrosive elements that would have attacked the tank itself.  This eventually leads to the anode rod corroding and needing to be replaced.

  1. Test the pressure relief valve

The temperature and pressure release (TPR) valve is found on the side of your water heater tank. It helps to balance water temperature and air pressure within the tank. If this valve stops working, there’s a risk of your water heater tank exploding.

If, after going through the above signs of a failing water heater, you decide that your water heater needs to be replaced, it is a good idea to work with a local plumber.

An experienced plumber will evaluate your home’s hot water needs and other essential factors to ensure you choose a water heater that will serve your household adequately.

Preventing Sewer Line Clogs: Expert Tips for Chicago Homes

a clogged sewer line in chicago

A clogged sewer line can be one of the most emotionally distressing and financially draining plumbing problems to have in your home. Keyrenter Jacksonville notes that your sewer line serves as the eventual exit point for all the drainage pipes in your home. That is why when it clogs, it can result in:

  1. Flooding and sewage backups

If the sewer line is blocked, wastewater from your toilet, shower, and sinks will have nowhere to go. After building up inside the line, this water will flow backwards until it enters your home through the drains closest to the floor, toilets, showers, and basement drains.

  1. Costly property damage

A clogged sewer line can leak water into the walls and flooring of your home, causing expensive damage. These problems can persist for a long time before their effects become apparent, necessitating the replacement of your flooring, drywall, and insulation.

  1. Foundation failure

One of the most devastating impacts of sewer line problems in a home is a failed foundation. Sewer line clogs can secretly leak water into the foundation of your building, undermining it and ultimately causing damage.

  1. Indoor air quality issues

Sewer line clogs and blockages cause severe indoor air quality issues in your home when trapped sewer gases inside the line escape into your home. Mold and mold spores also multiply in homes with sewer line problems.

  1. Pest infestation

Clogged and leaky sewer lines attract harmful pests to your home. Mosquitoes, roaches, centipedes, snakes, raccoons, etc., are just a few of the pests that will be drawn to your property when you have a clogged and leaky sewer line.

Tips for preventing sewer line clogs in your home

To prevent sewer line clogs in your home, first, you need to know what causes them.

  1. Dispose of FOG in the trash

Fats, oils, and grease are the #1 cause of sewer line clogs in both private and city sewer lines. That soft and runny grease you poured down the sink drain will congeal into a hard mass inside your sewer line. This hardened mass will stick to pipe walls, trap debris, and, in due course, block the sewer line.

  1. Watch what you put inside the toilet

Toilets are for human waste, water, and toilet paper only. Do not flush cat litter, paper towels or napkins, diapers, feminine hygiene products, cloth, wipes, dental floss, latex condoms, or items described as “flushable” into the toilet.

  1. Be careful of food waste

Do not dump starchy foods (mashed potatoes, pasta, boiled rice, etc.), fibrous veggies (celery, corn silk, broccoli, etc.), coffee grounds, eggshells, bones, and similar items into your sink drain. Dispose of food scraps in the trash can.

  1. Install strainers on sink and shower drains

Small hairs that find their way into the shower drain can mix with soap scum, FOG (fat, oil, and grease), and pieces of fiber to form large balls inside the sewer line. Reduce this risk by installing strainers on drain openings.

  1. Install root barriers

If there are trees and large shrubs in the vicinity of your sewer line, their roots can penetrate the line and block it. To prevent this, either remove the plants or install tree root barriers to stop plant roots from reaching your sewer line.

Create a preventive plumbing maintenance plan

Although the above steps help to slow the accumulation of debris inside your sewer line, they will not stop this process altogether. That is because the wastewater that flows into your sewer line always carries different amounts of solid and semi-solid waste with it.

Some of these materials will be deposited inside the sewer line as the water flows through the pipes. With time, this buildup can grow until it narrows the pipe channel and interferes with the flow of water through the line. Preventive sewer line maintenance will solve the problem.

  1. Periodic sewer line inspections

Doing a sewer camera inspection every 1-2 years allows you to know the true condition of your sewer line. A sewer camera inspection is the most cost-effective non-invasive method for assessing the condition of a sewer line.

  1. Professional drain-cleaning

To restore your sewer line to optimal flow, remove the accumulated debris inside it. Do this by having the line professionally cleaned every 1-2 years. The best methods for these are sewer rodding and hydro jetting. These two drain cleaning methods will remove any kind of buildup inside your sewer line.

  1. Upgrade the sewer line

If you have older pipe materials such as cast iron, galvanized steel, or clay, consider replacing them. These pipe materials are prone to corrosion and blockages. Installing newer sewer materials, such as PVC, will reduce the incidence of clogs and blockages in your sewer line.

Finally, do not underestimate the importance of working with an experienced drain expert when trying to solve the problems in your sewer system. A plumber who specializes in sewer line care and repair will not just solve the problems in the line; they will help you prevent future ones.

error: Content is protected !!