Author Archives: Chicago Plumbing Experts

How to Build An Effective Drain Cleaning Program for Your Chicago Business

How to Build An Effective Drain Cleaning Program for your Chicago Business

Drain cleaning is crucial for maintaining a healthy and functional plumbing system in any commercial establishment. A clogged drain can disrupt your business operations, cause unpleasant odors, and even lead to costly repairs if not addressed promptly. Here we will outline the steps to build an effective drain cleaning program specifically tailored for your Chicago business.

Why is Drain Cleaning Important?

Before we get into the details of building a drain cleaning program, let’s understand why drain cleaning is important for your business. Clogged drains are a common occurrence in commercial settings due to the higher traffic and usage compared to residential properties. Neglecting regular drain maintenance can result in:

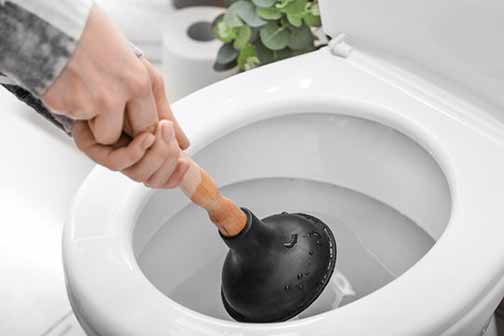
  • Slow drainage and backups
  • Unpleasant odors
  • Health and safety risks
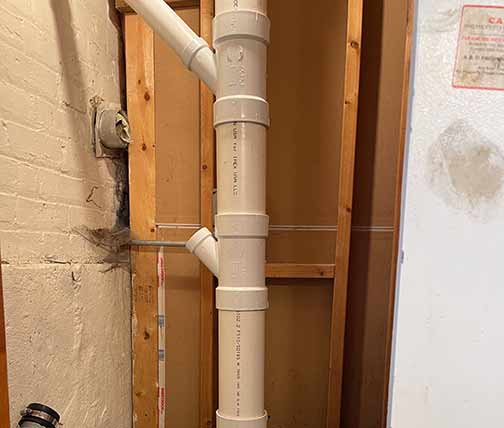
  • Damage to plumbing fixtures
  • Disruptions to your business operations

An effective drain cleaning program minimizes these risks and ensures the smooth operation of your plumbing system.

Assessing Your Drain Cleaning Needs

Every business has unique requirements when it comes to drain cleaning. The first step in building an effective program is to assess your specific needs. Consider the following factors:

  • The size and layout of your facility
  • The type of business and the associated waste disposal
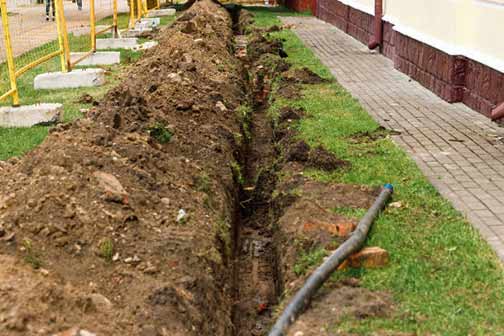
  • The age and condition of your plumbing system
  • The frequency of drain issues

By evaluating these factors, you can determine the level of drain cleaning required and create a program that suits your business best.

commercial drain cleaning services in chicago.

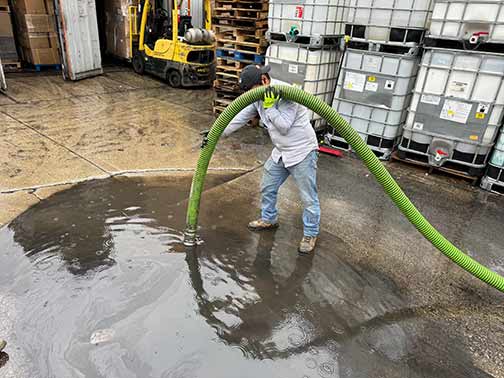
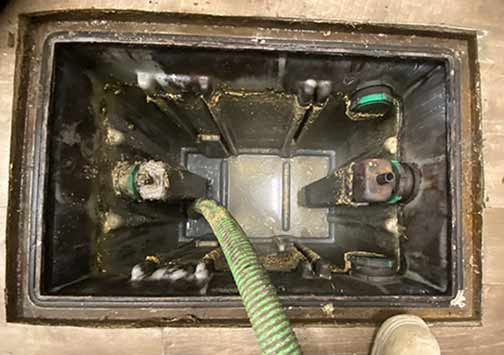
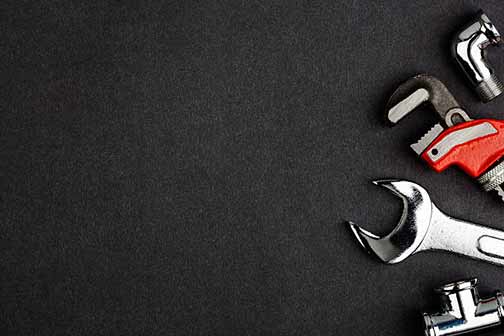
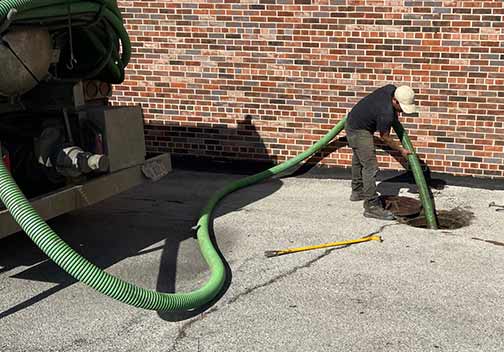
Depending on your business’s needs, you may choose to incorporate methods such as drain pumping or hydro jetting service.

Developing a Preventive Maintenance Plan

Once you have assessed your drain cleaning needs, it’s time to develop a preventive maintenance plan. A preventive approach helps avoid major drain blockages and keeps your plumbing system running smoothly. Here are the key steps:

Schedule Regular Drain Inspections

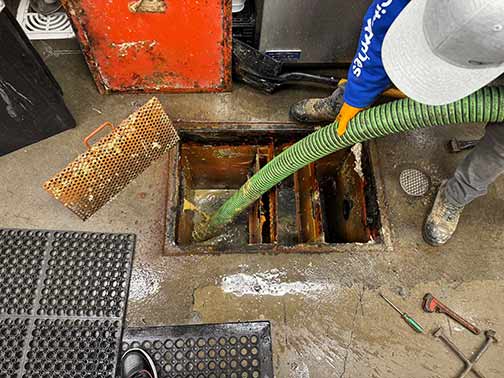
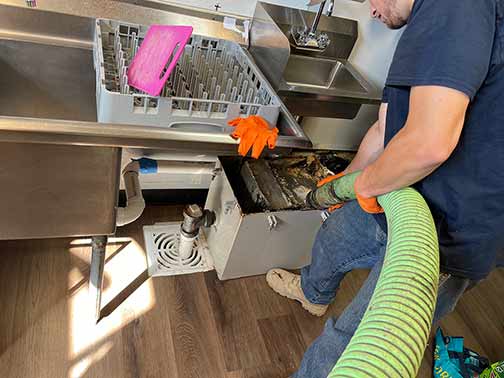
Regular drain inspections are the cornerstone of a preventive maintenance plan. Hire a professional plumber in Chicago to perform thorough inspections of your drains, identifying any signs of blockages, leaks, or other issues. This proactive approach allows you to address any problems before they worsen.

Implement Routine Drain Cleaning

In addition to inspections, routine drain cleaning is essential for preventing buildup and maintaining optimal drain flow. Depending on your business’s needs, you may choose to incorporate drain cleaning methods such as hydro jetting or enzymatic drain cleaners. Consult with your plumbing professional to determine the most suitable approach.

Train Employees on Proper Usage

Employee education plays a vital role in maintaining a clean and well-functioning drainage system. Train your staff on proper usage and disposal practices to minimize the introduction of substances that can clog drains. Emphasize the importance of reporting any drainage issues promptly to the designated personnel.

Establish Clear Guidelines for Waste Disposal

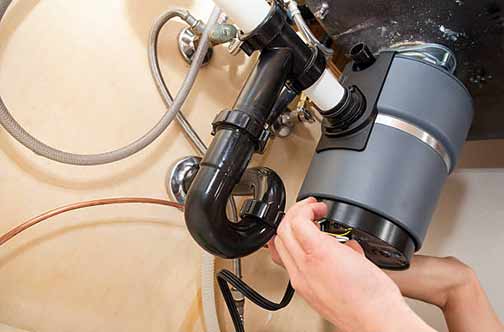
If your business generates specific types of waste that can potentially harm your drains, it’s crucial to establish clear guidelines for their disposal. Improper disposal of substances like grease, chemicals, or solid materials can lead to severe blockages and damage. Educate your employees on the proper disposal methods and provide designated containers for hazardous waste.

Maintain a Cleaning Schedule

Consistency is key in drain maintenance. Create a cleaning schedule that outlines the frequency of drain inspections and routine cleaning activities. Assign responsible individuals or teams to ensure the tasks are carried out as planned. Regularly review and update the schedule as necessary to accommodate any changes in your business operations or plumbing system.

commercial drain cleaning plumbers helping out a business in chicago.

By assessing your drain cleaning needs, developing a preventive maintenance plan, and choosing the right plumbing service, you can ensure the longevity and reliability of your plumbing system.

Choosing the Right Plumbing Service

Building an effective drain cleaning program requires the expertise of a professional plumbing service. When selecting a commercial plumber in Chicago, consider the following factors:

  • Experience and reputation
  • Availability of emergency services
  • Knowledge of commercial plumbing systems
  • Use of modern equipment and techniques
  • Positive customer reviews and references

Research potential plumbing services thoroughly and compare their offerings to make an informed decision.

An effective drain cleaning program is a vital component of your Chicago business’s overall maintenance strategy. By assessing your drain cleaning needs, developing a preventive maintenance plan, and choosing the right plumbing service, you can ensure the longevity and reliability of your plumbing system. Remember, regular maintenance is far more cost-effective than dealing with major drain issues and repairs. Invest in professional drain cleaning services and protect the health and functionality of your business.

Plumbing for Home Renovations in Chicago

Plumbing for Home Renovations in Chicago

Whether you’re remodeling your kitchen, bathroom, or entire home, understanding the plumbing aspects is crucial to ensure a successful and hassle-free renovation.

Why Plumbing Matters in Home Renovations

Plumbing is an essential component of any home renovation project. It involves the installation, repair, and maintenance of water supply and drainage systems. Neglecting plumbing can lead to various issues such as leaks, burst plumbing pipe emergencies, or inefficient water flow, which can dampen your renovation experience.

Choosing Reliable Plumbers

To ensure your home renovation project in Chicago goes smoothly, it’s vital to hire a reliable plumber in your area. Consider the following factors when selecting a contractor:

  • Experience: Look for plumbing professionals with experience in residential renovations.
  • License and Insurance: Ensure the plumber holds a valid license and has proper insurance coverage for liability and workers’ compensation.
  • References: Ask for references or check online reviews to gauge the plumbers reputation.
  • Estimates: Obtain detailed estimates from multiple plumbers to compare pricing and services.
  • Communication: Choose a plumber who communicates effectively and understands your renovation goals.

Understanding Chicago Plumbing Codes and Permits

Before starting any plumbing work, it’s essential to familiarize yourself with the plumbing codes and regulations in Chicago. These codes ensure the safety and functionality of plumbing systems within the city. Additionally, certain plumbing projects may require permits. Hiring a licensed plumbing contractor will ensure compliance with all necessary codes and permits.

Key Plumbing Considerations for Home Renovations

Upgrading Water Supply Lines

When renovating, it’s wise to consider replacing your lead water lines. Older homes may have outdated or corroded pipes that can cause issues with water pressure and quality. Upgrading to newer materials like copper or PEX can improve the overall performance and longevity of your plumbing system.

Installing Energy-Efficient Fixtures

Save both water and money by installing energy-efficient fixtures during your home renovation. Choose low-flow toilets, showerheads, and faucets that reduce water consumption without compromising functionality. These fixtures not only benefit the environment but also lead to long-term cost savings.

Adding Additional Bathroom or Kitchen Sink

If your home renovation includes creating new bathrooms or expanding your kitchen, adding additional sinks may be necessary. Consult with a plumbing professional to determine the best location and layout for the new sink, ensuring proper water supply and drainage connections.

Upgrading Drainage Systems

During a renovation, it’s an ideal time to assess and upgrade your drainage systems. Proper drainage is essential to prevent water damage and ensure the efficient removal of wastewater. Consider installing floor drains in bathrooms, laundry rooms, and basements, especially in areas prone to flooding.

Waterproofing in Basements

Chicago’s climate and occasional heavy rainfall make basement waterproofing a crucial consideration for home renovations. Prevent water seepage and potential mold growth by installing French drains, sump pumps, and waterproofing membranes. Speak with a plumber experienced in basement flood prevention systems to determine the best solutions for your specific needs.

a family attempting diy plumbing in chicago.

Unless you have plumbing expertise, it’s best to leave major plumbing tasks to professionals. Attempting DIY plumbing can lead to costly mistakes and preventable issues.

Common Plumbing Mistakes to Avoid

While renovating your home, it’s important to be aware of common plumbing mistakes and avoid them:

  • DIY Plumbing: Unless you have plumbing expertise, it’s best to leave major plumbing tasks to professionals. Attempting DIY plumbing can lead to costly mistakes and preventable issues.
  • Ignoring Leak Detection: Don’t ignore signs of leaks, such as damp walls, musty odors, or water stains. Timely leak detection and repairs can save you from extensive damage and expensive repairs in the future.
  • Incorrect Pipe Sizing: Proper pipe sizing is crucial to maintain optimal water pressure and prevent issues like poor drainage or inconsistent water flow. Contact a nearby plumber in Chicago to determine the correct pipe sizing for your renovation project.
  • Neglecting Ventilation: Adequate ventilation is essential for plumbing systems to function properly. Ensure your renovation plans include proper venting to prevent a range of plumbing issues, including sewer gas odors.

As you embark on your home renovation journey in Chicago, prioritizing plumbing considerations will set the foundation for a successful project. By hiring experienced plumbers, staying compliant with local codes, and making informed decisions about upgrades and installations, you’ll create a renovated space that functions flawlessly for years to come. Remember to avoid common plumbing mistakes and always consult professionals when in doubt.

All You Need to Know About Plumbing Stacks: A Detailed Explanation

All You Need to Know About Plumbing Stacks

Below we will cover all the essential information you need to know about plumbing stacks. Whether you are a homeowner, a renter, or a plumbing enthusiast, understanding plumbing stacks is crucial for maintaining a healthy and functional plumbing system.

What is a Plumbing Stack?

A plumbing stack, also referred to as a soil stack or a waste stack, is an essential component of a building’s plumbing system. It plays a vital role in transporting wastewater and sewage from different fixtures in a building to the main sewer or septic tank. Essentially, a plumbing stack is the vertical pipe that connects all the drainage pipes in a house or building.

The Function of a Plumbing Stack

The primary function of a plumbing stack is to provide a passage for waste and wastewater to flow out of a building efficiently. It serves as a vent pipe and a drain pipe simultaneously. Here’s how it works:

  • Drainage: When water is used in any plumbing fixture, such as a sink, toilet, or shower, it flows through the fixture’s drainpipe and enters the plumbing stack.
  • Venting: As wastewater enters the plumbing stack, air is required to prevent the formation of a vacuum. The plumbing stack serves as the vent pipe, allowing air to enter and equalize pressure within the drainage system.
  • Transportation: Once the wastewater reaches the plumbing stack, it begins its descent towards the main sewer or septic tank. Gravity aids in the movement of wastewater, guiding it through the vertical plumbing stack and out of the building.

Types of Plumbing Stacks

There are two main types of plumbing stacks commonly found in residential and commercial buildings:

  • Soil Stacks: Soil stacks are responsible for transporting solid and liquid waste from toilets. They are designed to handle larger volumes of waste and are usually larger in diameter compared to waste stacks.
  • Waste Stacks: Waste stacks are responsible for transporting liquid waste from fixtures such as sinks, bathtubs, and showers. They carry relatively less solid waste compared to soil stacks and are generally smaller in diameter.

Both soil stacks and waste stacks play a crucial role in maintaining a functional plumbing system.

a plumbing stack replacement.

The stack pipe is the main vertical pipe that extends from the basement or ground floor to the roof of the building. It connects all the different fixtures’ drainpipes within the building.

The Components of a Plumbing Stack

A plumbing stack consists of several components that work together to ensure the smooth flow of wastewater and ventilation in a building. Here are the key components:

  • Stack Pipe: The stack pipe is the main vertical pipe that extends from the basement or ground floor to the roof of the building. It connects all the different fixtures’ drainpipes within the building.
  • Branch Vent: Branch vents are secondary vent pipes connected to individual fixtures. They provide additional ventilation and prevent traps from being siphoned.
  • Fixture Drain Pipes: These pipes connect the various plumbing fixtures, such as toilets, sinks, bathtubs, and showers, to the stack pipe.
  • Sanitary Tee: A sanitary tee is a specific type of fitting used to connect fixture drain pipes to the stack pipe. It allows wastewater to flow into the stack while also providing a vent connection.
  • Vent Flashing: Located on the roof, the vent flashing prevents water from entering the plumbing stack while allowing air to escape.

The Importance of Proper Ventilation

Proper ventilation within a plumbing system is crucial for a few reasons:

  • Preventing Trap Siphonage: Ventilation prevents siphoning of water from traps, which could lead to the release of foul odors and the potential for harmful gases, such as sewer gas, to enter the building.
  • Preventing Pressure Imbalances: Ventilation equalizes pressure within the plumbing system, preventing slow drainage, gurgling sounds, and the potential for clogs.
  • Increasing Plumbing System Efficiency: Adequate ventilation improves the efficiency and effectiveness of the plumbing system, ensuring smooth wastewater flow and minimizing the risk of backups and overflows.

Signs of Plumbing Stack Issues

Identifying potential issues with your plumbing stack is crucial for addressing them before they escalate. Here are some common signs of plumbing stack problems:

  • Gurgling Sounds: If you hear gurgling sounds coming from your drains or toilets, it could indicate a problem with your plumbing stack.
  • Slow Draining: If water is slow to drain from your sinks, bathtubs, or showers, there may be an obstruction in your plumbing stack.
  • Unpleasant Odors: Foul odors emanating from your drains could be a sign of a plumbing stack issue, such as a dried-out trap or a ventilation problem.
  • Backups and Overflows: If wastewater starts backing up into your sinks, bathtubs, or toilets, it is essential to address the issue quickly.

Maintaining and Fixing Plumbing Stack Issues

To ensure your plumbing stack remains in optimal condition, regular maintenance is vital. Here are some maintenance tips:

  • Prevent Clogs: Use drain covers and avoid flushing or draining objects that can cause blockages in your plumbing stack.
  • Proper Ventilation: Ensure your plumbing stack is properly vented to prevent pressure imbalances and siphoning.
  • Regular Inspections: Schedule periodic inspections by a professional plumber to identify and address any potential plumbing stack issues.
  • Prompt Repairs: If you notice any signs of plumbing stack problems, such as slow draining or unusual sounds, contact a professional plumber to address the issue promptly.

In Conclusion

A plumbing stack is a critical component of any building’s plumbing system. Understanding its function, types, and importance of proper ventilation allows you to maintain a healthy and functional plumbing system. By being aware of the signs of plumbing stack issues and following proper maintenance practices, you can ensure the longevity and efficiency of your plumbing stack for years to come.

Troubleshooting Plumbing Issues in Chicago: Kitchen and Bathroom Edition

Troubleshooting kitchen and bathroom Plumbing Issues in Chicago

Bathrooms and kitchens are the two rooms in your home where the bulk of your plumbing problems are likely to happen. As RGroup Management explains, that is because you typically don’t go a day without using these rooms. Bathrooms are essential for sanitation, and kitchens are vital for preparing meals.

Since these two activities require a lot of water, it is normal that many of your home’s plumbing issues will happen in your kitchen and bathroom. But plumbing problems in the kitchen and bathroom should not be a big deal if you discover them on time.

The real problem is when you don’t know a plumbing problem exists or cannot determine its cause. Trying to fix a plumbing malfunction without first uncovering the root of the problem often results in a massive waste of money and time.

Any solutions you apply to the problem will only be temporary, and the issue will eventually worsen with time. That is why it is essential to know how to troubleshoot different plumbing problems in your bathroom or kitchen.

In this post, we discuss the common bathroom and kitchen plumbing issues Chicago homeowners often have to deal with and the steps for finding the real cause of the problems.

Toilet won’t flush

If a toilet doesn’t flush when you push the lever, do the following:

  • Check if the water pressure is low or if the water supply to the tank has not been cut off.
  • Open the tank and check if the flush lever is connected; pushing the flush handle should lift the lever.
  • If water is running into the bowl but it is not draining, your toilet drain may be blocked.

If your toilet drain is blocked, you should have a professional plumber look at it.

The toilet is draining slowly or backing up

If the toilet is backing up or draining slowly, you have a blockage inside your sewer line or in the toilet drain. To determine the cause of the problem, follow these steps:

  • Check if other drains are working. If they are, the blockage is not in your sewer line.
  • If there are small children in the home, ask them if they flushed something into the toilet.
  • Check for blockages near the toilet drain opening.
  • Try to remove the clog with a wire (if it is a piece of fabric) or unclog the toilet with a plunger.

If this doesn’t work, contact a professional plumber.

Toilet is running

A running toilet will constantly discharge water from the tank into the bowl. This problem will waste a lot of water. To find the cause, do this:

  • Open the tank and check if the flapper chain is slack, too short or caught on something.
  • Check if the flapper is faulty by lifting it gently. If the water stops running, your flapper is bad.
  • Check the float arm; lift or push it down to see if the water stops or starts running.
  • Check that the fill valve has not become brittle and dirty. Clean or replace it, if necessary.
  • Replace any damaged components inside the tank or get a professional plumber.
a person repairing a garbage disposal.

Press the garbage disposal’s safety reset button and rerun the unit. If it runs and shuts off again, you may have a jammed impeller.

Garbage disposal is not working

If the garbage disposal is not working at all or it is humming but not working, follow these steps to get to the root of the problem:

  • Check the electrical connections to make sure the unit is connected to power.
  • Check if the circuit breaker is not in the “off” position and you don’t have a blown fuse.
  • Press the garbage disposal’s safety reset button and rerun the unit. If it runs and shuts off again, you may have a jammed impeller.
  • If the impeller is jammed insert an Allen key into the bottom of the unit to turn the impeller manually.

If this doesn’t work, your garbage disposal is blocked, or the motor has burned out. Contact your plumber and have them look at the problem.

Low water pressure

If you are struggling with low water pressure in your home, take these steps to find the cause of the problem:

  • If the issue is isolated to a faucet or showerhead, the faucet or showerhead could be blocked.
  • Dismantle and clean the fixture or soak it in vinegar to dissolve any buildup.
  • Low water pressure can be caused by a severe crimp in nearby piping. If water pressure is normal across the rest of the home, you may suspect this.

If the entire house suffers from low water pressure, there could be a blockage or leak in your main water line that needs repair.

If the problem also affects your neighbors, it could be from the city water supply.

To conclude, plumbing issues are among the most damaging problems in homes.

Understanding the Science Behind Toilet Clogs and How to Avoid Them

Understanding the Science Behind Toilet Clogs and How to Avoid Them

Plumbing networks are among the largest systems found in homes. In addition, according to Fireside Management, an average-sized modern house will have hundreds of feet of pipes that make up its plumbing. This vast system is necessary to bring fresh water into the home and remove used water.

But with so many pipes, valves, joints and fixtures making up the home’s plumbing, there are bound to be numerous opportunities for problems in the system. That is why plumbing issues are among the most common problems homeowners face.

Top of the list of these problems are clogs in the drainage system, and perhaps the worst clog is the toilet clog. A clogged toilet can disrupt the daily routine of your entire family, and if the problem is bad enough, it can cause massive damage to your home.

Why do toilet clogs happen, and are there steps you can take to prevent them? To help you understand this problem, this post will explain the science behind the formation of clogs in your toilet, as well as simple steps to slow down or prevent these processes.

The simple science of toilet clogs

When it comes to toilet clogs in your home, three scientific principles are at work.

Density

When an object is immersed in water, it will displace the same volume of water as its volume. If the weight of that displaced water is greater than the object’s weight, the object will float. But if its weight is greater than the weight of the water, the object will sink.

That explains why some objects float in water while others – which may be smaller – sink. Since waste matter contains different materials with different weights, some of these materials will float while others will sink. That can disrupt the flow of the water through your drain pipes.

The law of hydrodynamics

Hydrodynamics deals with the motion of fluids or the motion of objects when they are immersed in fluids. Water moves in a certain way when it flows through your drain lines, but this pattern is disrupted when solids or semi-solids are inside the wastewater.

When water encounters a solid material, it will try to flow over or around it. That can lead to more solid objects being deposited around the location of the first one, leading to a blockage in the path of the water. That is a common problem in the toilet drain since toilets handle a lot of solid waste.

Adhesion and cohesion

This refers to the tendency of substances to either stick together or stick to nearby surfaces. Adhesion is when substances stick to surfaces, while cohesion is when similar substances stick together. Adhesion and cohesion play a role in the formation of toilet clogs.

Adhesive substances stick to the sides and bottom of drainpipes, making them uneven and slowing the movement of wastewater. That increases the rate of buildup inside the pipes. Cohesive substances clump together to obstruct the pipe channel, making it hard for wastewater to pass through.

a woman cleaning her toilet.

Cleaning your toilet regularly makes it easier to spot problems in their early stages.

How to avoid toilet clogs

From the explanations above, it is clear that the number one cause of toilet clogs is the presence of solid and semi-solid materials in wastewater. To prevent toilet clogs, you must take steps to make it easier for these materials to flow from your toilet into your main sewer line.

Here is how you can do that:

Only human waste and toilet paper

Nothing but water, toilet paper and human waste should go into your toilet. Never flush so-called flushable items like wipes, paper towels, feminine hygiene products, latex condoms, diapers, dental floss and other items into your toilet.

Use single-ply toilet paper

Single-ply toilet paper will not clog your toilet because it disintegrates quickly and is sewage/septic-friendly. Double-ply toilet paper, on the other hand, is more comfortable but doesn’t dissolve as fast as single-ply.  Double-ply toilet paper increases the risk of toilet clogs.

Flush your toilet twice

Low-flow toilets increase the risk of toilet clogs. That is because they don’t use enough water to allow waste to flow freely through the pipes. To solve this problem, you may need to flush your toilet twice if you think the waste has not been completely removed.

Clean your toilet regularly

Cleaning your toilet regularly makes it easier to spot problems in their early stages. If you have had issues with toilet clogs before or suspect one could be forming, fill a 5-gallon bucket halfway with water and pour it into the toilet bowl. Make sure to pour the water fast.

Lastly, periodic inspection of your toilet and entire plumbing system by a professional plumber will help to keep toilet clogs at bay.

How to Properly Maintain Restaurant Kitchen Plumbing

How to Properly Maintain Restaurant Kitchen Plumbing

When it comes to running a successful restaurant, there are many factors to consider, from the quality of the food to the service provided. However, one aspect that is often overlooked is the maintenance of the restaurant kitchen plumbing. Properly maintaining the plumbing system in a restaurant is crucial for a number of reasons, including ensuring the health and safety of both customers and staff, maintaining a clean and hygienic environment, and avoiding costly and disruptive plumbing issues. Here we will explore the importance of properly maintaining restaurant kitchen plumbing and provide some useful tips on how to do so.

Why Proper Maintenance is Essential

Restaurant kitchen plumbing is subject to a lot of wear and tear due to the high volume of water usage, as well as the food particles and grease that can accumulate over time. This makes regular maintenance essential to prevent plumbing problems that can disrupt operations and lead to unsanitary conditions. By properly maintaining the plumbing in your restaurant’s kitchen, you can avoid the following issues:

  • Clogged drains: Food particles, grease, and other debris can accumulate in the drains, leading to clogs that can cause backups and unpleasant odors. Regular maintenance can help prevent these clogs and keep the water flowing smoothly.
  • Leaks: Leaking pipes can not only waste water but also cause damage to the surrounding areas. Promptly addressing any leaks can help prevent water damage and mold growth.
  • Foul odors: A kitchen with poor plumbing maintenance can often develop foul odors, which can be off-putting to both customers and staff. Regular cleaning and maintenance can help eliminate these odors and create a more pleasant environment.
  • Bacterial growth: Without proper maintenance, bacteria can thrive in the kitchen plumbing system, posing a risk to the health and safety of both customers and staff. Regular cleaning and maintenance can help prevent the growth of harmful bacteria.
a restaurant kitchen grease trap being cleaned out and maintained properly.

Make sure to install grease traps in the appropriate locations and clean them regularly to ensure they are functioning effectively.

Tips for Properly Maintaining Restaurant Kitchen Plumbing

Now that we understand the importance of proper maintenance, let’s explore some practical tips for keeping your restaurant kitchen plumbing in top shape:

Regularly clean the drains

Food particles, grease, and other debris can easily accumulate in the drains, leading to clogs and unpleasant odors. To prevent this, it’s important to regularly clean the drains using a drain cleaner or a mixture of baking soda, vinegar, and hot water. Be sure to follow any specific instructions provided by the manufacturer of the drain cleaner.

Install and maintain grease traps

Grease traps are essential for restaurants to prevent grease from entering the plumbing system and causing clogs. Make sure to install grease traps in the appropriate locations and have the grease traps cleaned regularly to ensure they are functioning effectively.

Educate staff on proper usage

Train your staff on the proper usage of the kitchen plumbing fixtures to prevent any unnecessary strain or damage. This includes teaching them how to properly dispose of food waste and grease, as well as using the garbage disposal correctly.

Schedule regular inspections

It’s important to schedule regular inspections of your restaurant kitchen plumbing system to catch any potential issues before they escalate. Hire a professional plumber to conduct thorough inspections and address any problems that may arise.

Promptly address leaks

If you notice any leaks in your restaurant kitchen plumbing, it’s crucial to address them promptly. Even small leaks can lead to significant water damage and mold growth if left untreated. Contact a plumber to fix the leaks as soon as possible.

Maintain proper ventilation

In addition to maintaining the plumbing fixtures, it’s also important to ensure proper ventilation in your restaurant kitchen. Adequate ventilation helps prevent the buildup of moisture and reduces the risk of mold growth.

Follow local regulations and guidelines

Every region may have specific regulations and guidelines regarding restaurant kitchen plumbing. Make sure to familiarize yourself with these regulations and ensure that your plumbing system complies with them.

Properly maintaining restaurant kitchen plumbing is essential for ensuring a safe, clean, and efficient working environment. By following the tips provided in this article, you can minimize the risk of plumbing issues and create a positive dining experience for your customers. Remember, regular maintenance and inspections are key to preventing costly and disruptive plumbing problems. Invest the time and effort into maintaining your restaurant kitchen plumbing, and you’ll reap the rewards in terms of improved efficiency, reduced downtime, and enhanced customer satisfaction.

How to Detect and Fix a Leaking Outdoor Faucet

How to Detect and Fix a Leaking Outdoor Faucet

A leaking faucet not only wastes water but also can lead to costly damage if left unattended. By learning how to detect and fix a leaking outdoor faucet, you can save water, money, and prevent further damage to your property. Below we will provide step-by-step instructions on how to identify and resolve a leaking outdoor faucet.

Understanding Outdoor Faucet Leaks

Before we dive into the detection and fixing process, it is important to understand the common causes of outdoor faucet leaks. Outdoor faucets, also known as hose bibs or water spigots, are prone to leaks due to various reasons including:

  • Worn-out washers or O-rings
  • Cracked or damaged pipe
  • Loose fittings
  • Freezing and thawing

Identifying the cause of the leak will help you determine the appropriate solution for fixing it.

Step 1: Shut Off the Water Supply

The first step in fixing a leaking outdoor faucet is to shut off the main water supply to your home. Locate the shutoff valve near the faucet and turn it clockwise to close it. This will prevent any further water flow and allow you to work on the faucet without getting soaked.

Step 2: Inspect the Faucet

Once the water supply is turned off, closely inspect the faucet for any visible signs of leakage. Check for dripping water, pooling water around the base, or any unusual dampness. Also, examine the handle, spout, and connections for any cracks or damage.

Step 3: Check the Washers and O-Rings

The most common cause of a leaking outdoor faucet is worn-out washers or O-rings. These rubber components can deteriorate over time and cause leaks. To check the condition of the washers and O-rings, follow these steps:

  1. Turn the faucet handle counterclockwise to remove it.
  2. Using a wrench, unscrew the packing nut located below the handle.
  3. Remove the stem assembly from the faucet.
  4. Inspect the washers and O-rings for any signs of damage or wear.
  5. If necessary, replace the washers and O-rings with new ones of the appropriate size.

Make sure to apply plumber’s grease or silicone lubricant to the new washers and O-rings before reassembling the faucet.

Step 4: Tighten Loose Fittings

If the leaking persists even after replacing the washers and O-rings, there may be loose fittings causing the problem. Use a wrench or pliers to tighten any loose connections between the faucet, pipe, and hose.

Step 5: Insulate the Faucet

In regions with colder climates, freezing and thawing can cause outdoor faucets to leak. To prevent this, it is essential to insulate the faucet before winter arrives. Use foam insulation sleeves or covers specially designed for outdoor faucets to protect them from freezing temperatures.

Step 6: Test the Faucet

Once you have completed the necessary repairs and insulation, it’s time to test the faucet for any remaining leaks. Turn on the water supply and check for any signs of leakage. If the faucet is still leaking, double-check the washers, O-rings, and fittings to ensure everything is tightened correctly.

Fixing a leaking outdoor faucet is a relatively simple task that can save you both water and money. By following the step-by-step instructions in this guide, you can easily detect and fix a leaking outdoor faucet. Remember to regularly inspect your outdoor faucets to catch any leaks early and prevent further damage. By taking prompt action, you can ensure the longevity of your outdoor faucets and conserve water for a greener future. If all else fails you can contact your local plumber to assist in repairing your outdoor water faucet.

Help! My Garbage Disposal is Jammed: How to Fix It

how to fix a jammed garbage disposal

Dealing with a jammed garbage disposal can be a frustrating and inconvenient experience, but fear not, we are here to help you resolve this common household issue. Below we will provide you with step-by-step instructions on how to fix a jammed garbage disposal and get your kitchen back to full functionality. Whether you are a first-time homeowner or a seasoned DIY enthusiast, our guide will walk you through the process in a clear and concise manner.

Understanding the Problem

Before diving into the troubleshooting steps, it is essential to understand why your garbage disposal might be jammed. The most common reasons for a jammed garbage disposal include:

  • Foreign objects such as utensils or small non-food items getting stuck
  • Excessive food waste or improper use
  • Lack of maintenance and cleaning

By identifying the underlying cause of the jammed disposal, you can better address the issue and take preventive measures to avoid future problems.

Gathering the Tools

Before attempting to fix your jammed garbage disposal, gather the necessary tools to ensure a smooth troubleshooting process. Here are the tools you will need:

  • Hex wrench or Allen wrench
  • Pliers
  • Flashlight
  • Baking soda and vinegar (optional, for cleaning)

Having these tools readily available will save you time and frustration during the repair process.

plumbing tools for fixing a jammed garbage disposal.

Before attempting to fix your jammed garbage disposal, gather the necessary tools to ensure a smooth troubleshooting process.

Step-by-Step Guide to Fixing a Jammed Garbage Disposal

Follow these steps to fix your jammed garbage disposal:

1. Safety First

Always prioritize safety when working with a garbage disposal. Make sure to:

  • Turn off the power: Locate the circuit breaker or fuse connected to your garbage disposal and turn it off to prevent any accidental activation.
  • Disconnect the power cord: Unplug the garbage disposal from the power source to ensure no electrical current is flowing.

2. Identify the Jam

Inspect the disposal to determine the location and cause of the jam. Use a flashlight to have a clear view inside the unit. Look for any foreign objects or excessive food waste that might be obstructing the blades.

3. Use a Hex Wrench

Locate the hex hole at the bottom of the garbage disposal unit. Insert the hex wrench into the hole and rotate it back and forth to free the impellers or flywheel. This manual turning motion should help dislodge the jam.

4. Reset the Disposal

After freeing the impellers, locate the reset button on the bottom of the garbage disposal unit. Press the button to reset the motor. This step is especially important if the disposal tripped a circuit breaker or shut off during the jamming incident.

5. Test the Disposal

Once you have completed the above steps, it’s time to test your garbage disposal. Reconnect the power supply and turn on the water faucet. Slowly run water into the sink and activate the disposal. Observe the operation to ensure it is now functioning properly.

6. Clean and Maintain

Prevent future jams by practicing good maintenance and cleaning habits. Here are some tips to help:

  • Regularly run cold water while operating the disposal to flush away food waste.
  • Avoid putting non-food items, fibrous materials, or grease down the disposal.
  • Periodically clean the disposal by pouring a mixture of baking soda and vinegar down the drain. Let it sit for a few minutes before rinsing with hot water.

Following these maintenance practices will extend the lifespan of your garbage disposal and minimize the chances of future jams.

Fixing a jammed garbage disposal may seem like a daunting task, but with the right knowledge and tools, it can be a straightforward process. By following our step-by-step guide, you can quickly resolve the issue and restore proper functionality to your kitchen sink. Remember to prioritize safety, identify the jam, use the appropriate tools, and perform regular maintenance to prevent future problems. If all else fails, we recommend calling a local plumber to help assist you. We hope this article has been helpful in assisting you with fixing your jammed garbage disposal.

How Often Should You Complete a Grease Trap Cleaning in Chicago?

How Often Should You Complete a Grease Trap Cleaning in Chicago

Grease traps are mandatory for Chicago businesses that produce a lot of used grease. That includes commercial kitchens, restaurants, and establishments where food is prepared in large quantities. Grease traps are necessary for the safety of the city’s vital infrastructure.

But grease traps do not only exist to protect Chicago’s sewer systems from the risk of fatbergs. Fatbergs are rock-hard masses that form inside the sewers when grease fuses with non-biodegradable waste materials, such as wet wipes, cloth, sanitary napkins, cotton buds, etc.

Fatbergs are a huge problem for cities; they are as strong as concrete and can grow to enormous sizes inside the sewer system. These hard masses cause blockages that can result in severe city-wide flooding. Specialized equipment is usually required to remove a fatberg, notes the experts at Rising Tide Property Management.

Grease traps also protect a business’s sewer lines from the risk of damage from clogs caused by deposits of FOG (fats, oils, and grease). Along with non-biodegradable materials that sometimes find their way into the pipes, FOG is the leading cause of sewer line damage for businesses.

However, these problems can be avoided by installing a grease trap between your kitchen drains and sewer lines. A grease trap intercepts and retains the grease inside wastewater, denying it the chance to enter the sewer system, which can cause problems for both the business and the city.

One unavoidable outcome of this system is that grease traps inevitably fill up with grease. When this happens, the device loses its functionality. Instead of trapping the grease in wastewater, it allows grease to flow into the sewer line and onward into the city sewer system.

That is why it is vital to clean your grease trap periodically. How often should you do this? What are Chicago City’s regulations for grease trap cleaning? This post will answer these questions.

a grease trap pumping taking place in a chicago restaurant.

Grease traps are to be cleaned every 90 days (every three months) or when they are 25% full, depending on which comes first.

How often should you clean your grease trap?

As per EPA regulations, which also apply to Chicago, these are the guidelines for grease trap cleaning:

The 25% rule

Grease traps are to be cleaned every 90 days (every three months) or when they are 25% full, depending on which comes first. This rule only specifies the minimum requirement. If the grease trap is small or a lot of grease is generated in your establishment, you may want to clean your grease trap monthly.

Every 14 days

The above rule applies to outdoor grease traps only. Small indoor grease interceptors must be cleaned every 14 days, the maximum allowed period. Clean the receptacle more frequently if the grease trap is small or fills up very fast.

Proper record-keeping

In addition to cleaning the grease trap, maintain detailed records of the grease trap cleaning schedule. The details expected in the records include the cleaning date, the cleaning method used and the contractor’s name.

Regular grease trap inspections

City officials are mandated to visit and inspect establishments that have grease traps. These visits are impromptu, and they are done to assess the grease trap, take careful measurements of grease levels, and ensure compliance with the applicable rules and regulations.

Other guidelines

These additional guidelines apply. To minimize the rate of grease buildup and the risk of grease trap malfunction, never dump grease directly into the drain, scrap leftovers from plates and bowls, and recycle grease.

Why is grease trap cleaning important?

Avoid fines and penalties

Businesses that fail to follow these guidelines risk hefty fines from city health officials and the temporary or permanent closure of their premises.

Protect your business

Bad odors in a kitchen or restaurant floor are not conducive to customers’ dining experiences. A neglected grease trap will leak foul odors into your business premises.

Protect your customers

Grease traps breed bacteria. If the device is not cleaned on time, it can overflow, and bacteria may find their way into food, causing food poisoning.

Avoid grease tank damage

If it stays too long inside the tank, grease will release hydrogen sulfur gas, which in turn becomes sulfuric acid that can end up corroding the metal parts of the tank.

Prevent sewer line problems

Grease trap neglect increases the risk of clogs inside your sewer line. If the city sewers are also affected, you will pay heavily to fix them.

Save money

By having your grease trap cleaned out at the right time and in the recommended manner helps you save money and avoid the costly consequences listed above.

To conclude, EPA data shows that the USA experiences around 40,000 sewer overflows yearly, and 5,000 of these overflows are due to FOGs (fat, oil and grease). You can avoid these problems if you take a few simple precautions.

7 Ways to Better Protect Your Home Against Flood Damage

7 Ways to Better Protect Your Home Against Flood Damage

Water damage is the most common and devastating problem that American homeowners face. In 2023 alone, every single day, there were around 14,000 reported cases of water damage in homes, with the average insurance claim for each one standing at $11,605.

A significant number of these events were caused by flooding, which is a huge problem. Up to 99% of all US counties experienced flooding in some years. 98% of US homes are also expected to suffer water damage due to basement flooding at least once.

These statistics show us that flooding is a major problem for US homeowners, and almost no home is exempt from this risk. That is because flooding incidents in the property are not always caused by rain but also by the home’s plumbing, faucets, sprinkler systems and leaky pipes.

In other words, according to the Ratner Property Management team, your home does not have to be in a flood-prone area to experience flood damage. Furthermore, climate change is causing such monumental shifts in weather patterns that we are seeing massive natural disasters, like flooding, in areas where they didn’t use to happen.

What can you do to protect your home from water damage caused by flooding? This post will explain seven effective steps for flood-proofing your home. Following these tips will help you avoid the huge burden that flooding incidents can place on your finances.

a french drain installation is a good way to prevent flooding in your home.

If water consistently pools in one part of your yard and you have tried to solve the issue by grading the land, you may need to install a French drain.

7 ways to protect your home from flood damage

Assess your level of flood risk

Homes in areas with high flood risk need more flood protection measures than those in low-risk areas. High-flood risk locations typically include low-lying areas, flood plains, and homes close to a water body. To know your home’s level of exposure, check your area’s flood map; you can access it for free on the Federal Emergency Management Agency website. The rest of the steps in this post depend on the result of your research.

Keep downspouts and gutters clear

Poorly maintained drains and gutters increase your home’s exposure to the risk of flooding. If gutters and downspouts are discharging water on the walls of your building or near the base of the house, there is a chance that some of that water will find its way into your home. To prevent this, it is essential to keep gutters and downspouts free of debris and ensure they are not in a state of disrepair.

Fix grading issues in your yard

The grade determines the direction in which water will flow in your yard when it rains. You have grading issues if water flows toward your house instead of away from it. This problem can cause a water pool at the base of your building. Some of that water will penetrate the basement. To solve the problem, look for low-lying areas or depressions around your yard and fill them with soil.

Maximize drainage with a French drain

If water consistently pools in one part of your yard and you have tried to solve the issue by grading the land, you may need to install a French drain. A French drain is an underground channel for solving drainage problems in land prone to waterlogging. The great thing about French drains is the system is underground, and the aesthetics of your yard are not impaired.

Create a flood barrier

Flood barriers are designed to stop or slow the advance of floodwaters. There are many types of flood barriers, berm, sandbags, etc. The advantage of sandbags is they are easier to make. You can remove them when not needed. A berm, on the other hand, takes time to construct and is permanent. The advantage of a berm is it can be designed as part of your landscaping to protect your home and improve its aesthetics.

Create a swale or dry pond

A swale is an open channel with gently sloping sides that is used to capture water and direct it away from a home. Swales often have grass growing inside them to prevent erosion and make water penetrating the soil easier. A dry pond, on the other hand, is a large depression that is used to collect and hold water on a property. It acts as a reservoir for runoff water.

Install a sump pump

You need a sump pump even if your home’s flood risk is minimal. A sump pump is your home’s last defense against flood damage. The sump pump will protect your home if a flood happens despite your flood-protection measures. But to get the maximum benefit from a sump pump, you must maintain it regularly. It is also vital to have a sump pump backup battery system installed.

To conclude, before deciding on which flood-protection measure to adopt, it is essential that you talk to an expert. Flood protection measures can be expensive, so you want to be sure that whichever option you choose is the best for your home.