Author Archives: Chicago Plumbing Experts

Why Chicago Homes Need Regular Drain Cleaning (and How Neglect Leads to Major Plumbing Failures)

a plumber cleaning a drain in chicago

Every year in Chicago, homeowners and businesses of all kinds are faced with a constant stream of drainage issues in their buildings. From minor clogs that are easily fixed to major drainage problems that result in huge financial losses, many rely on local rental support with Compass to help manage and address these challenges.

Where do these drainage problems come from? Apart from the common problems that all modern drainage systems are subject to, drainage systems in Chicago are exposed to diverse problems that place enormous pressure on their performance and longevity. These problems include:

  1. Chicago’s extreme climate

Chicago’s weather often alternates between two extremes: heavy rainfall and subzero winters characterized by heavy snow and chilly winds. During periods of intense rainfall, street and basement flooding become a common phenomenon, as rainwater strains city infrastructure, often with dire consequences for private drainage systems.

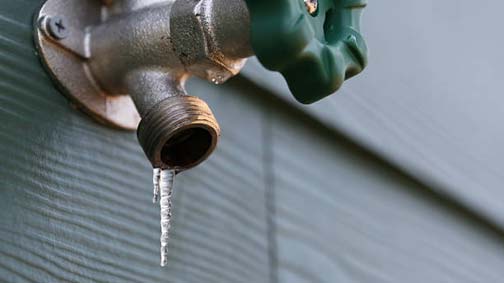
Winter also brings its own set of drainage problems to the city. Subzero temperatures cause the contents of drainage pipes (fats, grease, oil, soap scum, etc.) to congeal, leading to more drain clogs and sewer backups. Ground movements due to freeze-thaw cycles also increase the risk of drainage pipe misalignment.

  1. Chicago’s overburdened sewer system

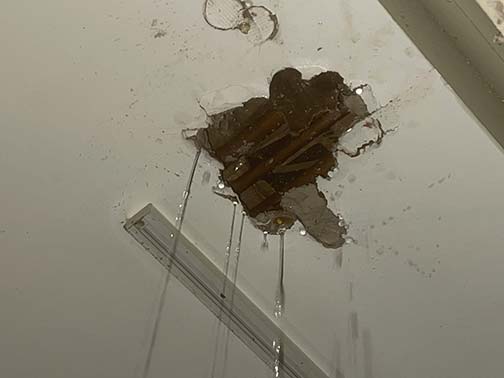
Much of Chicago relies on a combined sewer system. This system serves the dual purpose of carrying both rainwater and sewage. Under conditions of intense rainfall, the system may become overwhelmed with runoff and fail. The consequence of that failure is an increase in the number of drainage problems in Chicago homes.

This problem is exacerbated by the city’s swampy foundations, which means that in most parts of Chicago, the water table is quite high. As a result, water does not absorb into the ground quickly, and in periods of heavy rainfall or snowmelt, flash floods and basement flooding can become a real issue.

  1. Misuse of homes’ drainage systems

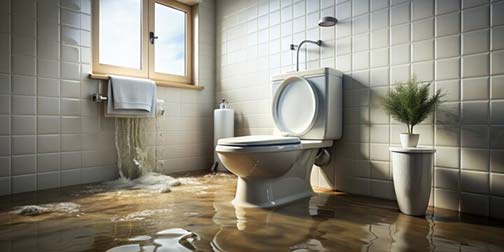
The above problems are aggravated by the misuse of the home’s drainage systems. A home’s occupants may use the drainage like a waste bin. They might dispose of so-called flushable items like paper napkins & wipes, diapers, etc., in the toilet, with the result that these items clog the drainpipes and cause major drain emergencies in the home.

The other problem is the dumping of fats, oils, and grease (FOG) into drains. Once inside the pipes, these materials attract debris, accelerating the rate of buildup within the system. The same process occurs with starchy foods, fibrous vegetables, eggshells, coffee grounds, and other types of food waste that end up in the drainage system.

The intersection of these problems is why Chicago homes always seem to be plagued by an epidemic of drainage problems. But what can you do about it? Is there a way to protect your most valued asset -your home – from the risk of damaging drainage problems? Yes, there is.

Protecting your Chicago home from drainage failures

The following strategies will help you minimize the risk of drainage problems in your home.

  1. Watch what you flush

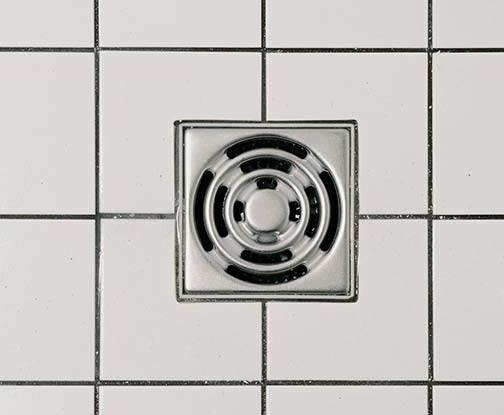
Begin by acting on what is within your control. Stop dumping fats, oils, or grease, and harmful food scraps into your drains. The only things that should enter your toilet are human waste, toilet paper, and water. To further stop debris from entering your drains, install strainers on sink and shower drains. Lastly, educate your household on the dangers of misusing the drains and place trash cans in strategic areas in your home.

  1. Inspect your drains yearly

To help you stay ahead of problems in your drainpipes, have a professional plumber conduct a sewer camera inspection every year. Sewer camera inspections are the most effective non-invasive method for assessing the physical condition and function of underground pipes. This yearly inspection will save you a lot of money by allowing you to detect problems before they become emergencies. Consider this step as an investment in your own peace of mind.

  1. Schedule professional drain cleaning

Professional drain cleaning methods like sewer rodding and hydro jetting help you remove accumulated debris inside your drainage lines. By cleaning your pipes every 1-2 years, you terminate the inevitable process of debris buildup within the drainage system. Scheduled drain cleaning using sewer rodding or hydrojetting will stop problems like sewer odors in your home, strange sounds from your drains, slow drains, tree root intrusion, and sewer backups.

  1. Install a backwater valve

As long as your home’s drainage system is connected to the city’s sewer system, your home is not immune to issues happening in the municipal sewers. To ensure that problems in the city sewer lines don’t ripple backward to cause a sewer backup in your home, you should install a backwater valve on your main sewer line. This valve will automatically close if it senses a reversal in the direction of flow in the city sewer systems.

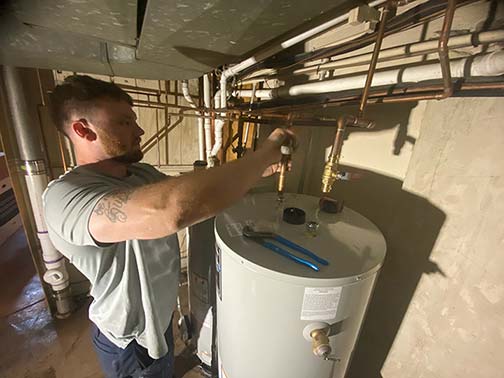
Lastly, you need an experienced plumber to conduct an audit of your home’s drainage system to identify existing and potential problems and help you find the best ways to solve them.

Paying for Major Home Repairs Without Derailing Your Finances

a handyman making repairs

Homeowners face a common reality: roofs leak, HVAC systems fail, and foundations crack—often without warning. Major home repairs can cost thousands of dollars, and the stress usually comes from timing as much as price. The good news is that there are practical ways to prepare, pay, and move forward without jeopardizing long-term financial stability.

Key takeaways

  • Emergency savings reduce stress and borrowing costs when repairs hit unexpectedly.
  • Multiple financing options exist, each suited to different timelines and credit profiles.
  • Planning ahead gives homeowners leverage, flexibility, and better terms.

Why preparation matters more than most people think

Big repairs are rarely optional. When heat goes out in winter or water damage spreads, delay often multiplies costs. Preparation shifts repairs from crisis mode into decision mode, where you can choose the least expensive and least disruptive option.

Start by understanding the age and condition of your home’s major systems. A 15-year-old roof or aging plumbing isn’t a surprise failure—it’s a scheduled expense that simply lacks a calendar reminder.

How to build a repair-ready plan

Before exploring loans or credit, homeowners benefit from a simple readiness checklist:

  • Review inspection reports or maintenance records for high-risk systems.
  • Set aside a dedicated repair reserve, even if contributions start small.
  • Get baseline quotes from contractors before emergencies arise.
  • Check your credit profile so you know what financing doors are open.
  • Confirm insurance coverage and exclusions for common repair scenarios.

Preparation doesn’t eliminate costs, but it reduces panic-driven decisions—often the most expensive kind.

Common ways homeowners pay for major repairs

There is no universal “best” payment method. The right choice depends on urgency, total cost, and how long you need to repay the expense.

The table below shows how different funding paths typically stack up.

OptionBest forTradeoffs
Emergency savingsFast repairs, no debtRequires discipline to build
Credit cardsSmaller, urgent fixesHigher interest if not paid quickly
Personal loansMid-range projectsFixed payments, credit-based
Home equity loans/linesLarge repairsUses home as collateral
RefinancingMajor upgradesLonger-term commitment

Each option solves a different problem. The mistake is choosing one based on speed alone rather than total cost.

Using an FHA refinance to fund repairs

For homeowners who already carry a mortgage, refinancing can serve as a reset rather than a setback. An FHA cash out plan allows you to replace your current mortgage with a new FHA loan, which may be easier to qualify for than conventional options and can spread repair costs across predictable monthly payments. Most FHA loans require mortgage insurance premiums at closing and ongoing for the life of the loan, which should be factored into long-term affordability. In addition, FHA refinances typically require that you’ve made at least six monthly payments on your existing mortgage before applying. This approach works best when repairs are substantial and refinancing aligns with broader financial goals.

Timing repairs to protect value

One overlooked factor is timing. Delaying structural or moisture-related repairs often leads to cascading damage, while cosmetic issues can sometimes wait. Prioritizing repairs based on risk—not appearance—protects home value and keeps financing needs smaller.

When possible, bundle repairs. Contractors often price more favorably when work is consolidated, and financing one larger project can be cheaper than stacking multiple small loans.

Smart questions financing homeowners ask

Should I drain my emergency fund or finance the repair?
Using savings avoids interest, but it can leave you vulnerable to the next surprise. Many homeowners split the difference by using some cash and financing the rest. The right answer depends on how quickly you can rebuild savings.

Is refinancing just for people already struggling?
No. Refinancing can be strategic, especially when it lowers overall monthly costs or funds necessary upgrades. It’s often about restructuring, not rescuing. The key is understanding the full loan terms.

Do home equity options put my house at risk?
They use your home as collateral, which adds risk if payments lapse. However, they often offer lower rates than unsecured loans. Stable income and conservative borrowing reduce that risk significantly.

Can insurance cover major repairs instead of loans?
Insurance usually covers sudden, accidental damage—not wear and tear. Roof age, plumbing condition, and maintenance history matter. Always verify coverage before assuming a claim will pay out.

What if my credit isn’t ideal right now?
Some options, including FHA-backed loans, may have more flexible requirements. Improving credit even slightly can open better terms. Timing repairs alongside credit improvement can save thousands.

Should I fix everything at once or phase repairs?
Critical repairs should happen immediately to prevent further damage. Non-essential upgrades can wait until finances recover. Phasing work can reduce borrowing and stress.

Closing thoughts

Major home repairs are disruptive, but they don’t have to be destabilizing. Preparation creates choice, and choice creates savings. By understanding funding options, prioritizing work, and aligning repairs with long-term goals, homeowners can protect both their property and their financial footing. The house stays solid—and so does the plan.

What Renters Must Know About Quick Plumbing Fixes

woman holding a plunger for quick plumbing fixes

Do you know that feeling when you notice a plumbing issue beginning? A drip gets louder. The drain slows down. You wonder if it will stop on its own. Many renters ignore these signs and hope for the best. That choice often leads to bigger problems. Learning a few quick plumbing fixes helps you stay in control and avoid stress. You do not need special skills or expensive tools. You only need awareness and fast action. Let’s explore common plumbing issues you can handle, what to report, and how to protect your space. 

Know What You’re Allowed to Fix as a Renter

Every renter should start with their lease. Most rental agreements allow basic care but restrict major repairs. You can usually tighten a loose handle or clear a minor clog. You should not remove pipes or change fixtures. Understanding this boundary protects you from repair costs.  If a problem looks small, act carefully. If it looks structural, pause and report it. Avoid DIY plumbing mistakes– take photos before touching anything. Clear communication helps everyone. When you stay within your role, you avoid blame and extra expenses. Smart renters focus on prevention and early response. That approach keeps small plumbing troubles from turning into serious damage.

faucet in the bathroom
There are quick plumbing fixes, and there are DIY plumbing fails.

Check Plumbing Early After Moving In

After relocating, take time to check plumbing before routines begin. Run all faucets and showers. Flush every toilet. Check under sinks for moisture. Listen for unusual sounds. Look for slow drains or weak water flow. These checks take minutes but reveal hidden problems. Early reporting protects you from being blamed later. It also helps landlords fix issues quickly. Many problems come from previous wear, not your use. Document what you find with photos. Send a clear message if something feels off. 

Tools to Keep Handy After Settling In

When settling in after relocating, having basic tools to unpack after moving saves time and frustration. You do not need a full toolbox. A few simple items help you react fast. Keep these within reach:

  • A plunger for sinks and toilets
  • A bucket to catch leaks
  • Old towels for quick cleanup
  • A small adjustable wrench

These tools help with minor issues without risk. They are especially useful during the first weeks in a new place. Many plumbing problems show up after water use increases. Being prepared helps you stay calm. You can contain small issues until help arrives. Preparation makes you feel more at home and in control.

How to Fix it? Dripping Faucets and Loose Handles

A dripping faucet is one of the most common issues renters face. It often starts quietly and gets worse over time. First, turn the handle firmly but gently to see if the drip stops. If water still leaks, check if the handle feels loose. Many handles tighten with a small screw hidden under a cap. If tightening stops the drip, you are done. Do not take the faucet apart. Place a bowl under the sink to catch any stray drops while you test it. Wipe the area dry so you can see if water returns. A slow drip may seem minor, but it wastes water and creates stains. If tightening does not help, report it to your landlord with photos.

Slow or Clogged Drains

Slow drains usually happen from soap, hair, or food buildup. Start with hot water poured slowly down the drain. This often loosens residue. If the water still drains slowly, use a plunger. Cover the drain fully and press several times gently. Avoid strong force. Remove visible debris with gloves if possible. Never use chemical drain cleaners. They can damage pipes and cause burns. After clearing the drain, run water for a minute to test it. If clogs return often, stop trying to fix the drain troubles and report the issue.

bathtub drain
Clogged drains are usually a quick fix.

Running Toilets

A running toilet often means the tank is not sealing properly. Remove the tank lid carefully and place it somewhere safe. Look inside and check the chain connected to the flush handle. If it is tangled or too loose, adjust it so the flapper closes fully after flushing. Flush once to test it. If the water keeps running, stop and notify your landlord. Do not replace parts without permission. Running toilets waste water quickly, so early action matters.

Small Leaks Under Sinks

If you notice moisture or a small puddle under a sink, act fast. Place a bucket underneath to catch drips. Dry the area with a towel and check the pipe connections by hand. If one feels loose, tighten it slightly. Do not use tools unless approved. Never force connections. After tightening, wait and watch for a few minutes. If water continues to appear, take photos and report it right away. Small leaks can damage cabinets and flooring if ignored.

fixing the drain
Notice big problems and know when to call professional help.

When Professional Help Is the Smart Choice

Some signs mean it is time to ditch quick plumbing fixes and call for help. Water stains on ceilings need attention. Repeated clogs signal deeper issues. Low water pressure throughout the unit suggests a system problem. Frozen pipes require expert care. In these cases, contact your landlord or a licensed plumber. If you need guidance, reach out to local professionals for reliable support and advice. Fast reporting helps reduce damage and repair time.

Conclusion: What Renters Must Know About Quick Plumbing Fixes

Plumbing issues do not need to feel overwhelming. When you notice early signs, act instead of waiting. Knowing quick plumbing fixes helps you protect your space and stay calm. Use basic tools, check plumbing early, and respect your limits. Clear communication and fast response make a big difference. Renting becomes easier when you feel prepared. Small actions today will prevent bigger problems tomorrow.

Sewer Smoke Testing in Chicago: Quick, Safe, and Revealing for Every Home

a sewer smoke test in chicago

Sewer line problems in your home, like leaks and cracks, are notoriously hard to find. Most times, you are not even aware that your sewer line is damaged until you start to see the signs of the issues through the malfunction of the various drains in your home.

Essentially, especially those seeking reliable HCM housing support, homeowners often wait until their drains block, overflow, or emit offensive odors into the house to realize they have a sewer line break. Usually, this is after the issue has already caused costly damage to their plumbing and building.

Sewer smoke testing solves this dilemma.

Sewer smoke testing not only helps homeowners avoid the costly disruptions that come with invasive methods of detecting sewer line problems, but it also finds those sewer line problems before they escalate into bigger issues.

How does sewer smoke testing work, and how do you know when you need it?

How sewer smoke testing works

Sewer testing uses non-toxic smoke to discover gaps, cracks, and bad joints in a sewer line, as well as detect dried-out P-traps that release sewer gases into the house. It is one of the most effective methods for detecting sewer lines and plumbing problems in the home.

Here are the steps to do a sewer smoke test in your home:

  1. Isolate the home’s sewer line

To prevent smoke from going up the sewer line, through the city sewer main, and into your neighbors’ sewer line before exiting inside their home, it is important to isolate your sewer line from the city main sewer line. This is done by inserting a test ball into the sewer line via the cleanout and inflating it, so that it seals the pipe. This will keep the smoke from entering the city’s main sewer line.

  1. Insert the hose

The smoke testing machine hose is inserted into the sewer cleanout. To make sure smoke does not escape from the cleanout, the hose should fit snugly around the opening of the sewer cleanout. If there is a gap between the hose and the cleanout, the technician or plumber will seal it with tape or pack rags around it to form a tight seal.

  1. Cap plumbing vents

To create pressure in the plumbing system, the plumbing vents are closed with a foil cap. This step is not always necessary, unless the conditions require it. Without it, it is still possible to detect leaks or cracks in the sewer and plumbing system.

  1. Begin the test

To make smoke, the plumber uses a smoke candle. These come in white or gray and last 30 seconds or 60 seconds, depending on the type. The candle is placed in front of the smoke machine and lit.  As the candle begins to smoke, the testing machine will suck in the smoke and push it into the cleanout.

  1. Call the fire department

Before starting the test, the plumber calls the fire department to inform them of the smoke test at your address. Skipping this step means that neighbors might see smoke coming from your roof vent and call the fire department to your house. Informing the fire department on time prevents chaos and fines.

  1. Check for smoke

This test will fill your plumbing system and sewer line, not your house, with smoke. If smoke is seen inside the house, there are leaks in your plumbing; perhaps a dried-out P-trap, a broken toilet seal, or leaks and cracks in your sewer line. If you have a broken sewer line, you will also see smoke emerging from the ground outside your home.

Benefits of smoke testing

  1. Detects points of inflow and infiltration

These are locations in the sewer line through which rainwater and groundwater can enter the pipes to overload the system and increase the risk of sewer backups.

  1. Detects plumbing leaks

If there are damaged vents, leaky pipes, loose toilet or faucet seats, improperly installed drain traps, and dried-out P-traps in the home, a sewer smoke test will uncover them.

  1. Detects sewer gas intrusion

Smoke testing helps identify openings – such as leaks, cracks, or weak spots – in your plumbing that can allow dangerous sewer gases (including hydrogen sulfide, methane etc.) to enter your home.

  1. It is affordable and effective

Sewer smoke testing is fast, cost-effective, and can find problems in your sewer line efficiently. It helps you avoid the issues associated with more invasive detection methods.

When should you get sewer smoke testing?

You need sewer smoke testing if:

  • You have sewer odors in your home: If there is a persistent odor of sewer gases inside your house.
  • You’re dealing with chronic drain issues: Despite your best efforts, your drains are slow or clog frequently.
  • You have high water bills: The water bill is inexplicably high, even though your water usage stays the same.
  • You have newly installed plumbing: A smoke test helps you check for problems in new plumbing installations.
  • You are buying a new home: When buying a new home, a smoke test helps you troubleshoot the plumbing and sewer system.

Periodic sewer smoke tests also help you detect budding issues in your sewer line. Are you dealing with constant sewer lines and plumbing issues in your home? Do you think a smoke test will help you solve these problems, but you would like more information? Reach out to us if so at 773-599-9181.

What to Do If a Pipe Bursts: Quick Actions for Chicago Weather

a burst pipe emergency in chicago

A burst water pipe in your home can happen for many reasons. The most common ones are aging and freezing. In Chicago, burst water pipes are a common occurrence in winter because subzero temperatures increase the risk to your plumbing —an issue that homeowners and renters alike face, from Midwest cities to Portland housing solutions designed to help residents maintain safe and functional living spaces.

Depending on where it happens, a burst water pipe can cause massive water damage to your home. But you can reduce the impact of this plumbing emergency if you know what to do and take quick action to control the situation.

Here are the steps to follow if you find a burst water pipe inside your home.

  1. Shut off the water supply

Your number one priority should be to stop more water from being discharged into your home. Do this by turning off the water either at the dedicated shut-off valve for the broken pipe or your main water shut-off valve. In most homes, you can find the main water shut-off valve in the basement, utility room, or outside, near the point where the main water line enters your home.

  1. Turn off the electricity

If there is even a remote chance that the water will come into contact with a power outlet or appliance, turn off the electricity to the affected area. If it is not possible to turn off the power to that section of your home, turn off the power supply to the entire home. When doing this, avoid touching the water if you suspect that it may have come into contact with electricity. Protect yourself; wear rubber shoes and gloves or call an electrician.

  1. Contain the water

Place a bucket under the broken pipe to catch dripping water and open all the cold water faucets in your home to allow any water left inside the pipes to drain. Move your furniture and all valuables out of the affected area to prevent water damage. To stop the water from spreading into other parts of your house, roll up towels, bedspreads, and similar items and place them in the path of the water to block its flow.

  1. Notify your insurance company

Do not wait till you have sorted out the emergency to inform your insurance company. Do it as soon as you have some breathing space. No need to have all the answers before calling the company, and you do not need to explain the cause of the burst pipe in your home. Simply notify them of the incident. Your insurer may send an expert to your home to determine the cause of the accident and the extent of damage.

  1. Document the damage

Before attempting to fix the damage and clean up your home, get out your smartphone and do a video recording of the scene. Make sure the burst pipe, your flooded floors, and any damaged items are captured in the video. Add narration to the video to give it context and help capture your emotions in the moment. This video will become very useful when filing your insurance claims later.

  1. Mop up the water

Use mops and rags to soak up the water on the floor of your home. If you have a wet/dry vacuum, or you can borrow/rent one, it will make the job faster. If there is a lot of spilled water in the area, scoop it into a bucket with a bowl or dustpan. Dry up as much of the water as possible. If there are wet items or badly damaged items in the area, like carpets and rugs, remove them from the house.

  1. Call an emergency plumber

When dealing with a burst pipe, you want a plumber who will visit your home at short notice and solve the issue in time. Emergency plumbers are trained and equipped for these kinds of situations. They are available 24/7 and will arrive at your home with the right parts to fix the damaged pipe. When talking to the plumber, do not forget to ask them how long it will take them to reach your home.

  1. Ventilate and dry the area

To prevent further damage to your home, dry the affected areas as quickly as possible. Open all windows to improve air flow through your home. If you have a fan, space heater, or dehumidifier in the house, set it up inside the room to dry it faster. If parts of your baseboards, drywalls, and insulation are damaged, the affected sections will have to be cut out.

  1. Hire a water damage restoration service

To reduce the risk of future structural weakness and mold, have a water damage restoration service access your home and recommend ways to fully dry out the building. This ensures that any moisture trapped within the structures of your building will be removed. Neglecting this step can put the long-term structural soundness of your home at risk.

Finally, work with your plumber to reveal the near and remote causes of the pipe burst and take steps to prevent a repeat of the problem in the future.

Preventing Sewer Backups: The Role of Backflow Prevention in Chicago Rainstorms

a bathroom in chicago with sewer backup

A sewer backflow preventer is an essential device that stops the contaminated water in your sewer lines from flowing into your home’s fresh water supply. Under normal circumstances, your home’s plumbing operates on a simple principle: water flows from high pressure to low pressure as emphasized in housing maintenance guides and Real Property Management rental assistance resources. This ensures that the water in your sewer line flows only in one direction.

But sometimes, problems or events such as heavy rainfall, overflowing or aging municipal sewer lines, etc., can compromise the operation of your sewer line and cause the water inside the line to reverse its flow.  If this happens, the untreated water in your drainage system can mix with the clean water entering your house.

This problem is known as sewer backflow. In addition to the causes listed above, sewer backflows are sometimes caused by excessive and sudden drops in water pressure, maybe as a result of firefighting equipment being connected to a nearby hydrant. Another major cause of the problem is a broken water main.

A sewer backflow can introduce harmful pathogens, grease, debris, and hazardous chemicals into your drinking water supply, increasing the risk of gastrointestinal illnesses in your home and posing a huge risk to the health and function of your plumbing. The main danger of sewer backflow is that it is hard to detect. 

This is partly why it is a major problem for Chicago homeowners and businesses. The city’s high water table, combined sewer system, aging infrastructure, and frequent heavy rainstorms mean that sewer backflows are fairly common here. The problem costs the city, homeowners, and businesses millions of dollars in annual healthcare and plumbing costs.

How do you prevent sewer backflow in your home?

Backflow preventers and how they work

Backflow preventers function like a one-way gate; they use various methods to ensure that the water inside your plumbing only flows in one direction. They are installed at the critical points of failure in the system, where the risk of sewer backflow is highest. Typically, this is outside the home, near the main water meter, and after the meter for your irrigation system.

Backflow preventers use methods like air gaps, pressure vacuum breakers, spring-loaded check valves, and pressure-relief valves to protect your water supply from the risk of contamination. How a backflow preventer works depends on the method it is based on. Most backflow preventers in homes use spring-loaded check valves and pressure relief valves.

They have two check valves, separated by a pressure-monitored chamber and a pressure relief valve. During normal operation, when supply-side pressure exceeds the downstream pressure, the relief valve is shut. However, if a low-pressure zone forms on the supply side, it will force one check valve to close, followed by the other, if the problem persists.

After the check valves close, the pressure relief valve opens automatically to allow any water that has collected inside the chamber drain. The pressure relief valve also provides an escape route for any sewer vapors inside the chamber. Once normal pressure is restored, the pressure relief valve closes, allowing the check valves to open, restoring regular flow.

Impact of sewer backflow and benefits of a backflow preventer

Some of the problems you may experience in your home if you have a sewer backflow include:

Health problems among family members: Sewer backflow introduces disease-causing bacteria and toxins into your water supply. It can contaminate the surfaces inside your house, increasing the risk of respiratory and gastrointestinal issues among family members. 

Foul odors inside the house: During a sewer backflow, sewer gases can escape from the sewer line and enter your home’s ventilation system. The result can be a strong and persistent smell of raw sewage inside your house.

Pest invasion of the home: The presence of small amounts of sewage in your water supply and sewer odors inside the house attracts pests – flies, cockroaches, rodents, etc. – to your home. This only worsens the sanitary issues in your home.

But a backflow preventer can help you avoid these problems by:

Preventing supply disruptions: If untreated wastewater enters your drinking water supply, you may have to wait days for the system to be flushed before you can use it. But a backflow preventer helps you avoid disruptions to your home’s water supply. 

Prevents property damage: Contaminated water accelerates the rate of corrosion in your plumbing system. If a sewer backflow occurs in your plumbing and there is no backflow preventer, you may be looking at costly repairs.

Ensures peace of mind: Most of the time, you won’t know when a sewer backflow happens in your home. You may only realize the problem after family members start getting sick and your water is tested. Installing a backflow preventer gives you peace of mind.

Protect your community: Installing a backflow preventer not only protects your water supply from the harmful wastewater in the municipal sewer systems, but it also protects the public water supply from contamination by your home’s irrigation or plumbing system.

Installing a backflow preventer in your home improves the safety and sanitation of your home. Before installing one in your home, speak with a qualified Chicago plumber to ensure that the installation is done to the best standards.

Chicago Winter Woes: 8 Common Plumbing Problems—and How to Prevent Them

a frozen water spigot in chicago

Chicago is well-known for its brutally cold winters. In winter, biting-cold winds and heavy snowfalls may drive average temperatures in the city below 27°F, with dire consequences for human comfort and home heating costs. One of the places in Chicago buildings where the impact of these winter temperatures is worst is in the plumbing. For tenants relying on Gregory rental services, understanding these challenges is essential to prevent costly damage.

Winter in Chicago brings its own unique set of plumbing problems, with the likelihood of unexpected and expensive plumbing emergencies highest at this time of the year. As a Chicago homeowner trying to navigate these difficulties, your best option is to know the most common winter plumbing problems in Chicago homes and how to prevent them.

8 common winter plumbing problems in Chicago homes

  1. Frozen pipes

Exposure to the winter cold can cause the water inside your water pipes to freeze. Pipes in the unheated spaces inside the house and along the exterior walls of your building are most vulnerable.

How to prevent the problem: Protect exposed pipes with pipe foam insulation or heat tapes. Check your exterior walls for air gaps at those points where pipes and electrical wires penetrate the walls. Keep cabinet doors slightly open to allow warm air to circulate into the cold spaces within the cabinets.

  1. Burst pipes

A frozen pipe can easily become a burst pipe because of the pressure exerted on the pipe walls by the expanding water. But you may not know that a frozen pipe has burst until the water inside it thaws.

How to prevent the problem: To prevent a burst pipe in your home, follow the steps for preventing frozen water pipes. In the event of a burst pipe in your home, a smart leak detection system can provide early warning to help you minimize damage.

  1. Low water pressure

Frozen pipes will limit or stop the free flow of water through your plumbing. Burst and leaking pipes can also contribute to this problem, especially if they happen in a part of the home where the damage is hard to spot.

How to prevent the problem: Install a pressure regulator in your home and ensure the device is serviced on a schedule. If you suspect a leak in your plumbing, enlist the expertise of a professional plumber to find it. Fix all leaks as soon as they are detected.

  1. Sump pump failure

Heavy snowmelt can cause water to intrude into your basement. This is not a problem if you have a working sump pump. However, if the discharge line is frozen, your sump pump will fail to remove water from your basement.

How to prevent the problem: Prepare your sump pump for winter by testing and servicing it. Insulate the exposed sections of the discharge line to prevent freezing and ensure it has a continuous downward slope to facilitate the free flow of water.

  1. Water heater problems

Increased demand on your water heater during winter can cause it to malfunction. If this happens, you may experience insufficient hot water or a complete lack of hot water.

How to prevent the problem: If you use a traditional water heater, flush the tank to remove sediments. If your tankless water heater has a heating element, descale it to improve efficiency. Also, inspect the cold and hot water supply lines for signs of damage.

  1. Clogged and blocked drains

The holiday season often means more people in your home and an increased likelihood of grease and other food scraps finding their way into your drains. Freezing temperatures can cause the grease inside your drainpipes to congeal, leading to blockages in your pipes.

How to prevent the problem: Before winter, have your drainpipes cleaned by rodding or hydrojetting them. Educate your household on the dangers of flushing grease into the drains. Install a drain strainer on the drain opening to catch debris.

  1. Sewer line backups

This can happen as an aftermath of a clogged drain. Cold temperatures can also slow the movement of wastewater through the pipes, eventually causing your sewer line to freeze.

How to prevent the problem: If you do a good job of preventing clogs in your drains, the risk of a sewer backup in your home is almost zero. To prevent the sewer line from freezing, ensure there are no air gaps in the system and that the soil above the line has not thinned out.

  1. Basement flooding

Clogged gutters can cause ice dams inside your roof, direct water from melted snow into the roof’s inner structures, or discharge water onto the walls of your home and into the basement. Your downspout can contribute to these issues by discharging in the wrong place.

How to prevent the problem: Clear the gutters to remove accumulated debris. If there are broken or loose sections in it, repair them, and ensure your downspout discharges water at a safe distance from the base of your house.

To fully ensure that your home is safe from all the aforementioned problems during winter, a qualified Chicago professional plumber can inspect your home and plumbing to spot any potential issues you may have missed.

How to Detect and Respond to Burst Pipes in Logan Square, Chicago

a burst pipe emergency in logan square chicago

Why are frozen and burst pipes such a huge problem in Logan Square homes? There are several reasons why these problems happen. Most times, they are the result of diverse issues in your plumbing that just happen to collide at the location where the burst pipe occurs. For residents exploring Portland rental solutions, understanding these common plumbing risks can help prevent costly repairs and maintain a safe living environment.”

Common issues that can directly or indirectly cause a burst water pipe in your home include: 

  • High water pressure: High water pressure weakens pipes and pipe joints. This problem can originate from the city water supply, a faulty pressure regulator, a partially closed valve, clogs, or other problems in your plumbing.
  • Subzero winter temperatures: Water pipes in unheated spaces in your home can freeze if exposed to low temperatures. The frozen water may exert enough pressure on the pipe to crack it, causing your home to flood after the pipe thaws.
  • Aging plumbing: Older pipe materials, such as iron and steel, are more likely to burst due to their susceptibility to rust and corrosion. Aging and worn-out pipes, whether modern or obsolete, are more likely to burst.
  • Hard water: Regions and cities like Chicago, which have hard water, have higher rates of burst water pipes and related plumbing issues. That’s because plumbing systems in these locations are easily clogged with calcium and magnesium deposits.

How can you tell when a pipe in your Logan Square home has burst, and how do you deal with the problem?

Signs of a burst pipe in your home

  • Low water pressure: If neighboring homes are not experiencing the same issue, a sudden drop or strange fluctuations in water pressure across your entire home may be due to an undetected burst pipe.
  • Unusual sounds: Strange hissing, dripping, and whistling sounds from behind walls, floors, and ceilings could be the result of pipe damage inside these structures.
  • Strangely high water bill: If your water bill has gone up without a corresponding increase in your home’s water usage, you may have a burst pipe somewhere in your plumbing.
  • Water discoloration: If the burst pipe is underground, soil may infiltrate your water supply via the broken pipe section, giving the water a brown, yellowish, or rusty hue.
  • Pools of water in the home: If your water pipe is broken, puddles of water may appear in places inside your home where water typically doesn’t pool. 
  • Visible water damage: Watermarks on drywall, ceilings, or flooring, as well as bubbling wallpaper, peeling paint, and bulging sections of drywall, are all signs that you may have a burst pipe in your home

What to do if you have a burst pipe in your house

  1. Shut the water supply

Place a bucket under the burst pipe to catch the water and shut off the water supply. If the burst pipe has a dedicated shut-off valve, close it to stop the water. If not, turn off the water at the main water shut-off valve, which you can find in the basement, utility room, or where the main water line enters your house. Turning the valve clockwise should turn it off.

  1. Turn off the electricity

To prevent contact between the water and electricity, turn off the power supply to the affected area of your house. If there is a risk that the water may already be in contact with a power outlet or an appliance, do not touch it. For your own safety, wear rubber gloves and boots while doing this, or just call an electrician.

  1. Contain the water

To minimize damage, move items that can be damaged by water out of the area. Roll up some blankets and towels and place them on the floor to block the path of the water. Use a bowl or dustpan to scoop water off the floor into a bucket. If the pipe is in your ceiling, poke a hole in the lowest part of your bulging ceiling and catch the falling water with a bucket.

  1. Contact your insurer and plumber

Document the burst pipe and the damage to your home by videoing the scene with your Smartphone. Call your insurance company to inform them of the event, and also contact an emergency plumber. While waiting for the plumber, you may try a temporary fix for the burst pipe, so that you can restore your home’s water supply.

But what if you cannot find the burst pipe?

If the burst pipe is underground, underneath a paved surface, or inside one of your home’s main structures, you may not find it. If that is the case, you should have a professional plumber do a detailed inspection of your plumbing system to locate the problem.

Professional plumbers have the tools, techniques, and experience to detect hidden pipe leaks in your home. Even if the burst pipe is underground, the plumber will not only find it but also recommend the most cost-effective long-term solution for the problem.

How to Spot the Right Time to Replace Your Water Heater in Chicago

a plumber replacing a water heater in chicago

In most Chicago homes, the water heater counts as one of the family’s top three most important appliances. Why? Because a malfunctioning water heater in Chicago’s brutal winters qualifies as a life-threatening problem. According to Baltimore housing experts, ensuring the efficient functioning of their water heater is an essential task for most homeowners in this city.

But sometimes the problems in your water heater are beyond what can be solved by repairing the appliance. What you view as problems in your water heater may be the unit’s way of telling you that it has reached the end of its useful life. A water heater that is at the point of retirement cannot be fixed; it must be replaced.

Any money spent to fix the unit will be wasted because the problems in the appliance will not be solved; they will simply return in worse condition. If your water heater is failing, it will not just drain your energy and wallet, but it can also cause other problems in your home. What are the signs that a water heater has reached the end of its service life?

Signs that you need a water heater replacement

  1. The water heater is 10-12 years old

Traditional water heaters have a lifespan of 8-12 years. Tankless water heaters last between 15 and 20 years. You may slightly extend the lifespan of your water heater by taking good care of it. However, the time still comes when you must replace it. A water heater that has reached the end of its lifespan can still appear to be working. The problem with keeping it is that it can fail suddenly and disastrously. Furthermore, an older water heater will use up more energy as it steadily loses efficiency.

  1. The water heater is leaking

If your water heater tank is leaking, the only solution is to replace it. However, before reaching that conclusion, check the tank to ensure the leak is not from the TPR valve, the drain valve, or the joint where the hot and cold water lines meet the water heater. If the leak is at any of these spots, you can solve the problem by replacing the valve or sealing the joint. However, if the leak is from the tank, you must replace the water heater. That’s because a leaky water heater tank cannot be repaired.

  1. Your hot water is discolored and smelly

Rust colored water from your water heater is a sign that the tank is severely rusted. But it could also be a sign that the sacrificial anode rod inside the tank is corroded. However, if the problem persists after replacing the anode rod, the issue is certainly from the tank. Flushing the tank may remove the strange color. If it doesn’t, you must replace the water heater. Your water will also have a strange smell or metallic taste if the tank wall is heavily corroded and is leaching heavy metals into your water.

  1. You don’t get enough hot water

The water heater could be running out of hot water because your home’s hot water needs have increased, and the unit is unable to keep up. It is also possible that sediment buildup at the bottom of the tank has reduced the amount of hot water that the tank can hold. This will cause you to run out of hot water faster. You can remove the buildup by flushing the tank, but if the tank has not been flushed for many years, the sediment may be caked in. In that case, the only way to resolve the issue is to replace your water heater.

  1. The unit makes strange noises

Excessive sediment buildup inside the water heater tank will cause strange noises, such as rumbling, hissing, or banging sounds. These strange sounds are caused by hardened debris at the bottom of the tank that is interfering with the normal functioning of the water heater. A water heater with hardened sediment is likely to explode because the buildup inside the tank will cause the appliance to constantly overheat. This is the reason for some of the strange noises the water heater makes.

  1. The water heater takes longer to heat water

One of the signs that a water heater is about to fail is that it will take a longer time to reheat water. The recovery rate of a water heater is the duration it takes to reheat a specific amount of water after it runs out. After using the unit for years, you should have an idea of your water heater’s recovery rate. If the appliance is taking longer to reheat water, start planning to replace it.

If your water heater is showing any of these 6 signs, what should be your next step? You may want to speak with an experienced Chicago water heater replacement expert to help you select the best replacement water heater for your home and ensure a smooth installation of the appliance.

DIY Plumbing Mistakes Chicago Homeowners Should Avoid

a man in chicago doing DIY plumbing

Plumbing problems occur in your home frequently, and if you’re like the average Chicago homeowner, you may sometimes attempt to fix these issues yourself. That is a good thing because not all plumbing issues in your home need the attention of a professional Chicago plumber.

According to Mainlander Property Management Inc. , learning basic DIY plumbing skills can help you save money and time. It lets you minimize the impact of plumbing emergencies in your home. Working on your plumbing by yourself also gives you a better understanding of the system, making your plumbing maintenance more effective.

But when working to fix any of your home’s plumbing problems, it is vital to keep some things at the back of your mind. Firstly, remember that DIY plumbing skills do not replace the necessity for professional plumbing expertise; know the limits of your DIY knowledge.

Secondly, there are things you should never do when working on your plumbing. Making these mistakes will compound the problems you are trying to solve or even create new ones. What are some of these DIY plumbing mistakes to avoid? Find the answers below.

  1. Gluing a painted pipe

Amateur plumbers do this all the time. When trying to glue a fitting to a pipe, they apply the glue to the pipe without first removing the paint. The joint eventually fails because the paint prevents a good connection, resulting in leaks later. That’s because the glue or solvent is meant to fuse the two pieces together, but this can’t happen with a layer of paint in between. The correct way to glue fittings is to first strip away the paint on the end of the plumbing pipe with paint thinner before applying the glue or solvent.

  1. Using the wrong kind of plunger

You should have two kinds of plungers in your home: a sink plunger and a toilet plunger. They do the same work but look very different. A toilet plunger typically features a flap, whereas sink plungers are generally flat. The flap helps to ensure a perfect seal when plunging the toilet. Using a sink plunger in the toilet will result in much work without success because the plunger can’t achieve an airtight fit. Unless you want to contaminate your kitchen sink with human waste and bacteria, never use a toilet plunger in your kitchen. Get one plunger for the toilet and another one for the kitchen.

  1. Cooling a soldered joint with water

Basic science teaches us that heat causes metals to expand, while cold causes them to shrink. When you use water to cool a soldered joint, the solder loses heat too quickly and unevenly. While the surface of the material is cooling and shrinking, the inner part is still hot and expanding. This creates tension between the two temperature zones, causing small cracks to appear in the solder. This weakens the joint, effectively destroying your work. To avoid this, let the solder cool by itself; that should take no more than 30 – 60 seconds. 

  1. Not disconnecting your outdoor hose in winter

At the first hint of winter, outdoor water hoses should be disconnected and drained before storing them. A hose left connected to an outdoor faucet may still hold water inside it. When subzero temperatures hit, the water inside the hose and faucet can freeze and transfer cold from outside the home to the water pipes inside your house, causing your pipes to freeze. The result is often a burst pipe inside your home. To prevent this problem, disconnect the hose and drain both it and the faucet.

  1. Installing one pipe on top of another

When laying copper pipes in the same area, it is a mistake to let them be in contact with one another. Pipes move when the water is turned on or off, and the constant motion can cause them to rub against each other. With time, those pipes will wear thin and eventually leak. When laying copper pipes, and there is a risk of them touching, use fittings to navigate around one of the pipes. If this is not possible because the pipes are already installed, adding some insulation between the two pipes should solve the problem.

  1. Foregoing a P-trap

P-traps are a requirement for any fixture with a drain. This P-shaped pipe, commonly found below sinks and bathtubs, serves a very important function. It keeps the foul gases inside the drainage system from flowing backwards and entering your home. P-traps also catch small objects that accidentally fall into the drain (like a wedding ring). Without a P-trap, you will experience unpleasant odors in some areas of your home. Ensure there is one installed in your sinks, bathtubs, washing machine, and shower drains.

The final DIY mistake you should never make is failing to call a professional plumber when the problem demands it. Your DIY skills should complement the knowledge of your plumber. As a matter of fact, a good Chicago plumber will help you improve your DIY skills because it makes their job easier.